How to Grow and Care for Spring Crocus in Your Garden
Plan spring crocus from fall planting to bloom: choose the right site and depth, grow them in pots or lawns, protect corms, and keep next year’s flowers.
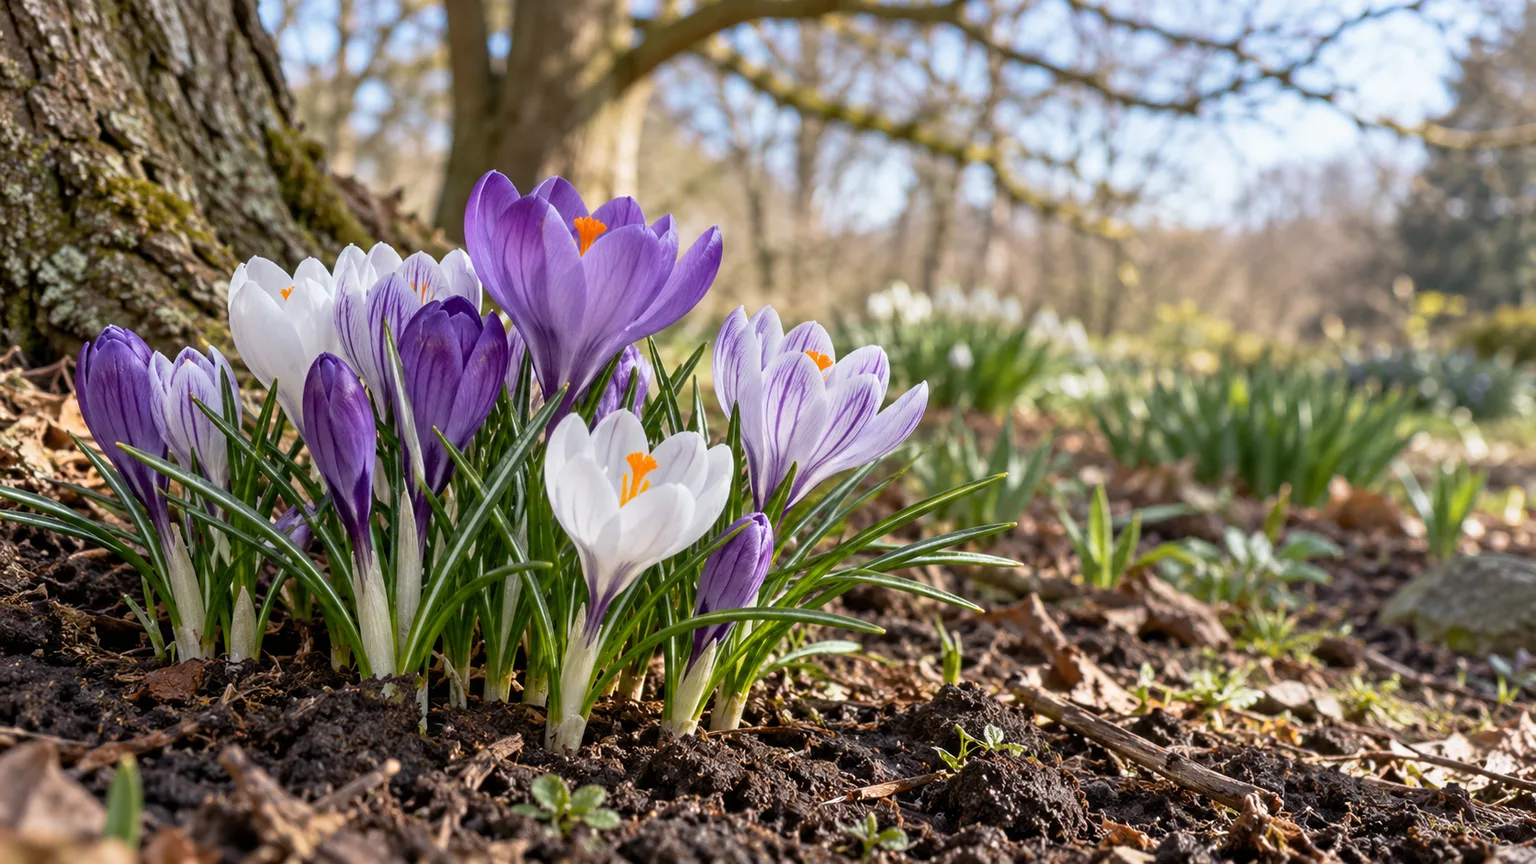
Spring crocuses are easiest when you treat them as a short spring show powered by a year-round corm. Plant the right spring-flowering type in autumn, give it winter conditions and well-drained soil, then leave its leaves alone after the flowers fade. Those simple choices matter more than a complicated fertilizer schedule.
A crocus bed can thrive in a border, under deciduous trees, in short grass, or in a pot. The best location is the one that gets light while the plant is growing, drains well during wet weather, and lets you tolerate the fading foliage for several weeks after bloom.
Spring Crocus at a Glance
Spring crocuses are low-growing perennials in the iris family, Iridaceae. They grow from corms, compact underground storage stems often casually called bulbs; each season’s corm supports leaves and flowers, then is renewed as the plant grows. Small cormlets can form around an established plant, gradually enlarging a clump.
The best-known garden forms include Dutch crocus (Crocus vernus hybrids), early snow crocus (C. chrysanthus and related hybrids), and smaller species such as C. tommasinianus. Their flowers may be purple, white, yellow, or striped, and their flowering sequence depends on cultivar and local weather. A cold snap can delay opening; a mild spell can bring an early flush, so the calendar is only a guide.
The early bloom can also feed foraging bees when few other flowers are open. Matt Mattus notes this seasonal value in Fine Gardening, another reason to let flowers open naturally rather than treating the patch as disposable color.
| Need | Practical starting point |
|---|---|
| Planting season | Autumn, while the soil is workable and before it freezes |
| Light | Sun during the growing season; deciduous shade later can work |
| Soil | Free-draining; avoid a bed that stays waterlogged |
| Spacing | Small groups or drifts; follow the corm label for cultivar spacing |
| Water | Let rainfall do most of the work in the ground; avoid soggy pots |
| After bloom | Keep green leaves until they yellow naturally |
These are starting points, not a promise that every crocus species behaves identically. The RHS crocus growing guide distinguishes among spring species, larger Dutch hybrids, lawn plantings, containers, and more specialist crocuses that need different conditions.
Choose a Crocus That Fits Your Site
Choose the cultivar for its job, not only its flower color. If you want an early naturalized carpet under deciduous trees, small species crocuses are often better suited to loose drifts. If you want stronger flowers to show through lawn grass or to carry a pot display, larger Dutch hybrids are easier to see and are commonly sold for those uses.
Crocuses vary in bloom timing and performance. C. tommasinianus is often used for early naturalizing, while many C. vernus hybrids bloom later with larger cups; mixing types can lengthen the display, but it does not make one individual flower last longer. The RHS suggests C. tommasinianus and C. chrysanthus for small naturalized groups and Dutch hybrids for lawns and containers, while Kew horticulturist Richard Wilford makes a similar distinction in Gardens Illustrated.
Check the package for the botanical name and the supplier’s depth and flowering notes. “Crocus” can refer to dozens of species, including autumn-flowering kinds; a packet marked for fall bloom is not a spring crocus just because its common name contains crocus.
Spring Crocus and Autumn Crocus Are Not the Same Plant
True spring crocus belongs to the genus Crocus and is planted in fall to flower after winter. “Autumn crocus” can mean an autumn-flowering Crocus species, but it is also a common name for Colchicum autumnale, a different plant in a different family. The flowers can look similar at a glance, yet their planting season, foliage, and toxicity differ.
Read the botanical name before buying if pets or children may reach the planting area. The ASPCA says spring Crocus ingestion can cause gastrointestinal upset, while Colchicum autumnale can cause far more serious poisoning; do not use a photo or common name alone to decide which plant is safe.
When to Plant Spring Crocus Corms
Plant spring-blooming corms in autumn, early enough for them to settle and develop roots before the ground freezes. In many temperate gardens that means early to mid-fall, but the useful window shifts with latitude, soil temperature, and how quickly winter arrives. Follow the supplier’s regional planting window if it gives one, and plant promptly rather than storing dormant corms for months in a warm room.
If you miss the ideal window but the soil is still workable, plant the corms rather than assuming the season is lost. They may flower weakly or later in their first spring if they had little time to establish, but the result depends on the cultivar, corm condition, and winter. Corms that have softened, dried out, or molded are poor candidates for planting.
Do not confuse the fall planting date with the bloom date. Spring crocuses usually flower in late winter or spring when the soil and air begin to warm, but an unusually warm or cold winter can move that date by weeks. If your garden stays warm through winter, choose a crocus suited to your climate or grow a pre-chilled, labeled corm in a container as a seasonal display instead of expecting every standard cultivar to naturalize outdoors.
Pick a Site With Spring Sun and Fast Drainage
Choose a place that receives sun while crocus leaves are active and drains freely after rain or snowmelt. Full sun is dependable, but partial shade from a deciduous tree can work because the branches are bare when the flowers emerge. Dense shade from an evergreen hedge or building can reduce flowering, and persistently wet soil can rot corms even when the surface looks acceptable.
Spring crocuses naturally go dormant after their brief growing season. A site that is moist in spring but drier in summer suits many common garden crocuses better than a bed kept constantly wet by irrigation. If your soil is heavy clay, improve the bed broadly with organic matter or plant on a raised, well-drained slope; putting a pocket of loose grit in an individual hole will not fix a wet planting site.
A simple drainage check can prevent a disappointing first year: after a soaking rain, see whether water remains pooled over the bed for hours. If it does, choose another position or raise the planting area before committing a large group of corms. This matters more than adjusting soil pH or adding a strong dose of fertilizer.
Under Trees, in Lawns, or in Containers
Under deciduous trees, plant in loose groups rather than a formal ring right against the trunk. The early light lets flowers open before the canopy fills in, and the fading leaves can be hidden by later-emerging perennials, as long as those plants do not shade the crocus while its foliage is still green.
A lawn can become a natural-looking crocus meadow, but plan for the mowing pause before you plant. Select a section that can remain unmown until the crocus leaves have yellowed; if a tidy, early spring cut is essential, put the corms in a border or pot instead. Kew horticulturist Wilford notes that established lawn plantings can be cut once the foliage has died back, and the RHS likewise advises delaying mowing until then.
Containers give you control over drainage and make small flowers easier to see, but the pot should have open drainage holes and a free-draining mix. Keep pots outdoors or in a suitable cool place for the seasonal cycle unless you are deliberately forcing them for a short indoor display.
How to Plant Crocus Corms
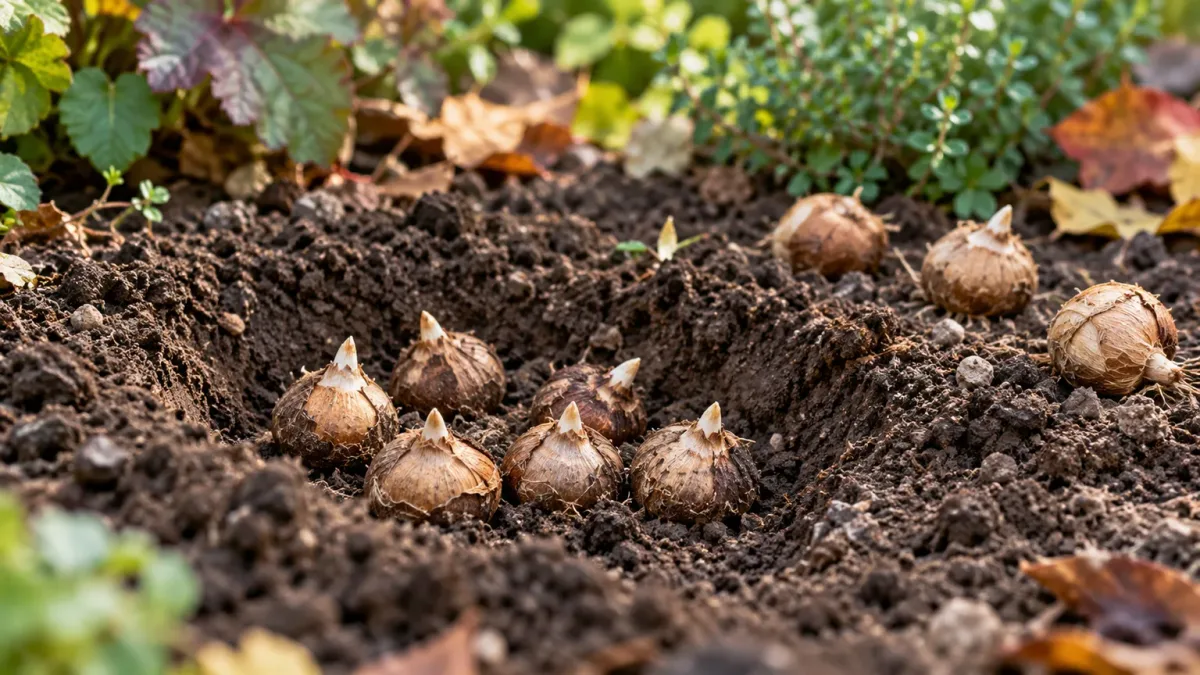
Plant healthy, firm corms in a group or drift so the small flowers read as a display rather than isolated dots. Loosen the soil, remove perennial weeds, and set each corm with its pointed growing end up and its flatter base down. If the top is hard to identify, planting it on its side is a safer choice than pressing it into compacted soil tip-first.
Backfill with the same loose soil and water once if the bed is dry. That settles soil around the corm without leaving it in a saturated pocket; after that, natural rain often supplies enough moisture in an established outdoor bed. Avoid piling fertilizer into the planting hole, where concentrated salts can damage new roots.
Depth, Orientation, and Spacing
Use the planting depth printed on the package because corm size differs among species and cultivars. As a practical range, small spring crocuses are often planted about 3 to 4 inches deep, while the larger Dutch hybrids can be set deeper—around 5 inches in a lawn planting—according to the RHS recommendations for spring crocuses. Measure from the soil surface to the corm’s base, not from the corm’s tip.
For a natural-looking patch, place smaller corms several inches apart in irregular little groups and repeat those groups across the area. Large hybrids can be spaced roughly 4 inches apart; tighter spacing creates a denser first display but gives offsets less room later. A useful design method is to scatter a handful on the prepared surface and plant where they land, shifting any corm that falls into a straight line or an awkward mowing strip.
Do not plant every corm in one deep hole if you want a dispersed carpet. Individual holes take longer, but a narrow trench or lifted turf strip is faster for a large lawn area; replace the turf carefully and mark the location so you remember to delay mowing in spring.
Water and Feed Lightly
In-ground crocuses usually need little supplemental watering once established. Water after planting if the soil is dry, then check conditions during active growth: if there has been no rain and leaves are wilting or soil is dry several inches down, give the bed a thorough drink. Do not follow a rigid weekly schedule through wet winter weather.
The critical balance is moist during active growth, not saturated, followed by a relatively dry summer dormancy for many common types. Containers dry faster than beds, so check the mix with a finger; water when it begins to dry rather than letting the entire root zone stay bone dry while leaves are green. Make sure excess water can drain out of the pot instead of collecting in a decorative cachepot.
Most established outdoor crocuses do not need routine fertilizer. The RHS advises that crocuses grown in the ground should not need feeding; healthy soil and undisturbed foliage are more important than a high-strength bulb food. If a soil test or persistently poor growth indicates a need, use a modest, label-directed amendment over the bed, not a homemade recipe or concentrated fertilizer against the corm.
What to Do After the Flowers Fade
Let the flowers fade on their own; deadheading is optional and not required for a spring display next year. The leaves are the important part: while they remain green, they photosynthesize and replenish the replacement corm and any small offsets. Cutting them back, braiding them tightly, or mowing them early can reduce the plant’s stored energy and weaken the next bloom.
Wait until the foliage yellows and begins to collapse naturally before removing it. There is no universal number of weeks because spring temperatures and cultivar timing vary; judge by the leaves, not a fixed date. In a lawn, delay the first cut over the crocus patch until that same point, even if surrounding grass needs attention sooner.
Once leaves are fully dry, tidy them if you prefer, then allow the summer soil to dry normally. Do not dig up a healthy clump simply because the flowers have disappeared; the corm is resting underground, not necessarily dead. Keep a small map or label if the planting is in a mixed border so later summer digging does not disturb it.
Grow Crocus in Pots and Force an Early Display
Use a pot with drainage holes and a gritty, free-draining potting mix. Plant corms close enough for a full bowl but not touching, following the label’s depth; for a layered bulb container, crocuses can sit above deeper-planted bulbs if there is still enough soil depth for their roots. Water after planting, then keep the pot cool through its autumn-to-winter rooting period.
To force spring crocuses indoors, begin with a cultivar recommended for forcing and follow the supplier’s chill directions. The RHS describes planting C. vernus in early autumn, giving the potted corms six to eight weeks of autumn chill outdoors or in a cool frame, then bringing them into a cool indoor space to encourage flowering. That is one documented method, not a universal chill requirement for every species or cultivar.
When shoots appear, move the pot to a bright, cool location rather than a hot radiator or sun-baked room. Keep the mix lightly moist while leaves are growing, discard standing water from the saucer, and expect the flowers to last longer in a cool room than in warm, dry air. The goal is a short seasonal display; a forced pot may need recovery outdoors after bloom rather than being treated like a permanent houseplant.
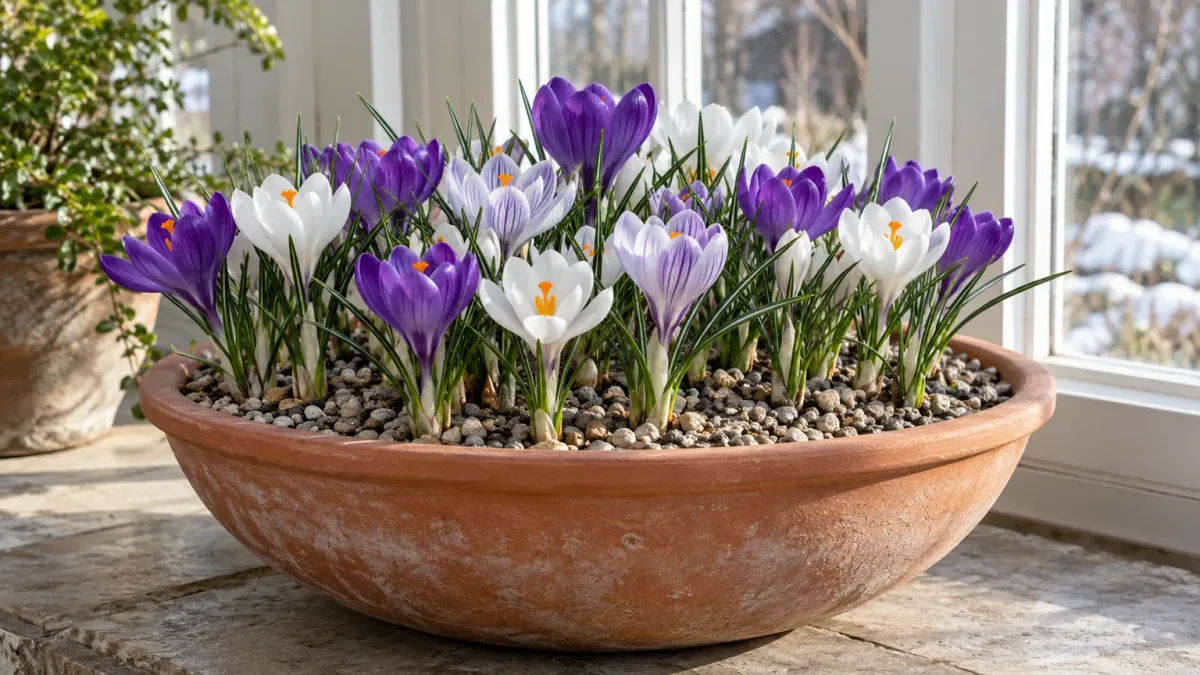
After flowering, continue caring for the leaves until they yellow. You can then plant the corms in a suitable garden bed or store a container-grown group cool and dry until the normal autumn planting period, as advised by the RHS growing guide. Do not save soft or moldy corms, and do not expect every forced corm to give a strong display immediately the following year.
Let a Healthy Clump Naturalize
Spring crocuses can spread through offsets and, for some species, seed. Naturalizing is slow rather than instant: let seed capsules mature if you want seedlings, and keep the soil and foliage undisturbed through the active season. Small species such as C. tommasinianus are often chosen for self-seeding, while many garden hybrids spread mainly by cormlets.
Divide only when a clump is visibly overcrowded, the display has become uneven, or you need to move it. Some species flower well in a close group, so lifting on a fixed three-year calendar can create unnecessary work. If you do divide, wait until the plant is dormant in late summer, lift carefully, separate firm healthy corms and offsets, discard soft or damaged material, and replant promptly at the correct depth.
Growing from seed is a patient project, not a shortcut to a filled bed. Seedlings need several growing seasons to reach flowering size, and seedlings may not match the parent cultivar. For a predictable display next spring, buy healthy corms; use seed when you enjoy raising plants and can wait.
Protect Corms From Pests and Keep Pets Safe
Squirrels, mice, voles, and other digging animals may find newly planted corms before they root. If you see fresh holes or missing corms, protect the planting during establishment with a firmly secured wire mesh under or over the soil, using openings that allow shoots to pass; remove or reposition any barrier that could snag leaves. In pots, a temporary mesh cover is easier to secure and remove.
Do not assume a repellent or companion plant will solve every animal problem. Site, local animal pressure, and the corm’s exposure all matter; for a small bed, physical protection is often more predictable than repeatedly treating the soil. Avoid adding bone meal as a rodent deterrent strategy, and follow the label for any garden product used around pets.
Keep pets from chewing or digging up crocuses. According to the ASPCA’s spring-bulb guidance, ingestion of spring Crocus may cause vomiting, diarrhea, or drooling; autumn Colchicum autumnale can cause much more serious effects. If an animal may have eaten any part of a crocus or corm, contact a veterinarian or animal poison-control service promptly and give them the plant label or botanical name.
Why Spring Crocus Fail to Bloom
A crocus that produces leaves but no flowers may be too newly planted, have a small or damaged corm, lack suitable winter conditions, sit in too much shade, or have lost leaf area before the corm replenished itself. A patch that was once bright and is now sparse can also be crowded, waterlogged, or partly dug up. The symptom narrows the possibilities, but it does not identify a cause by itself.
Start with the sequence: confirm that you planted a spring-flowering cultivar; check when it went into the ground; review whether leaves were cut or mown while green; then assess light and drainage. If those conditions were sound, inspect one declining area after dormancy for firm corms and offsets rather than disturbing the entire bed. Replace mushy or missing corms, and replant healthy offsets with more space only if crowding is evident.
If no leaves appear, gently check a small part of the bed for corms that have rotted, dried out, or been eaten. If leaves appear but flowers are absent, leave them in place through natural yellowing and reassess next spring; corms and seedlings may need more than one season to mature. More fertilizer is rarely the first fix for a plant whose light, drainage, season, or foliage cycle is wrong.
A Symptom-First Check for Missing Flowers
- No shoots: verify the spot and planting depth, then look for animal digging or a corm that softened in wet soil.
- Leaves but no flowers: check whether the corm was immature, planted too late, shaded during growth, or mown before the leaves yellowed.
- A shrinking patch: look for poor drainage, competition, or missing corms before dividing; retain firm offsets and discard decayed corms.
- Early wilt or distorted growth: isolate affected plants and inspect corm condition. Remove clearly diseased, distorted plants rather than moving them around the garden; ask a local extension service to identify a persistent problem before using a pesticide or fungicide.
Conclusion
For reliable spring crocus, start with the right spring-flowering cultivar and a site that is bright during leaf growth and drains well. Plant firm corms in autumn at the depth on their label, group them for a visible display, and water only to settle or support active growth when rain is lacking.
After bloom, protect the leaves until they yellow; that pause is what lets a small spring flower return with strength. If the display fades, check corm health, mowing, shade, and drainage before reaching for fertilizer. Keep pets away from the plant, read botanical names carefully, and treat possible ingestion as a veterinary question.