How to Grow and Care for Philodendron Brandtianum
Learn Philodendron brandtianum care with practical light, watering, soil, support, propagation, and troubleshooting advice for healthy silver-mottled leaves.
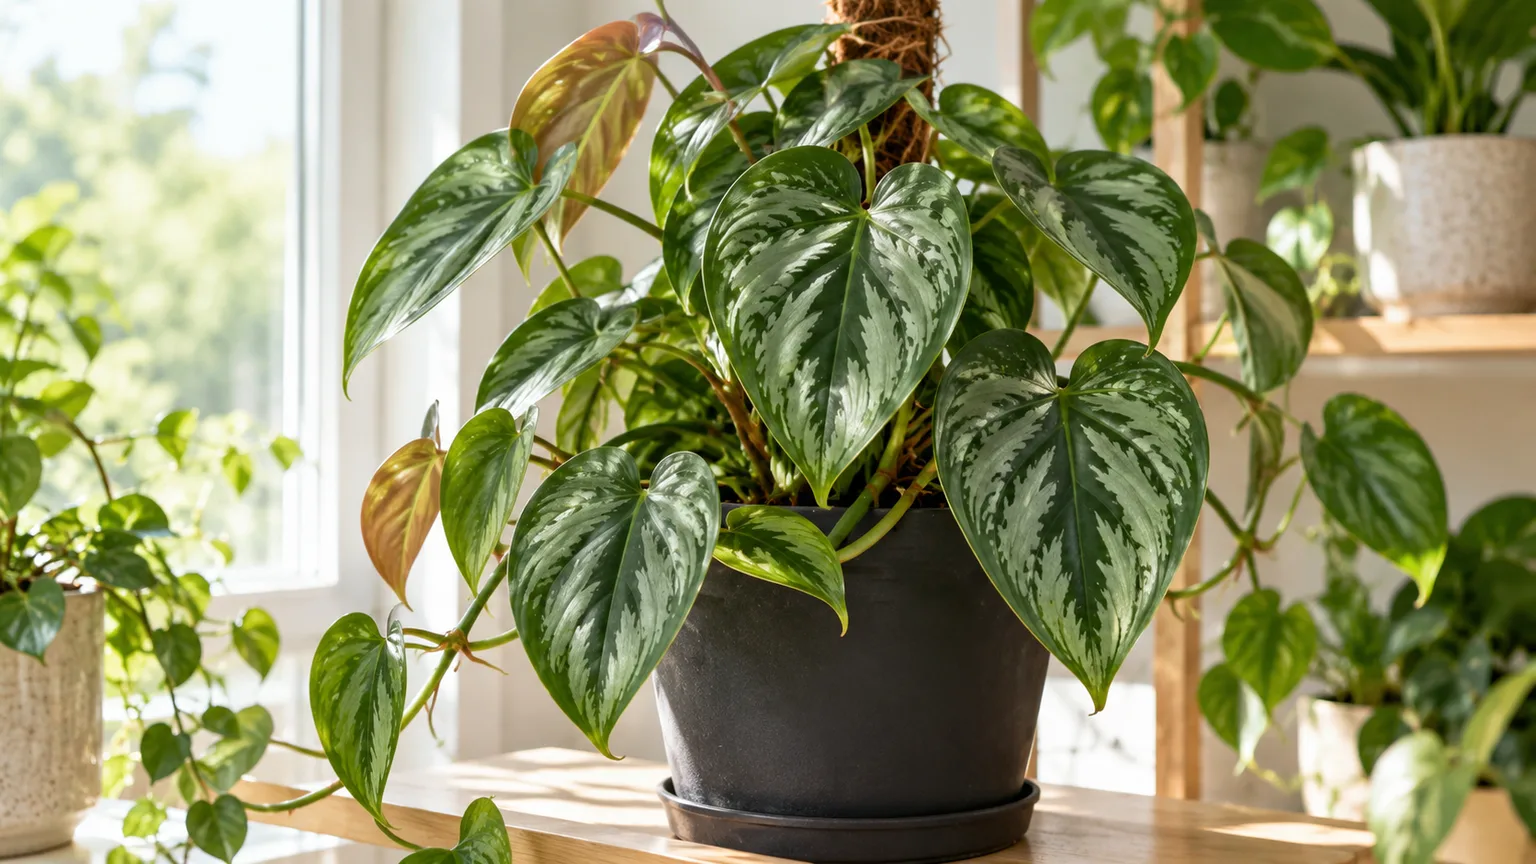
Philodendron brandtianum stands out for its heart-shaped leaves brushed with silver-gray markings, but it is also a forgiving climbing houseplant when its roots get air and its light stays steady. The useful care rule is simple: give it bright filtered light, let part of the potting mix dry before watering again, and choose whether you want the stems to climb or trail.
This species comes from South America, where it grows as a climber in seasonally dry tropical habitat. That background helps explain why it can appreciate even moisture during active growth without needing permanently wet soil. Kew’s Plants of the World Online recognizes the species as a climber native to southern Colombia, northern Brazil, and Bolivia, and Garden Betty’s species-specific guide likewise describes its climbing growth and seasonal moisture tolerance. (Plants of the World Online; Garden Betty)
Philodendron brandtianum care at a glance
| Care factor | A reliable starting point | What to adjust |
|---|---|---|
| Light | Bright, indirect light | Move it closer to a bright window if stems stretch or new leaves shrink; diffuse harsh sun. |
| Water | Water thoroughly after the upper mix has dried partly | Check more often in warm, bright weather and less often in winter or a large pot. |
| Soil | Loose, airy mix in a draining pot | Add bark or perlite if the mix stays wet; use a smaller pot if the root ball remains soggy. |
| Temperature | Comfortable indoor warmth, away from cold drafts | Growth slows in cool rooms; avoid abrupt exposure to cold glass or vents. |
| Humidity | Ordinary indoor humidity is workable; moderate humidity can help leaves unfurl | Improve room humidity if edges repeatedly crisp, while checking roots and salts too. |
| Growth habit | Climbing vine | Add a pole for upright growth or let the stems cascade from a shelf or hanging pot. |
These are starting points, not a watering timer. Pot size, mix, temperature, light, and the plant’s current root health all change how quickly the soil dries, so use the condition of the pot rather than a fixed weekday routine.
What makes the silver leaf philodendron distinctive
The common names silver leaf philodendron and Philodendron Brandi refer to P. brandtianum. Young leaves typically show the most obvious silver mottling against green tissue; emerging leaves can have a coppery or bronze cast before they mature. As a vine matures, later leaves may look longer and less heavily marked, so a change in pattern is not automatically a sign of decline. (Garden Betty)
It is easy to confuse this plant with Scindapsus pictus, often sold as satin pothos or silver pothos. Both have vining stems and silver markings, but the brandtianum leaves are generally smoother and more heart-shaped, while satin pothos has a matte, satiny surface. Identify the plant before copying a care routine from a label: their similar appearance does not make them the same species.
Kew records P. brandtianum as an accepted species and a climber, not a naturally compact rosette. Indoors, the vine can be trained upward or allowed to hang, and the space available often matters more to the display than an advertised mature-height number. (Plants of the World Online)
Light: bright enough to grow, filtered enough to protect leaves
Set the plant where it receives bright, indirect light for much of the day. An east-facing window is often easy to manage; a south- or west-facing window can work if a sheer curtain or a little distance from the glass softens hot afternoon rays. A bright room with no direct beam on the leaves is a better starting point than a dim corner chosen only to avoid sunburn.
Direct sunlight through glass can bleach or scorch leaves, especially if a plant that has been in low light is moved abruptly. If you want to move it nearer a window, shift it gradually over a week or two and watch the leaves. Low light is not a neutral choice either: internodes may lengthen, stems may lean toward the window, and new growth can be smaller with less striking silver.
Judge the site from the plant’s response over several weeks, not from one older leaf. If the vine stretches while leaves remain healthy, increase the available indirect light; if pale dry patches appear on the window-facing side, pull it back or filter the sun. Rotating the pot a quarter turn every week or two can help growth remain balanced without repeatedly moving the plant to a new environment.
Water: use the soil as your schedule
Water when the top inch or two of the mix has dried and the pot is beginning to feel lighter, then soak the root ball evenly until water runs from the drainage holes. Empty the saucer or decorative cachepot afterward. The aim is a moist root zone with air spaces, followed by a gradual dry-down—not a plant left standing in runoff and not a small splash that wets only the surface.
A fixed interval such as “every Sunday” will fail when the room changes. A small plant in a porous pot near a warm window may dry quickly, while a large pot in a cool room may remain wet much longer. Check the soil with a finger or a wooden skewer inserted several centimeters down; if it comes out cool and coated with damp mix, wait and recheck instead of watering because the surface looks dry.
In spring and summer, active growth and longer days usually mean more frequent checks. During darker, cooler months, the mix often dries slowly, so stretch the interval and reduce watering only when the plant’s actual dry-down supports it. Garden Betty also recommends adjusting between warmer growing months and winter rather than treating the plant as if it uses the same amount of water year-round. (Garden Betty)
If the leaves droop, look at the soil before reaching for the watering can. A dry, lightweight pot points toward thirst; a wet, heavy pot suggests a root or drainage problem, and more water can make that worse. Leaves are a clue, not a diagnosis by themselves.
Soil and pot: keep roots moist but oxygenated
Use a loose, water-retentive but fast-draining mix. A practical starting blend is three parts indoor potting mix, one part perlite, and one part fine orchid bark; adjust it for your home rather than treating those proportions as a formula. This combination holds some moisture while leaving larger air spaces, a balance suited to a climbing aroid in a container. Garden Betty describes a similar aroid blend and recommends drainage holes for this species. (Garden Betty)
If the mix remains wet for many days, increase the coarse bark or perlite, check that the pot has open drainage holes, and consider whether the pot is too large for the roots. If water races through without moistening the root ball, the mix may have become hydrophobic or overly coarse; water slowly in two passes, or refresh the mix at the next appropriate repot. The goal is not maximum drainage at the expense of any moisture retention.
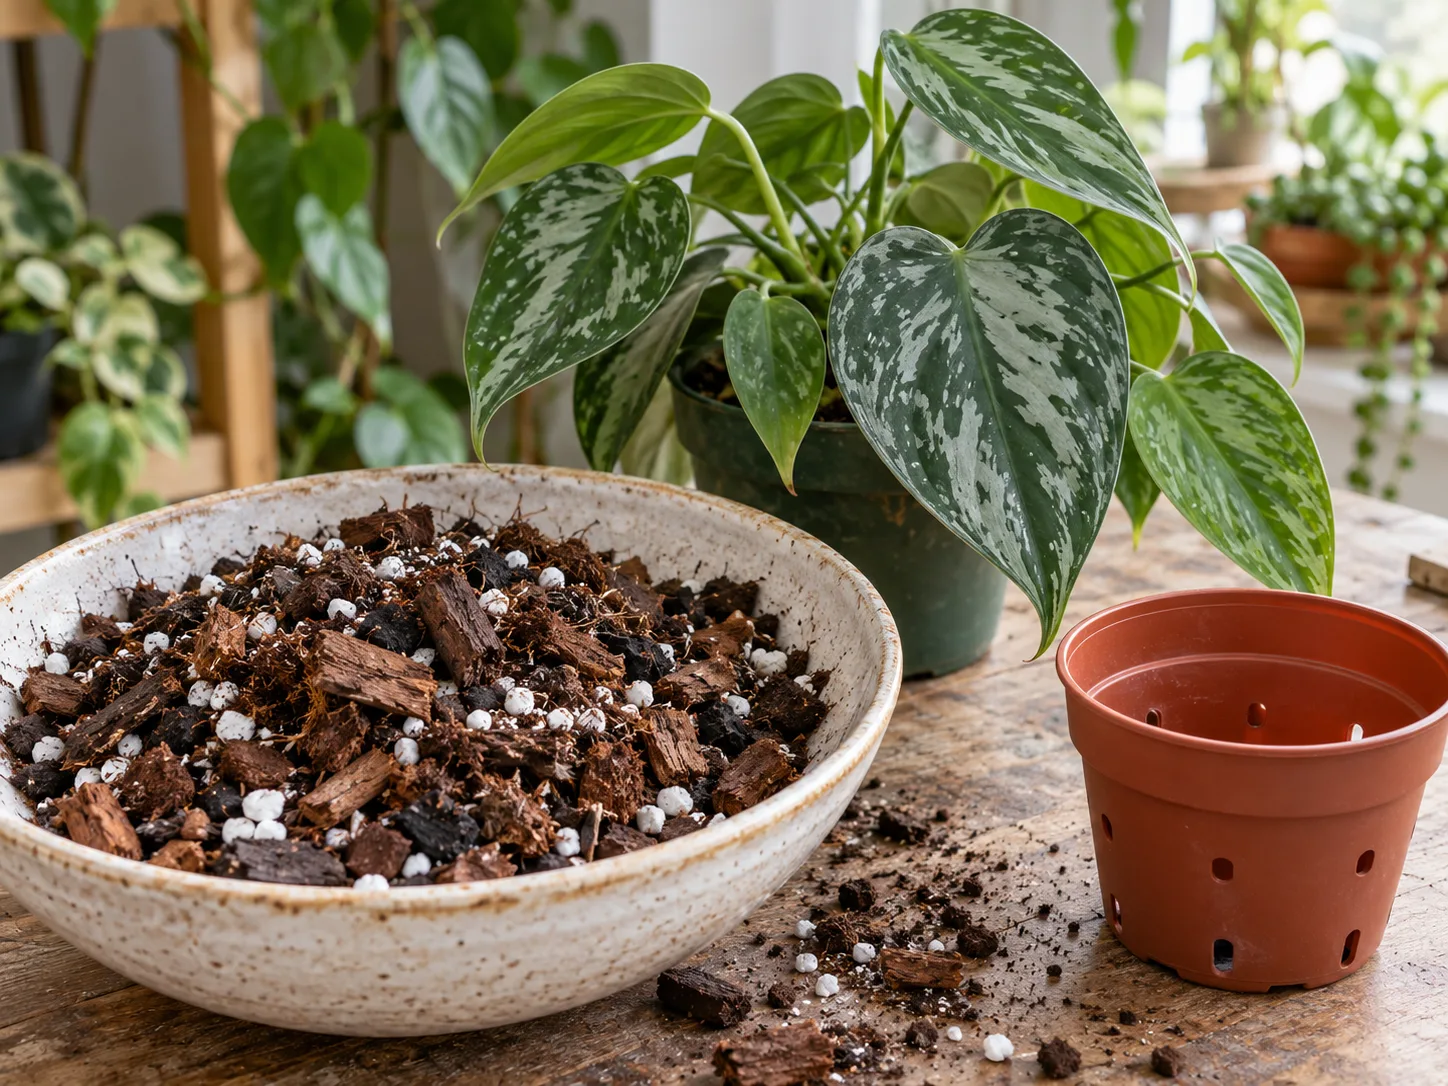
A nursery pot with drainage inside a decorative outer pot makes moisture easier to manage. After watering, remove the nursery pot from the cachepot, let it drain, and return it only when runoff has stopped. Do not add a gravel layer to the bottom as a substitute for a drainage hole; choose a container that drains from the start.
Temperature and humidity: steady warmth beats extremes
Normal warm household conditions suit this tropical vine. Keep it away from cold drafts, heating vents, air conditioners, and window glass that becomes cold at night. Garden Betty advises avoiding temperatures below about 60°F, and The Sill’s general philodendron guidance gives a similar lower boundary; treat that as a caution point rather than a target temperature. (Garden Betty; The Sill)
Humidity can influence how smoothly new leaves unfurl, but a typical home does not need to become a greenhouse. If the air is very dry and leaf edges keep crisping, first rule out inconsistent watering, direct sun, and fertilizer salt buildup; then group plants or use a room humidifier if the room itself is persistently dry. A tray of water under the pot does not meaningfully fix dry air around a whole plant, and the pot must never sit in standing water.
Avoid frequent misting as a substitute for stable room conditions. It only raises humidity briefly, and persistently wet foliage in a poorly ventilated spot can invite spotting. A modest, steady room environment is more useful than chasing a particular humidity number while the potting mix remains waterlogged.
Climbing or trailing: choose the shape you want
In nature, P. brandtianum climbs. Kew classifies it as a climber, and its stem nodes can produce roots that help it attach to a support. Indoors, a coir pole, moss pole, narrow trellis, or sturdy stake gives the vine an upward route; the plant does not need one to survive. (Plants of the World Online)
Choose a pole if floor space is limited or you want a vertical plant with a clear central shape. Insert the support close to the root ball without forcing it through thick roots, then loosely secure the vine with soft plant ties. Attach the stem, not the leaf stalk, and leave enough slack for it to thicken. Check ties as the plant grows so they do not constrict the stem.
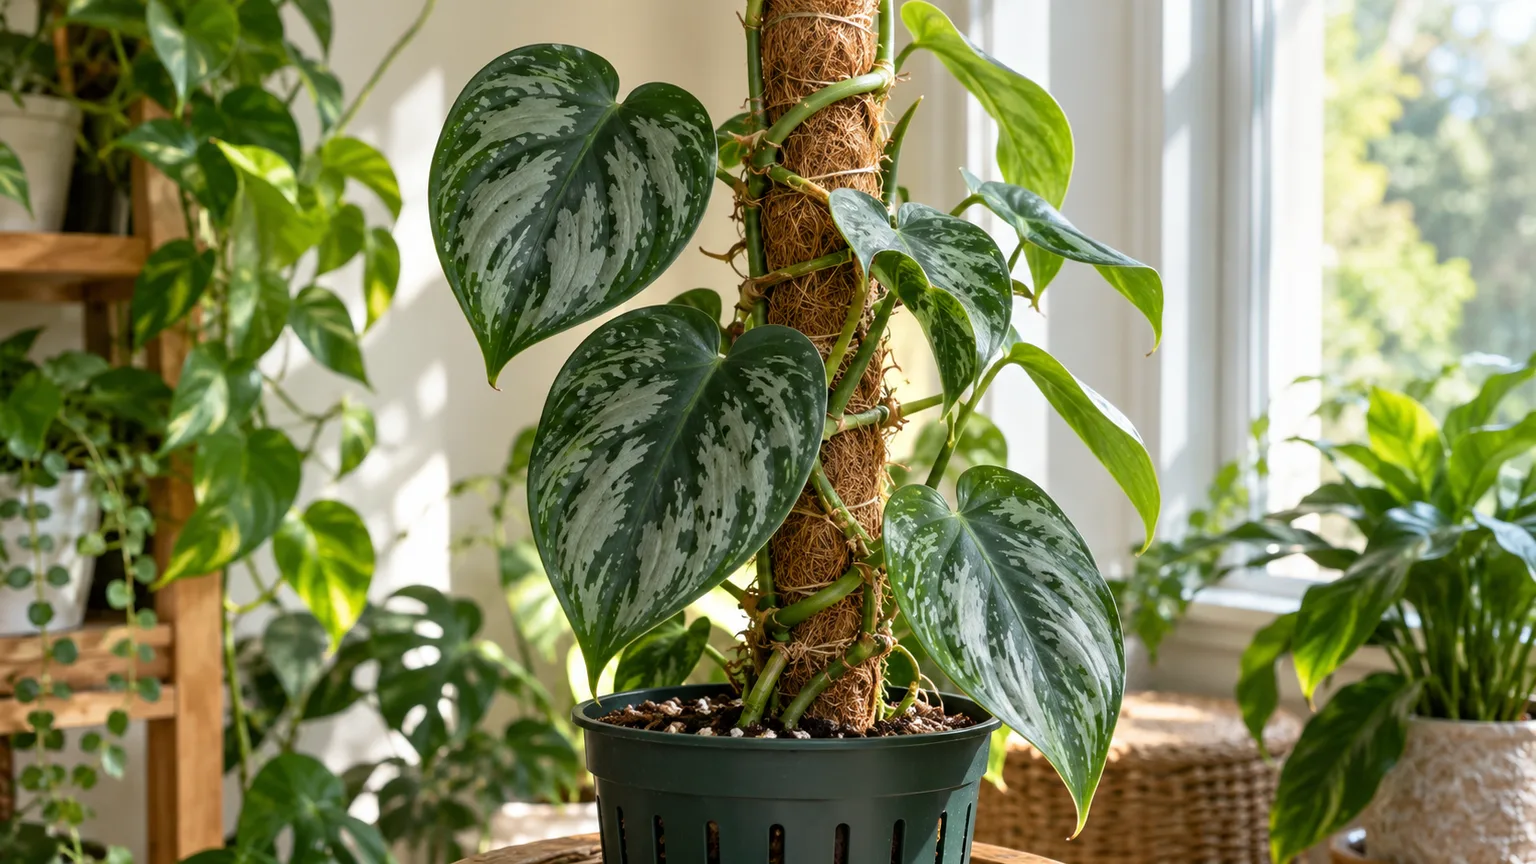
For a cascading display, place the pot on a shelf or in a hanging planter and let the vines trail. This is a valid way to grow it, although the leaves may remain smaller than on a supported vine as it matures. If you change your mind later, redirect the new growth to a support rather than trying to bend a stiff, older stem sharply in one go.
Fertilizer: feed only during active growth
A healthy plant in fresh potting mix can grow without frequent feeding. During spring and summer, when new leaves are appearing, use a balanced liquid houseplant fertilizer diluted according to its label; a conservative dose every four to six weeks is a reasonable starting point. Costa Farms gives monthly spring-and-summer feeding as general philodendron guidance, while Garden Betty recommends diluted feeding during the active season. (Costa Farms; Garden Betty)
Skip or reduce feeding when growth has slowed in winter, the plant is stressed, or the roots are damaged. Fertilizer cannot compensate for low light or chronically wet soil, and applying more can add soluble salts that damage roots and brown leaf tips. If a pale crust forms on the potting mix, pause feeding and water thoroughly enough to flush the mix—provided the container drains freely.
Pruning: trim with a purpose
Prune to remove dead leaves, shorten a vine, or take cuttings; routine shaping is optional. Use clean, sharp scissors and make the cut just above a node on the parent stem if you want the remaining vine to branch from a lower point. A cutting taken from a healthy long stem can become a new plant if it includes a node.
Do not remove several healthy leaves at once just because the plant looks sparse. Correct the light or support first, then let new growth fill in. If a leaf is only partly damaged, it can continue to photosynthesize; remove it when most of the blade is yellow or dry, or when you need to improve airflow around a crowded stem.
Repotting: move up only when roots need room
Repot when roots form a dense coil around the root ball, emerge in quantity from the drainage holes, or the plant dries unusually fast despite a suitable mix and steady conditions. One root poking through a hole is a reason to inspect, not proof that the plant must be moved that day. A pot that is much larger than the root mass holds extra wet mix for longer and raises the risk of root problems.
Choose a container only one size larger—usually about 1 to 2 inches wider—with drainage holes. Slide the plant out, loosen only the outermost circling roots if they are tightly bound, and look for firm, pale roots. Remove roots that are mushy or foul-smelling with clean scissors, then set the plant at the same depth in fresh mix. Water once to settle the soil and let it drain completely.
Spring or early summer is a convenient time because active growth helps the plant recover, but a serious drainage or root issue should be corrected when it is found. If the current pot still has room and the plant is growing normally, refreshing the top layer of mix is less disruptive than repotting by calendar.
Propagation: make a new plant from a stem cutting
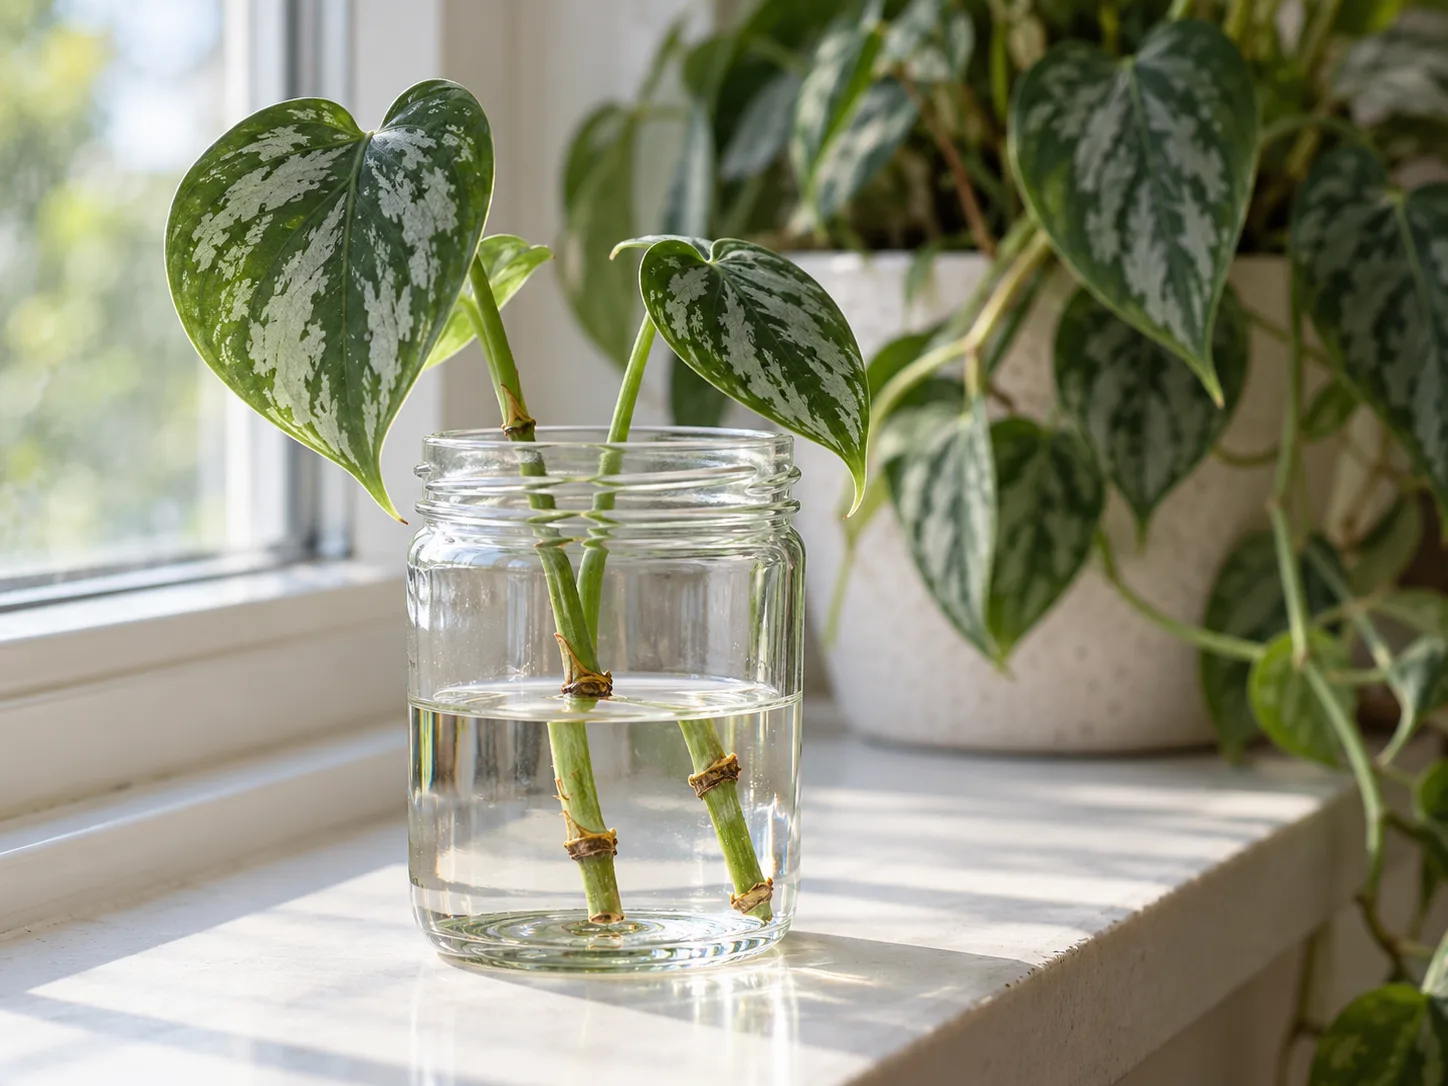
Use a healthy stem with at least one visible node—the small joint where a leaf or aerial root attaches. A leaf and its leaf stalk without a piece of stem containing a node cannot make a new vine, because the growing point is on the stem. Take cuttings in warm, bright months if possible, when the parent plant is actively growing.
With clean scissors, cut just below a node, keeping one or two leaves on each section. Remove a leaf that would sit under water or below the soil line. You can root the cutting in water or a lightly moist potting mix; Garden Betty describes both approaches for P. brandtianum. (Garden Betty)
Rooting in water
Place the node underwater in a clean glass while keeping the leaves above the waterline. Set it in warm bright-indirect light, refresh the water when it becomes cloudy, and check for roots rather than pulling the cutting up every day. Rooting speed varies with temperature, light, and the cutting itself, so do not discard a firm green cutting just because it has not rooted quickly.
Pot the cutting once it has several roots with some branching, not just a tiny nub. Use a small draining pot and keep the mix evenly, lightly moist while the new roots adjust. A large pot or a soaking-wet mix makes it harder for a small cutting to use available water without staying saturated.
Rooting directly in potting mix
Insert the node into a small container of lightly moist, airy mix and firm the medium gently around the stem. Keep the pot warm and in indirect light; the mix should stay slightly moist but never soggy. A loose clear cover can slow moisture loss if the room is dry, but vent it and remove it if condensation stays heavy or mold appears.
New leaf growth is encouraging, but resistance at the stem base is a better sign that roots have formed. Avoid repeatedly tugging at the cutting to check it. Once it is rooted and begins growing, treat it like a small established plant and let the surface dry partly between waterings.
Troubleshooting changes in leaves and growth
Start with the pattern and the pot, then adjust one factor at a time. A single leaf can age out naturally, while several new symptoms appearing together point to a change in the environment, roots, or pests. Check the undersides and stem joints for webbing, stippling, scale, or cottony clusters before changing the watering routine.
Yellow leaves: check moisture and age first
If one of the oldest lower leaves yellows while the rest of the plant is producing healthy growth, it may simply be finishing its life cycle. If several leaves yellow over a short period, check the soil and drainage. A heavy pot that remains wet, especially with soft or dark roots, points toward oxygen-starved roots or rot; stop watering, remove standing runoff, and inspect the root ball if the mix smells sour.
If the pot is very light and the mix is dry well below the surface, the plant may be thirsty. Water slowly until the whole root ball is wet and the excess drains. If yellowing continues after moisture is corrected, review light and pests, and avoid adding fertilizer until the plant is growing steadily again.
Brown edges or tips: trace the pattern
A dry, pale patch on the window-facing side can be sun scorch, especially after a sudden move into direct sun. Crispy tips across several leaves can also follow a long dry spell, persistently dry room air, or soluble salts from hard water or excess fertilizer. The pattern helps: isolated bleached patches suggest light exposure; repeated edge damage across leaves calls for a broader check of watering, humidity, and feeding.
Trim only the dry tissue if appearance bothers you; brown tissue will not turn green again. Keep the cut just inside the dead margin so you do not remove healthy leaf area, then correct the cause and watch the next leaves. Avoid treating every brown tip with more water: if the roots are wet, extra water can compound the problem.
Fading silver or small leaves: review light and support
A newly unfurled leaf may look bronze or copper before it hardens, and mature foliage can differ from the highly mottled juvenile leaves. But if successive new leaves are smaller, farther apart, or less patterned while the plant is otherwise healthy, check whether it is receiving enough bright indirect light. Increase light gradually rather than moving it into intense direct sun.
A climbing vine that is allowed to trail may also produce a different display from one growing up a support. If you want a more upright plant, secure the new stems to a pole and give them time to attach; adding fertilizer alone will not make a dimly lit or unsupported vine produce larger leaves. If growth is weak and the plant is root-bound, inspect the roots before deciding between more light and repotting.
Toxicity and safer placement
Treat the plant as unsafe to chew. ASPCA identifies tree philodendron, a different Philodendron species, as toxic to cats and dogs because it contains calcium oxalate crystals; MedlinePlus describes mouth and throat irritation and other symptoms after philodendron ingestion in people. Those references are not species-specific to P. brandtianum, so applying the caution to this plant is a prudent genus-level inference. Keep it beyond the reach of pets and children, and wash your hands after pruning. (ASPCA; MedlinePlus)
If a pet bites the plant, contact a veterinarian or animal poison-control service for advice rather than assuming the exposure is harmless. For a person who has chewed or swallowed philodendron, contact a poison center or medical professional; in the United States, Poison Help is 1-800-222-1222. MedlinePlus specifically advises against inducing vomiting unless poison control or a health professional directs it. (MedlinePlus)
Conclusion: build a routine around the plant’s cues
Give Philodendron brandtianum bright filtered light, an airy draining pot, and a thorough drink when the upper mix has dried partly. Let the room, season, pot, and soil determine how often that happens. If you remember one troubleshooting step, inspect moisture and roots before changing several care conditions at once.
Then decide how you want the vine to live in your space: train it upward on a pole or let it trail from a shelf. Prune or propagate when it suits the plant and your room, and keep it where curious pets and children cannot chew it. This steady, cue-based approach protects the roots and gives the silver-marked foliage the best chance to remain healthy.