How to Grow and Care for Peperomia Rosso Indoors
Peperomia Rosso care is simple when the mix dries evenly. Learn the right light, watering cues, soil, propagation steps, and fixes for yellow or faded leaves.
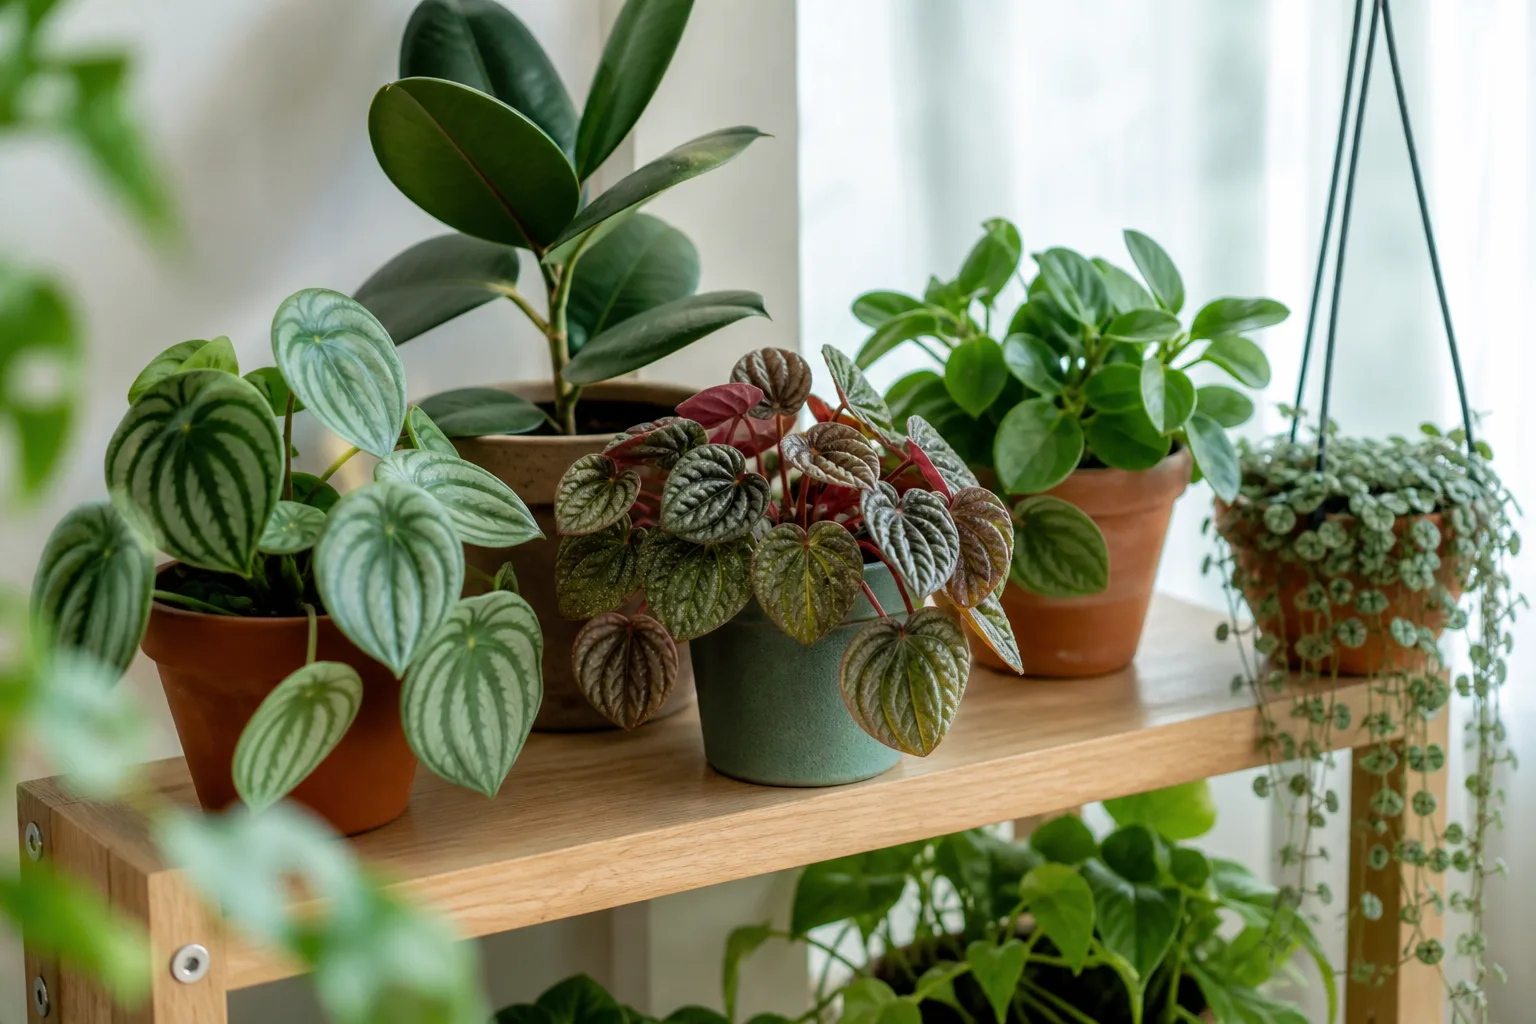
Peperomia Rosso is a compact indoor plant grown for its sculpted leaves: green to silvery-green above, deeply ridged through the middle, and reddish purple underneath. Give it bright, indirect light, a small pot with a drain hole, and a loose mix that holds a little moisture but lets excess water escape. Water when the upper layer of mix has begun to dry, then let the pot drain completely.
The one habit that causes the most confusion is treating every peperomia as if it were a drought-proof succulent. The leaves store some water, but Peperomia caperata can droop if its mix dries all the way through. At the same time, its fine roots and compact crown are vulnerable to long stretches in soggy soil. A quick check of the pot and leaves gives you a better watering cue than any weekly schedule.
What Peperomia Rosso Is—and What the Name Tells You
The plant sold as Peperomia Rosso is commonly labeled Peperomia caperata ‘Rosso’ or Peperomia ‘Eden Rosso’. Kew’s Plants of the World Online recognizes P. caperata as an accepted species in the pepper family, Piperaceae, native to southeastern Brazil; the cultivar name identifies a selected ornamental form, not a separate species. A Gardenia.net profile of ‘Rosso’ describes its compact, rosette-forming habit and the contrast between corrugated green leaves and reddish-purple undersides. The Royal Horticultural Society’s species profile describes the parent species as a small evergreen mound with puckered leaves and slender, pale flower spikes.
Rosso is not a trailing peperomia. Its leaves rise from a close central crown on fleshy petioles, so the plant usually forms a dense, low mound rather than long vines. The cultivar’s leaf color, size, and degree of ribbing can vary with the plant, its age, and its growing conditions; the common name is a useful label, not a guarantee that every nursery specimen will look identical.
That distinction matters because “peperomia care” covers a large genus. The National Garden Bureau’s guide to peperomias notes that species differ in how much drying they tolerate, and singles out P. caperata as one that can droop quickly if its potting mix dries completely. Rosso inherits the basic needs of its parent species, but its best routine still depends on the pot size, mix, window, and season in your home.
Give It Bright, Indirect Light
Place Rosso close to a bright window where daylight is strong but the leaves are not exposed to harsh, sustained midday sun. An east-facing window is often an easy fit; a brighter south- or west-facing window can work if the plant sits back from the glass or behind a sheer curtain. A north-facing window may be bright enough in a sunny room, but if the crown leans toward the glass and new petioles lengthen, move it nearer the light or add a grow light.
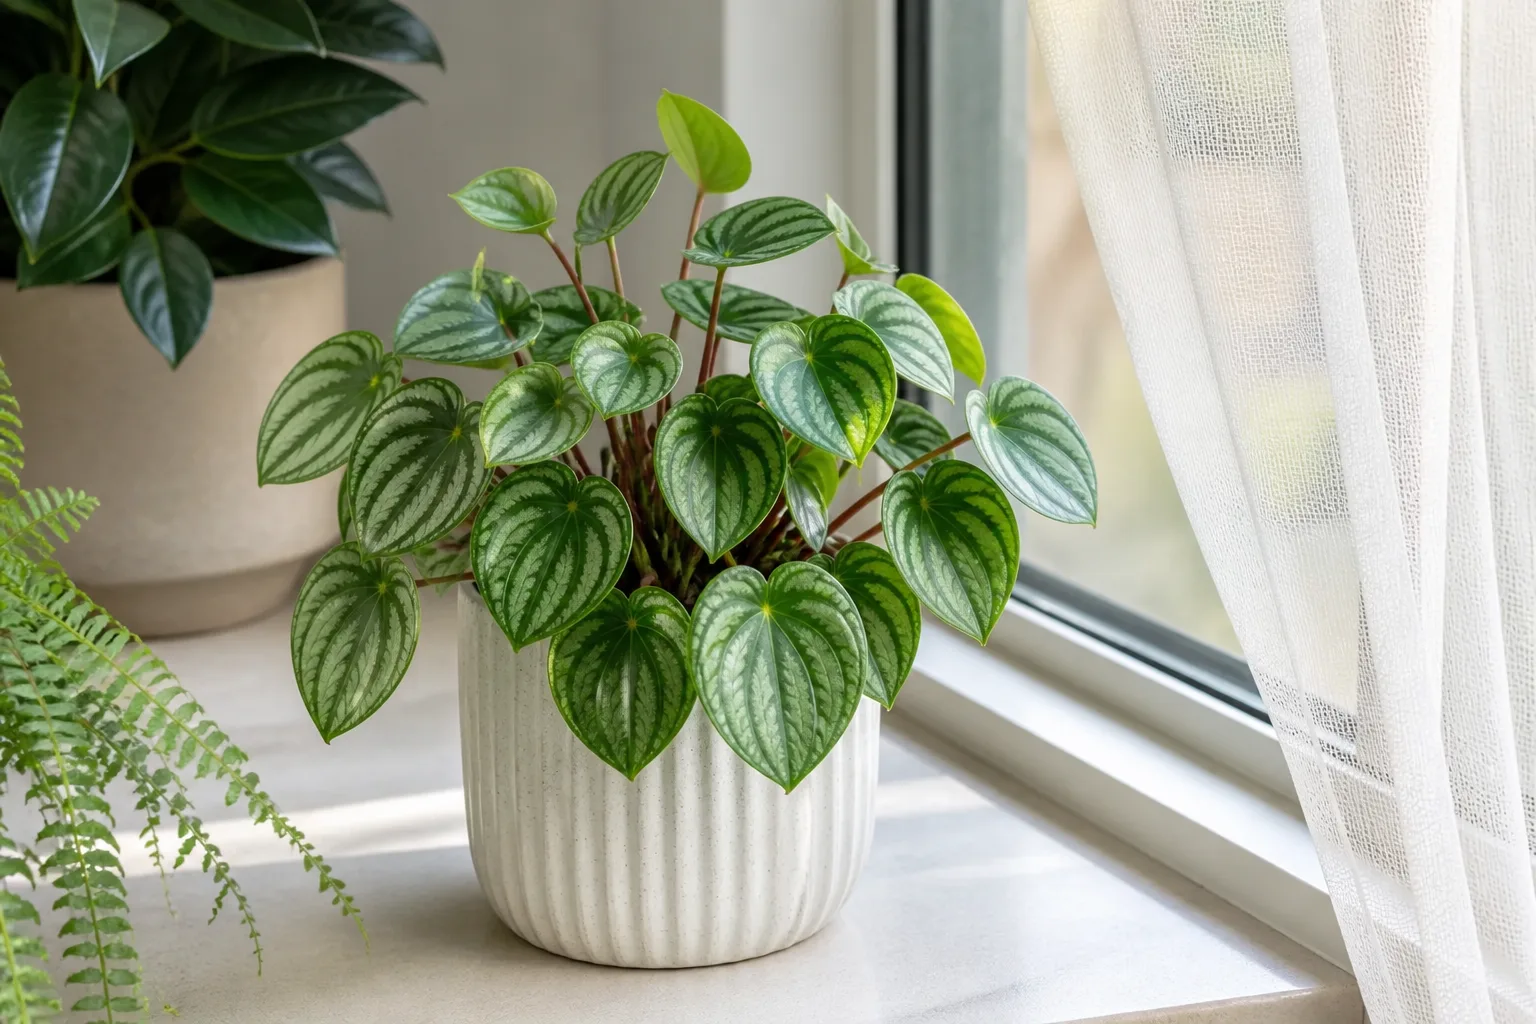
The goal is steady, filtered light, not deep shade. Rosso may remain alive in a dim corner, but growth often slows and the mound can open up as leaves reach toward the nearest source. A plant that was compact at the store may gradually develop long petioles if it is asked to grow in a dark hallway or several feet from a small window.
Direct sun is a different problem: it can bleach or scorch exposed leaf surfaces, particularly when a plant moves suddenly from a dim room into a sunny window. If you want more light, make the move in stages over several days. Rotate the pot occasionally so new growth does not all lean in one direction, but do not keep shifting the plant from room to room while you are trying to diagnose a problem.
Rosso’s red underside is a cultivar feature, not a light meter. A faded or stretched plant may benefit from more indirect light, but color alone cannot tell you what is wrong; compare the newest leaves and the shape of the whole mound. The RHS cultivation guidance for P. caperata calls for bright indirect light during growth, which is a good starting point for keeping a small indoor plant compact.
Water by Checking the Mix, Not the Calendar
Water when the upper portion of the potting mix has started to dry, while the root zone still feels lightly moist rather than bone dry. In a small pot, press a finger about an inch into the mix; if it feels cool and damp, wait and check again in a few days. If the top is dry, the pot feels lighter, and the mix below is only faintly moist, water thoroughly.
A useful routine is to take the nursery pot to the sink, pour water over the mix until it runs from the drainage holes, allow it to finish draining, and return it to its cachepot or saucer. Empty the saucer so the base does not sit in standing water. If you water from below, still check that the top of the root ball is not staying constantly wet and occasionally water through the top to rinse accumulated fertilizer salts from the mix.
How quickly the pot dries changes with the season and room. Bright summer light, warmth, and active growth may use water faster; winter light, cooler rooms, a large glazed pot, or dense soil may keep the mix wet for much longer. Use the plant’s condition and pot weight as feedback, not a promise that it needs water every seven or ten days.
The upper mix should not be confused with the whole root ball. In its overview of peperomias, the National Garden Bureau recommends allowing some mix to dry between waterings but warns that P. caperata is less tolerant of complete drying than some other common species. For Rosso, that means avoiding both extremes: do not water into a saturated pot, but do not deliberately wait until the entire root ball has gone dry and the leaves are limp.
If the mix remains wet for many days, remove a decorative sleeve, confirm that the drain hole is open, and assess whether the plant needs brighter light or a more open mix. Do not add a layer of gravel at the bottom of a pot; it does not fix slow-draining soil. Change one factor at a time so you can tell whether the pot is drying at a healthier rate.
Use an Airy Mix and a Snug Pot
Choose a houseplant mix that drains freely but does not dry into a hard, water-repellent block. A practical starting blend is two parts all-purpose indoor potting mix to one part perlite or pumice. If your home is cool or the mix stays wet, increase the mineral portion or add a little fine orchid bark; if it dries very rapidly in a warm, bright room, use a slightly more moisture-retentive mix and keep checking the deeper root zone.
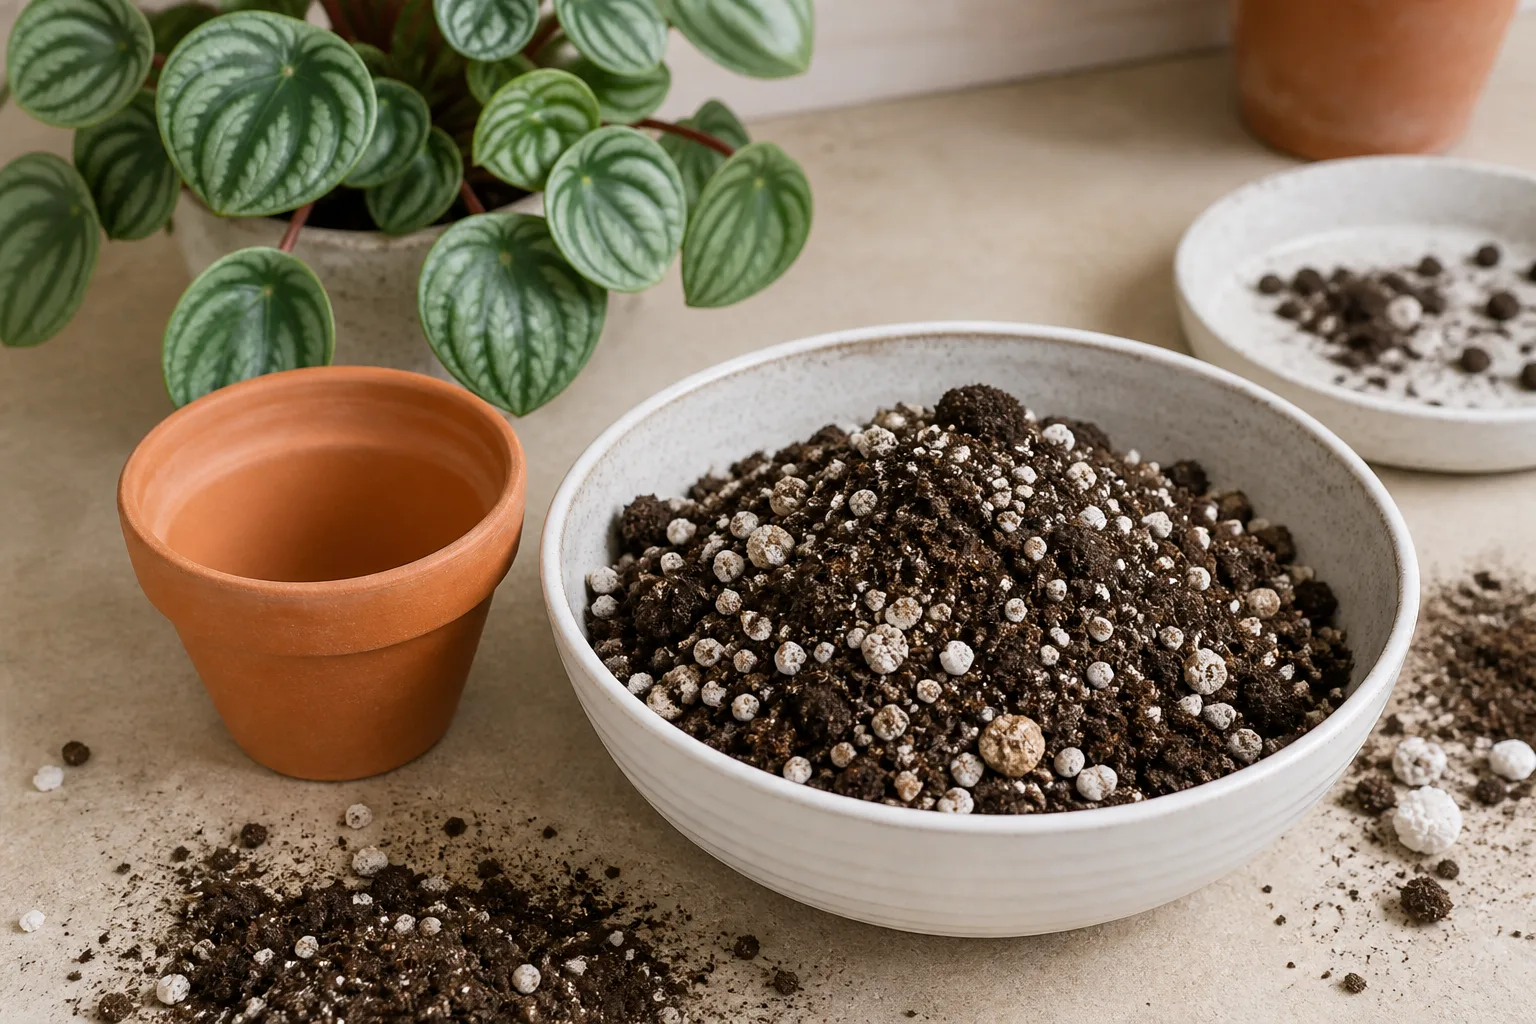
Use a container with at least one drainage hole and choose a pot only a little wider than the root ball. Rosso’s mound is small, and a pot that is much larger than its roots holds more wet soil than the plant can use. That extra volume can stay damp long after the surface looks dry, especially in a dim room.
Plastic, glazed ceramic, and terracotta can all work. Terracotta loses moisture through its sides, so it can be useful if you tend to overwater or your room stays humid; plastic retains moisture longer and can suit a warmer, brighter space. Whatever the material, use a pot with drainage and water according to how that specific setup dries.
Avoid packing the mix tightly around the crown or burying the leaf bases. Keep the crown at the same height it had in the previous pot, and brush loose soil away from the center if it collects between the leaves. Persistent moisture trapped at the crown can damage the growing point even when the outer soil appears to be draining well.
Keep It Warm; Average Home Humidity Is Usually Enough
An ordinary warm room suits Rosso. The National Garden Bureau gives 65–75°F (18–24°C) as a comfortable range for most peperomias, and the RHS profile places P. caperata among warm indoor or conservatory plants. Keep the pot away from cold exterior drafts, air-conditioning blasts, and heat vents that dry one side of the plant or swing the temperature abruptly.
Do not chase a tropical greenhouse humidity number if the leaves are firm and the plant is growing. Typical indoor humidity is often workable; a humidifier can help in a very dry heated room, but the priority is still a mix that drains and a crown that stays healthy. Misting does not keep humidity elevated for long, and repeated wetting of the center of the plant can leave moisture where it is hard to dry.
If the room is cold and the mix remains wet, the combination is harder on the roots than either factor alone. Move the plant to a warmer, brighter position and delay watering until the mix reaches the usual cue. Make the change gradually if the new spot has much stronger light than its previous one.
Feed Lightly During Active Growth
Rosso does not need heavy feeding to maintain its compact foliage. During spring and summer, when it is producing new leaves, apply a balanced liquid houseplant fertilizer at a diluted rate about once a month, or follow the label’s more conservative indoor-plant directions. The RHS recommends monthly balanced liquid feed during the growing period for P. caperata.
Do not fertilize dry soil, a plant with damaged roots, or a recently repotted plant in fresh pre-fertilized mix. Feeding cannot compensate for low light or saturated soil, and excess fertilizer can leave salts on the mix or brown leaf edges. Pause in winter when growth slows; restart when the plant begins making new leaves in brighter spring conditions.
Repot When Needed, and Decide What to Do With Flower Spikes
Repot when roots are circling tightly, the root ball dries unusually fast despite correct watering, or the mix has broken down and stopped draining—not because a calendar says two years have passed. Move up only one pot size and keep the crown at its previous depth. Loosen only the outer roots that need help; Rosso’s small root system does not benefit from aggressive untangling.
Rosso may send up slender, pale green flower spikes above the foliage. They are a normal part of the plant’s growth, not a sign of pests or a problem. The RHS describes these flower spikes as a feature of P. caperata; you can leave them in place or snip them off at the base with clean scissors if you prefer a foliage-only look.
Routine pruning is minimal. Remove yellow, dead, or broken leaves with clean scissors, cutting the petiole near its base without nicking the crown. If the plant is one-sided, improve its light and rotate the pot; pruning cannot shorten stretched petioles or make old leaves recolor, so judge the result by the new growth.
Propagate Peperomia Rosso From Leaves or Offsets
The most useful time to propagate is spring or early summer, when the parent is actively growing and the room is warm. Start with a firm, pest-free plant and clean scissors. The RHS recommends leaf-stalk or leaf-blade cuttings for P. caperata during spring and summer, and a GardenersHQ profile also identifies leaf cuttings as a practical route. That parent-species guidance is more relevant to Rosso’s rosette habit than generic instructions for trailing peperomias.
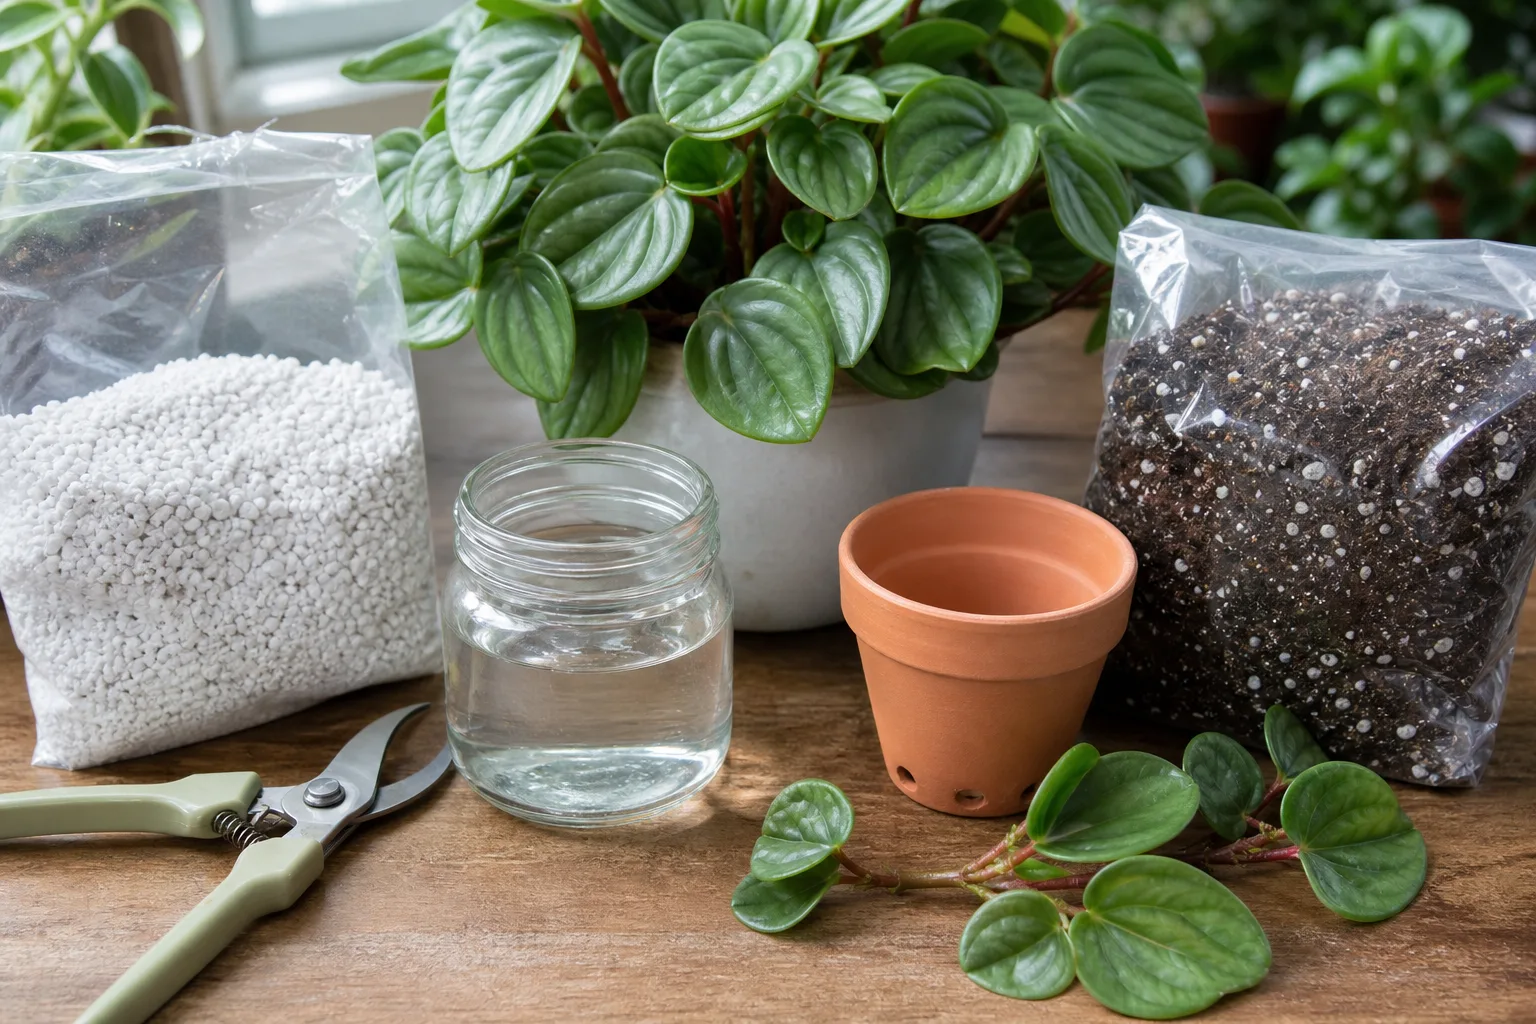
Because Rosso grows as a tight crown rather than a vine, do not look for a long runner with obvious nodes as you would on a pothos. A leaf with its petiole attached is a straightforward option. For a deeper step-by-step guide to the shared techniques, see the peperomia propagation guide.
Root a Leaf Petiole in Water
Choose a healthy mature leaf and cut it cleanly at the base, keeping the full petiole—the small stalk between the leaf blade and crown. Set the petiole in a narrow glass of clean water so the stalk is submerged but the leaf blade stays above the surface. Put the glass somewhere warm with bright, indirect light, not in direct sun. A Rosso propagation guide from CityCacti also describes water rooting as a practical option; soil rooting avoids transferring water-grown roots later.
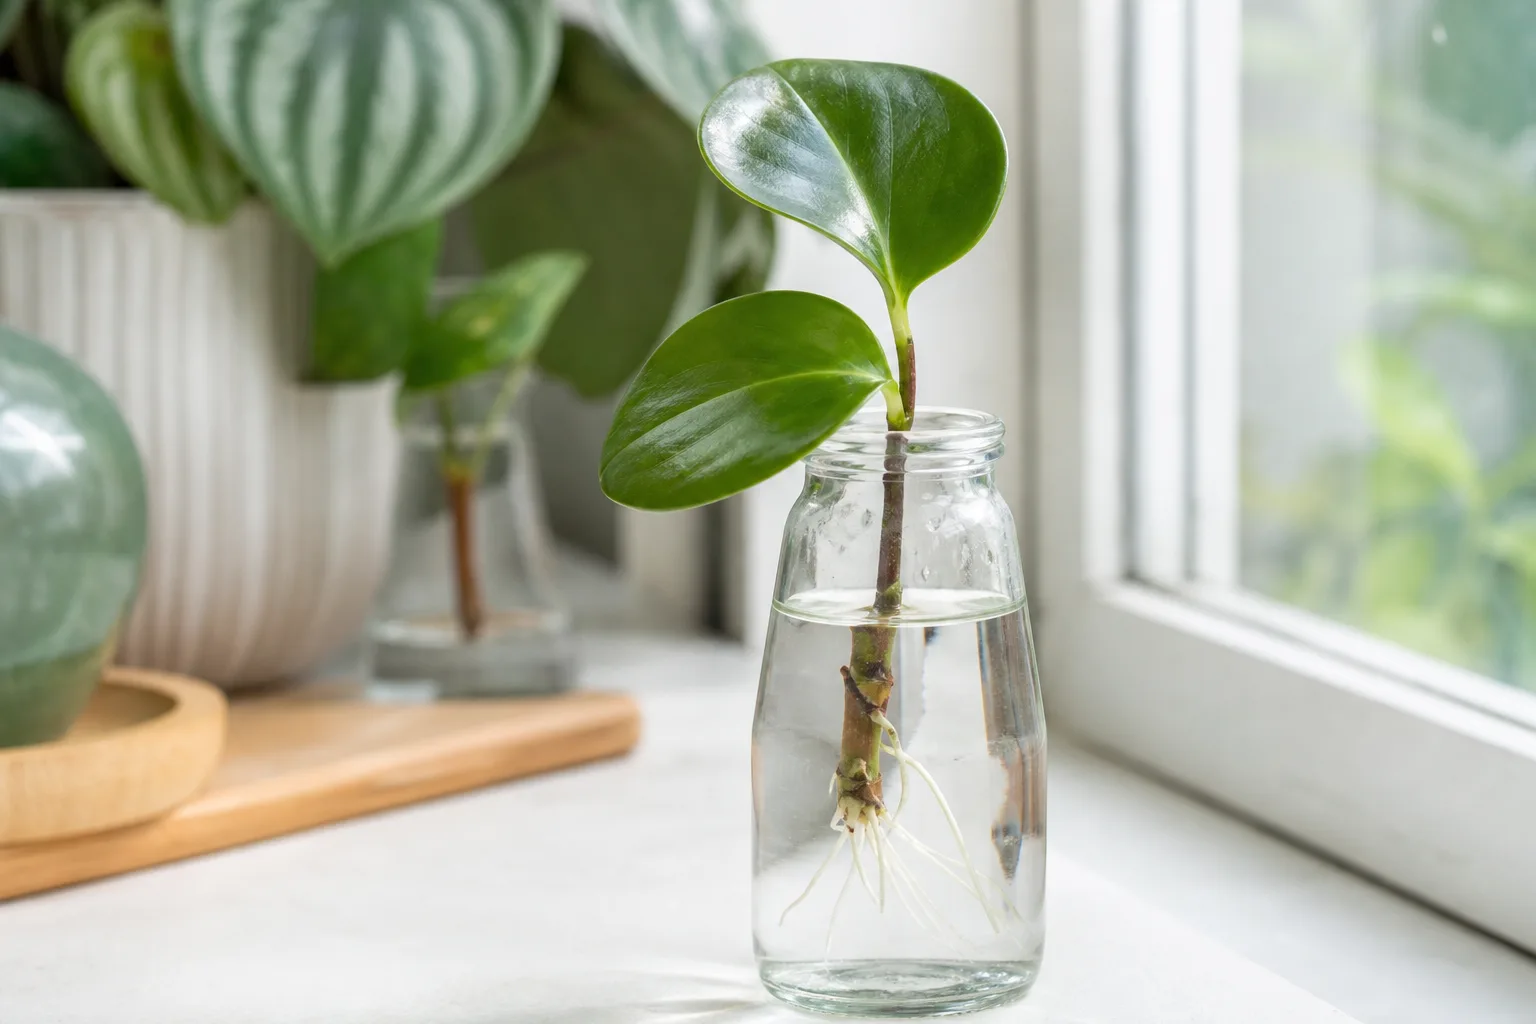
Refresh the water if it turns cloudy and top it up when the level drops. Roots may appear before a new plantlet does, so do not pot the cutting merely because you see a few short roots. Wait until it has a healthy root system and a small new plant forming at the base, then plant it in a small pot of lightly moist, well-drained mix.
Keep the new pot warm and bright, and do not let the young root ball dry completely while it is adjusting. The original leaf may fade as the plantlet develops; remove it only when it has withered or come away easily. If the petiole turns mushy before roots appear, discard it and restart with a fresh leaf and clean water.
Root a Leaf Cutting in Potting Mix
For a direct-to-soil method, fill a small pot with fresh, airy propagation mix and moisten it evenly before planting. Insert the petiole far enough to stand, but do not bury the entire leaf or pack soil into the crown. Cover the pot loosely with a clear bag or propagation lid to slow moisture loss, then open it regularly for fresh air.
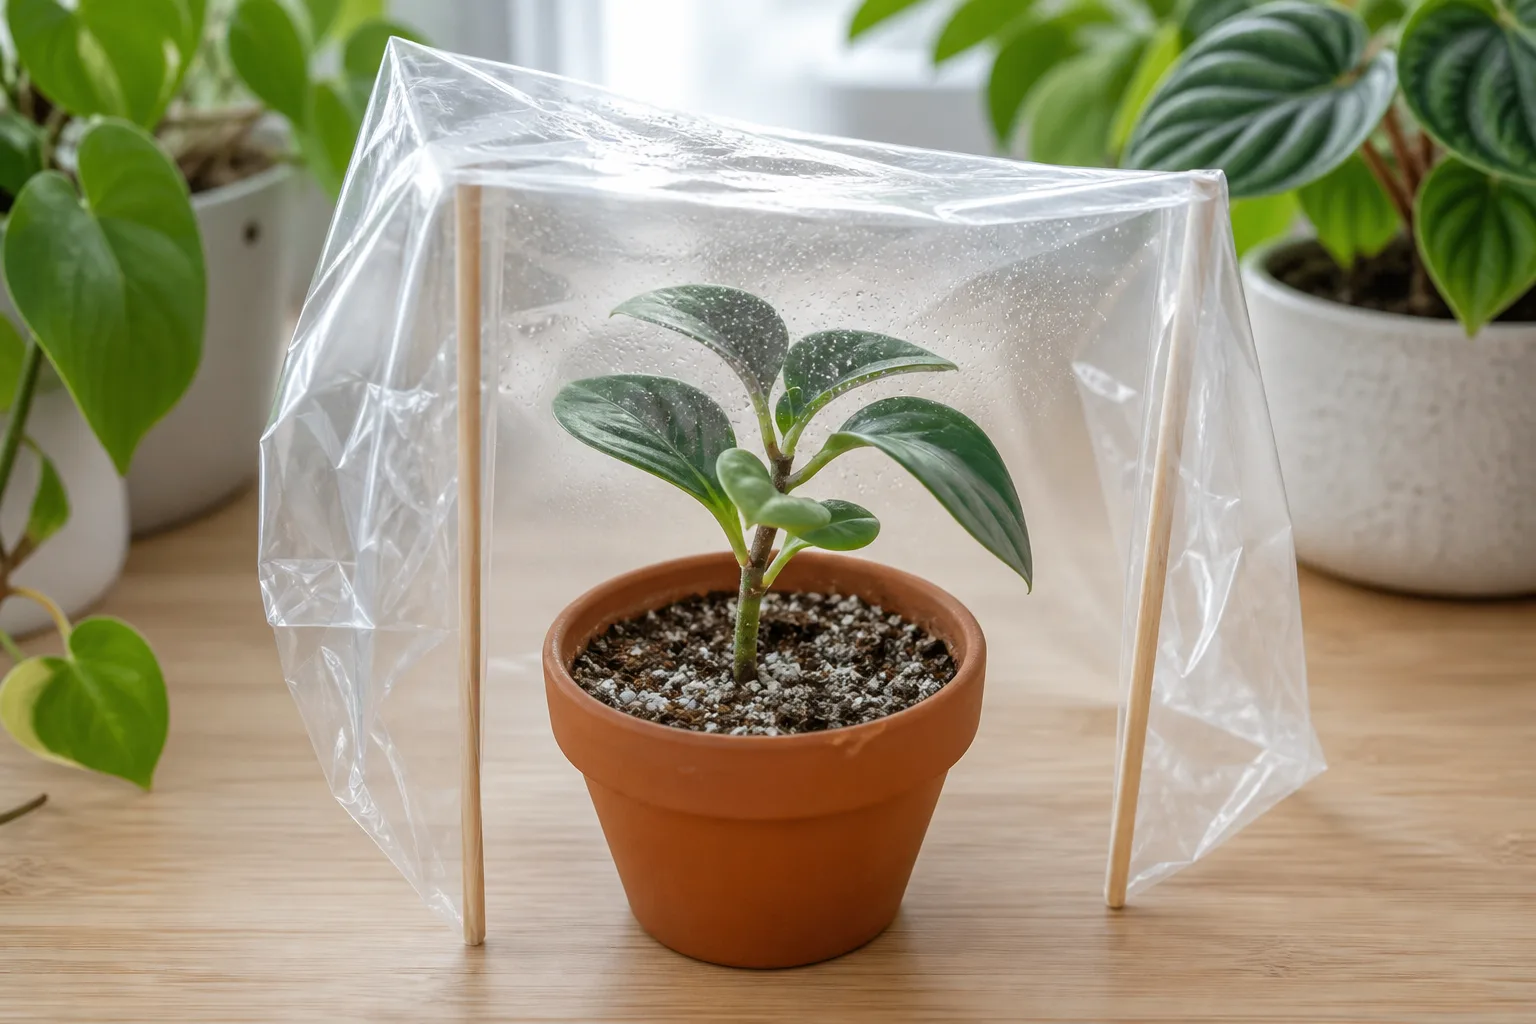
Keep the mix lightly moist, not saturated. A wet, sealed pot is a common cause of a cutting rotting before it roots; if condensation is running down the cover or the mix feels soggy, ventilate more and let the surface begin to dry. Bright indirect light, gentle warmth, and patience are more useful than rooting powder or constant watering.
Once the new plantlet is growing and holds itself in the mix, remove the cover over several days rather than taking it off abruptly. Continue to protect the young plant from direct sun while it adjusts to normal room air. Leaf propagation is slower than buying a mature plant, but it lets you make a new Rosso from a healthy parent without cutting away a large section of the crown.
Divide Only a Plant With Separate Crowns
If a mature plant has formed more than one distinct rosette, you can divide it while repotting. Ease the root ball from its pot and look for natural separations where each section has leaves and its own roots. Separate those sections gently with fingers or a clean blade, then pot each into a small container at the same depth.
Do not split a single tight crown just to make two plants. A division without roots or a growing point is more likely to stall or rot than to become an independent plant. When there is only one healthy rosette, a leaf-petiole cutting is the less disruptive option.
Troubleshoot Changes in the Leaves
A single older leaf changing color is not automatically an emergency. Look at where the symptom starts, whether the leaves feel firm or soft, how heavy the pot is, and how long the mix has stayed damp. Those clues are more useful than reacting to the leaf color alone.
Yellow Leaves or a Soft Crown
Yellowing accompanied by a wet, heavy pot suggests that the mix is staying too damp; a soft or darkening crown makes rot more concerning. Empty standing water, stop watering, and check whether the drain hole and mix are functioning. If the crown and roots remain firm, allow the pot to dry to the normal watering cue before changing anything else.
If several leaves yellow while the mix is wet for a long time, slide the root ball out gently and inspect it. Healthy roots are firm; roots that are brown, mushy, and unpleasant-smelling are damaged. Trim only tissue that is clearly rotten with clean scissors, repot into fresh airy mix and an appropriately small pot, and wait until the surface begins to dry before watering again.
If yellowing is limited to one old leaf while the rest of the mound stays firm and produces healthy new growth, remove the leaf and monitor the plant. Do not immediately fertilize or repot a healthy-looking plant because of one aging leaf. A sudden cluster of yellow leaves is more useful as a signal to inspect light, pot moisture, roots, and recent environmental changes.
Drooping, Curling, or Leaf Drop
Drooping can come from either a dry root ball or roots that have been sitting in wet soil too long; Gardenia.net’s caperata guide likewise lists both under- and overwatering as possible causes. Pick up the pot and feel below the surface: if it is light and the mix is dry, water thoroughly and let it drain; if it is heavy and damp, adding more water may worsen the problem. Firm, slightly wrinkled leaves with dry soil point toward thirst, while soft leaves with wet soil call for a root check.
A plant recovering from a dry spell may not regain every leaf that has already shriveled or fallen. Restore a steady routine rather than soaking it repeatedly or leaving it in a water-filled saucer. If the mix is wet, improve drainage and warmth first and be patient about recovery; damaged roots cannot take up water normally.
Sudden leaf drop can also follow a cold draft, a move into harsh sun, or a large shift in watering. Think back to what changed in the week or two before symptoms appeared. Correct the likely cause and keep the plant in a stable spot while it produces new growth.
Long Petioles or Less Vivid Color
Long, thin petioles and a loose mound usually mean the plant is reaching for more light. Move it gradually toward a brighter window or add a grow light above the foliage, then rotate the pot so the new growth stays balanced. Old petioles will not shrink, so assess whether the next leaves are shorter and closer together.
If foliage looks pale or dull, consider both light and the plant’s overall condition before adding fertilizer. A Rosso in low light may grow slowly and lose its compact shape, but direct sun can bleach or scorch leaf patches. A brighter filtered position is safer than moving it straight into hot afternoon sun.
Brown Margins, Scorched Patches, or Spots
Dry, crispy edges can follow missed watering, a very dry room, or fertilizer-salt buildup; tan, bleached patches on the window-facing side are more consistent with sun scorch. First check whether the soil is drying normally and whether the leaf damage is concentrated on one exposed side. Make the smallest correction that fits the pattern rather than increasing watering and humidity at the same time.
Dark, soft marks near the crown or water-soaked spots call for a closer look at drainage and airflow. Keep the crown dry during watering, remove tissue that is clearly rotting, and avoid misting as a routine humidity treatment. If spots continue to spread despite correct moisture and light, isolate the plant while you inspect it and remove affected leaves with clean tools.
Check for Pests Before Changing the Care Routine
Rosso is not especially pest-prone, but a compact mound gives small insects places to hide. Check where the petioles meet the crown and look underneath leaves for cottony mealybugs, hard scale bumps, fine webbing, or tiny insects on fresh growth. A sticky residue can also be a reason to isolate the plant and inspect it more closely.
Fungus gnats are more often a clue about persistently damp potting mix than a problem with Rosso’s leaves. Let the upper mix dry as appropriate, remove dead material from the soil surface, and confirm that water can escape. If you find insects, separate the plant from nearby houseplants while you identify the pest; do not apply a pesticide unless its label permits use on indoor ornamentals and you can follow all directions.
Outdoor Growing and Pet-Safety Notes
Rosso is best treated as a houseplant in climates with cool seasons. The RHS places P. caperata in sheltered indoor or conservatory settings, and Kew records the species’ natural range in southeastern Brazil’s wet tropical biome. Some horticultural references list warm outdoor hardiness zones for it, but a zone number does not protect a potted plant from a sudden cold night. If you summer it outside, choose bright shade, acclimate it over several days, keep the pot draining, and bring it indoors before cold weather or frost.
For pet owners, check the exact plant name rather than relying on a broad claim about all peperomias. The ASPCA entry for Watermelon Peperomia identifies it as Peperomia argyreia and lists that plant as non-toxic to cats and dogs; that is a different species from Rosso, usually sold as P. caperata ‘Rosso’. The listing does not itself establish a Rosso-specific result. If an animal chews the plant or develops symptoms, contact a veterinarian or animal poison-control service and provide the plant’s label or a clear photo.
Conclusion
Peperomia Rosso stays attractive when its small root system gets steady indirect light, an airy mix, and enough water to keep the root ball from drying completely—without leaving the pot wet. Check the soil and pot weight before watering, keep the crown clear of trapped moisture, and make light changes gradually. If leaves droop, yellow, stretch, or brown, use the soil, crown, and damage pattern to decide what to adjust first; a measured correction is more reliable than changing every part of the routine at once.