Keyhole Garden Design and Building Guide
Plan a keyhole garden that fits your reach and site. Get practical dimensions, safe materials, a build sequence, crop ideas, and compost troubleshooting.

A keyhole garden is easy to recognize from above: a raised bed, usually round, has a narrow notch that leads to a compost basket in its center. The shape gives you a path to the middle without stepping on the growing soil, while scraps and water added to the open basket can become part of the bed’s ongoing organic-matter cycle.
That combination can be useful in a small food garden, on a site with poor native soil, or wherever reaching and tending a conventional bed is awkward. It is not a magic self-watering planter, though. You still need to size it for your reach, build a sound growing bed, keep the compost basket aerated, and check whether the plants need water or nutrients.
What Is a Keyhole Garden?
A keyhole garden is a raised planting bed built around a central composting basket, with an opening cut into one side so a gardener can reach the basket and the inner planting ring. Viewed from above, the round bed and its access notch resemble an old-fashioned keyhole. The basket is open or permeable rather than a sealed household compost bin, so air and moisture can move through it and the surrounding soil can receive some of the decomposing material.
The design joins two jobs that many gardeners handle separately: growing vegetables and keeping a small stream of plant-based scraps in active decomposition. The University of Bristol Botanic Garden’s account of a school garden built with the community organization Send a Cow describes keyhole gardens as a practical response to dry, exposed, rocky growing conditions, with locally available wall and basket materials. That history helps explain the design’s purpose, but it does not mean every version needs the same height, shape, or fill recipe.
A keyhole garden is not simply a round raised bed with a decorative cutout. The notch should provide a useful working position, and the center basket should stay accessible for adding material and watering. If you do not want to compost in the bed, a standard raised bed will usually be simpler and may give you more uninterrupted planting space.
How the Compost Basket Works
The center basket acts as a small, contained place to add kitchen vegetable scraps, leaves, and other suitable organic material. As that material breaks down, moisture and dissolved nutrients can move through the open sides into the surrounding bed. The garden still needs a good soil mix; the basket is not a substitute for filling the entire growing area with healthy soil.
The amount and direction of that movement depend on what is inside the basket, how wet it is, the basket’s openings, the surrounding soil, and how water drains through the bed. A loose, moist mixture with air spaces decomposes differently from a packed, waterlogged mass. Nutrients do not distribute in a perfectly even circle, either, so watch the bed rather than assuming every plant has received the same benefit.
Treat the basket as an in-place composting station, not as finished compost. Fresh scraps can heat, settle, attract pests, or temporarily create conditions that are unsuitable for roots if they are buried among crops. Keep the main planting medium separate from fresh kitchen waste and use finished compost or a tested raised-bed mix as the root zone.
This distinction is important because some descriptions make the design sound self-fertilizing. Epic Gardening’s practical keyhole-garden guide makes a more useful point: the system still requires a gardener to add organic matter and water, and to carry out ordinary tasks such as weeding, thinning, and harvesting. The basket may simplify how you handle a modest amount of scraps; it does not remove the need to manage the garden.
When a Keyhole Garden Is Worth Building
A keyhole garden is a good fit when you want a compact raised bed and expect to use the compost basket regularly. It can keep a small crop bed, a composting point, and the access path together in one footprint. The raised sides can also reduce bending if you choose a comfortable working height, although a very tall masonry wall needs more material and a stable base.
The design is especially useful when the native ground is rocky, shallow, compacted, or poorly drained and you want to create a controlled growing area. Clemson Cooperative Extension notes that raised beds can help with difficult sites, including rocky or shallow soil and poor drainage. Its guidance also emphasizes a site with at least six hours of direct sun and easy access to water—conditions that matter just as much for a keyhole bed as for any other vegetable garden.
It is less attractive if your yard already has good garden soil and room for a conventional bed, if you produce almost no compostable scraps, or if raccoons, rodents, or other pests make exposed food waste difficult to manage. It may also be the wrong choice if you want to grow long rows of root crops, sprawling pumpkins, or many large plants that need a broad, uninterrupted area. A 4-foot-wide rectangular bed with a separate lidded composter may be less work.
Before building, run through three practical questions. Can you comfortably reach the center from the notch? Will you use a compost basket often enough to justify building it? Can you keep the bed watered during dry spells? If any answer is no, simplify the project or change the dimensions before you buy materials.
Choose Dimensions That You Can Reach
There is no single official keyhole-garden size. A circular bed around 6 feet across is a common compact starting point, but it is a convention, not a rule. The University of Bristol Botanic Garden describes a much larger school-garden example, which illustrates why a fixed measurement cannot fit every gardener or site.
Design from the access point rather than copying a picture. A bed that is too wide makes the outer ring difficult to tend; a narrow notch makes the central basket frustrating to use. Clemson Extension recommends keeping raised beds about 3 to 4 feet wide so gardeners can reach the middle without stepping on the soil. A circular keyhole bed changes the geometry, but the same principle applies: make the width of every planted area reachable from an outside edge or the notch.
For a modest home garden, sketch a circle about 5 to 6 feet in diameter, a central basket about 12 to 18 inches across, and an access notch wide enough for your shoulders, bucket, and tools. These are starting dimensions only. Use string or a garden hose to mark the outline, stand at the notch, and reach the farthest planned planting spots. If you have to lean across a wall, twist around the basket, or step into the bed, shorten the radius or widen the access.
Make the Notch and Basket Work Together
The notch should extend to the compost basket, not stop at the outer edge of the bed. Its width needs to suit the person who will maintain the garden; a narrow opening may save wall material but make filling, watering, or lifting out a compacted basket difficult. Leave room to stand or kneel safely, and avoid a sharp turn that forces you to reach around the wall.
Size the basket in proportion to the bed. A basket that is too small fills quickly and needs frequent attention; one that is too large takes planting area and may encourage you to add more scraps than the system can handle. For a starter bed, a 12- to 18-inch diameter cylinder is a sensible range to test against your actual scrap volume. If you generate more kitchen waste than it can accept, keep a separate compost bin rather than continually overloading the center.
Pick a Site and Wall Material
Choose a reasonably level spot with direct sun for the vegetables you plan to grow, good drainage, and a convenient source of water. Six hours of direct light is a useful starting point for a food garden, but crop needs and local heat matter: a hot climate may call for afternoon shade for tender greens, while fruiting vegetables generally need more sun. Place the bed where you will notice it often enough to harvest and check moisture.
A raised bed can be built from stone, brick, concrete blocks, or suitable rot-resistant lumber. Clemson Cooperative Extension’s raised-bed guidance lists stone, concrete blocks, landscape timbers, and other rot-resistant materials as options and recommends decay-resistant wood or properly labeled treated lumber for horticultural use. For a home project, use materials whose previous treatment is known; avoid salvaged boards that may have been painted, contaminated, or treated with an unknown product. Keep the structure stable enough to hold wet soil, especially at the notch where the wall ends.
The bed should not block drainage or rest in a low spot that stays waterlogged after rain. A raised bed can improve a poor site, but an enclosed wall cannot make a saturated location drain by itself. If the ground is compacted, loosen the soil beneath the footprint where practical before you add fill, and confirm where runoff will go. On concrete or another hard surface, drainage and weight become more important: make sure water can leave the bed and the supporting surface can carry the loaded structure.
Think about the path as part of the garden, not an afterthought. The access notch needs a stable surface where you can stand while carrying a watering can or bucket. Pavers, compacted gravel, or mulch can keep mud out of the compost basket, but do not raise the path so high that it traps water against the bed wall.
Build a Keyhole Garden Step by Step
Build the outer bed and compost basket together, before filling the growing ring. The exact wall technique depends on whether you use stone, block, or lumber, but the working order is consistent: mark and test the footprint, secure the basket, build a stable enclosure, then fill with suitable root-zone soil.
Mark the Circle and Access Notch
Mark the circle with a stake at the center and a measured string, or lay out a flexible hose. Mark the notch from the outer edge to the basket location and make it wide enough to work from. Test the reach before you build: stand in the notch, simulate adding scraps and watering the basket, and make sure you can also tend plants around the inner edge.
Clear sod and perennial weeds from the planting area. If you are building directly over lawn, remove the turf or smother it with a layer that will break down without leaving a thick barrier beneath the root zone. Avoid placing the garden over soil recently treated with a product whose food-garden use is unclear. If you have doubts about the existing soil, have it tested before you grow edible crops.
Assemble the Open Compost Basket
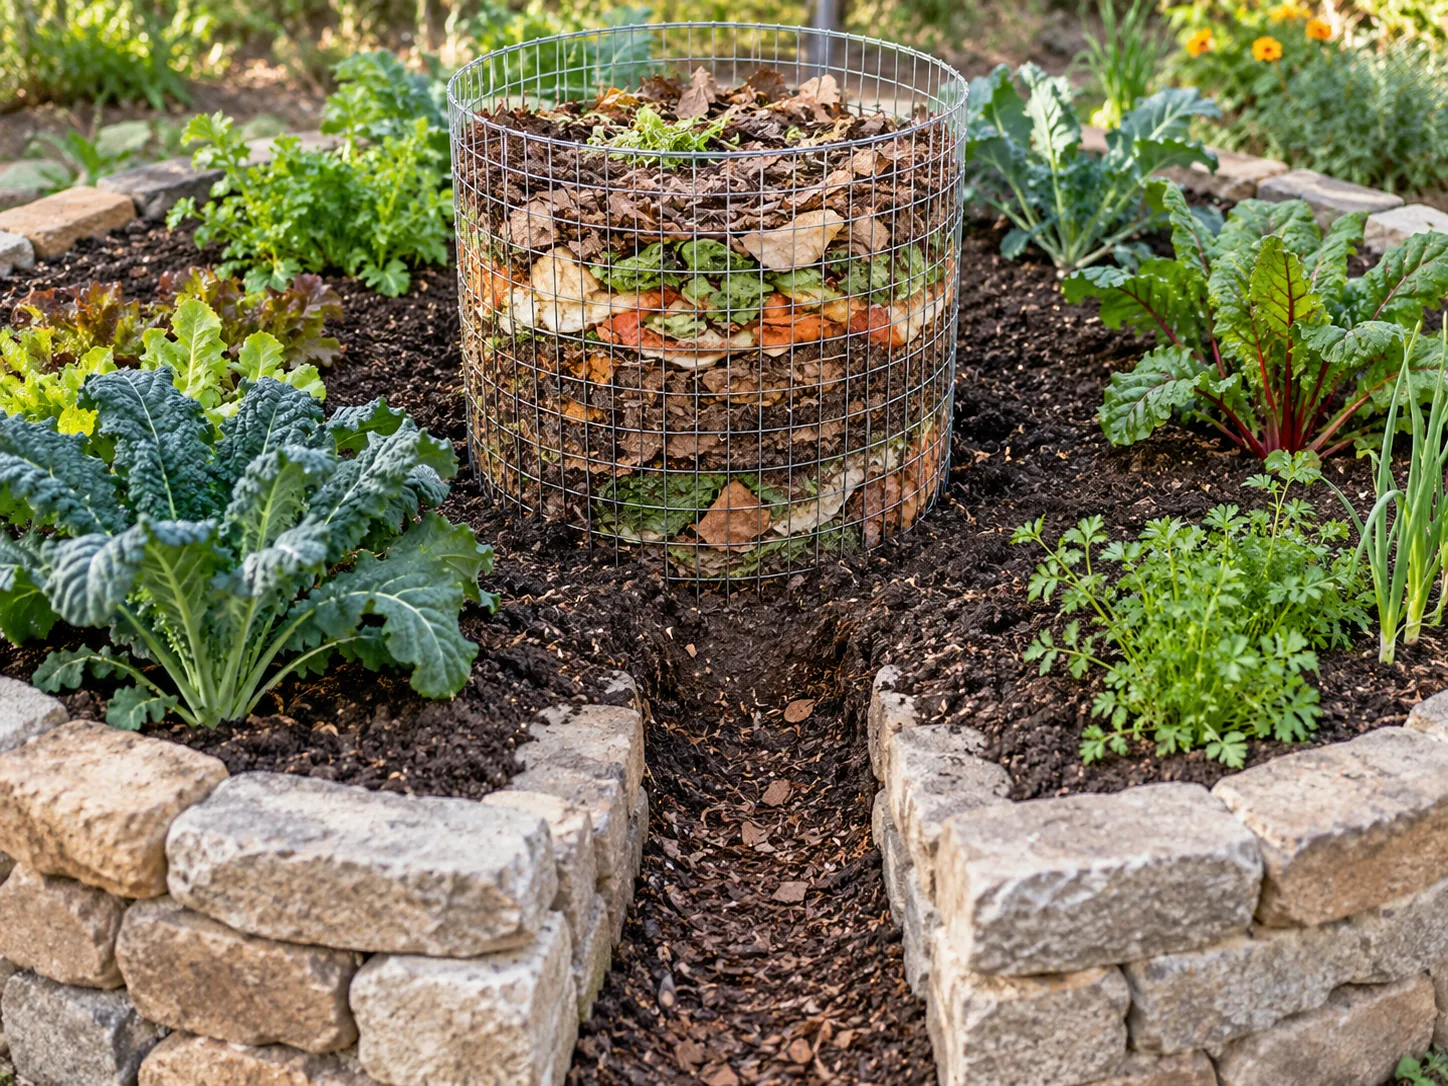
Make a stable cylinder from galvanized wire mesh or another durable, open material that will allow air and moisture to pass. Anchor it so it cannot tip as you add scraps. The basket should rise to the bed surface or slightly above it, making it easy to fill without leaning into the planting ring.
You do not need to fill most of the basket with rocks. The center is meant to hold decomposing organic matter; filling two-thirds of it with gravel reduces its usable capacity and does not turn it into a compost system. If very small pieces fall through the mesh, add a loose, breathable liner such as a thin layer of straw or coarse shredded plant material. Do not pack the cylinder tightly or seal it in plastic, because airflow is part of the design.
Build the Wall and Protect Drainage
Build the circle around the basket while leaving the notch open. With dry-stacked stone or block, make the wall stable and even; with lumber, fasten corners securely and use material suited to ground contact. Keep the wall height manageable. A 12- to 18-inch raised edge is easier to build and fill than a waist-high stone wall, while a higher bed may be worthwhile if reducing bending is a priority and the foundation is engineered for the load.
The lower bed should allow excess water to escape. If the structure sits on native ground, avoid installing an impermeable floor that traps water above the soil. If the ground beneath is contaminated or otherwise unsuitable, use a clean barrier and a design that still provides drainage, and follow local guidance for edible gardens. A hard-surface installation needs intentional drainage openings and a route for runoff; otherwise the bottom can become a stagnant basin.
Fill the Bed Without Burying Fresh Scraps
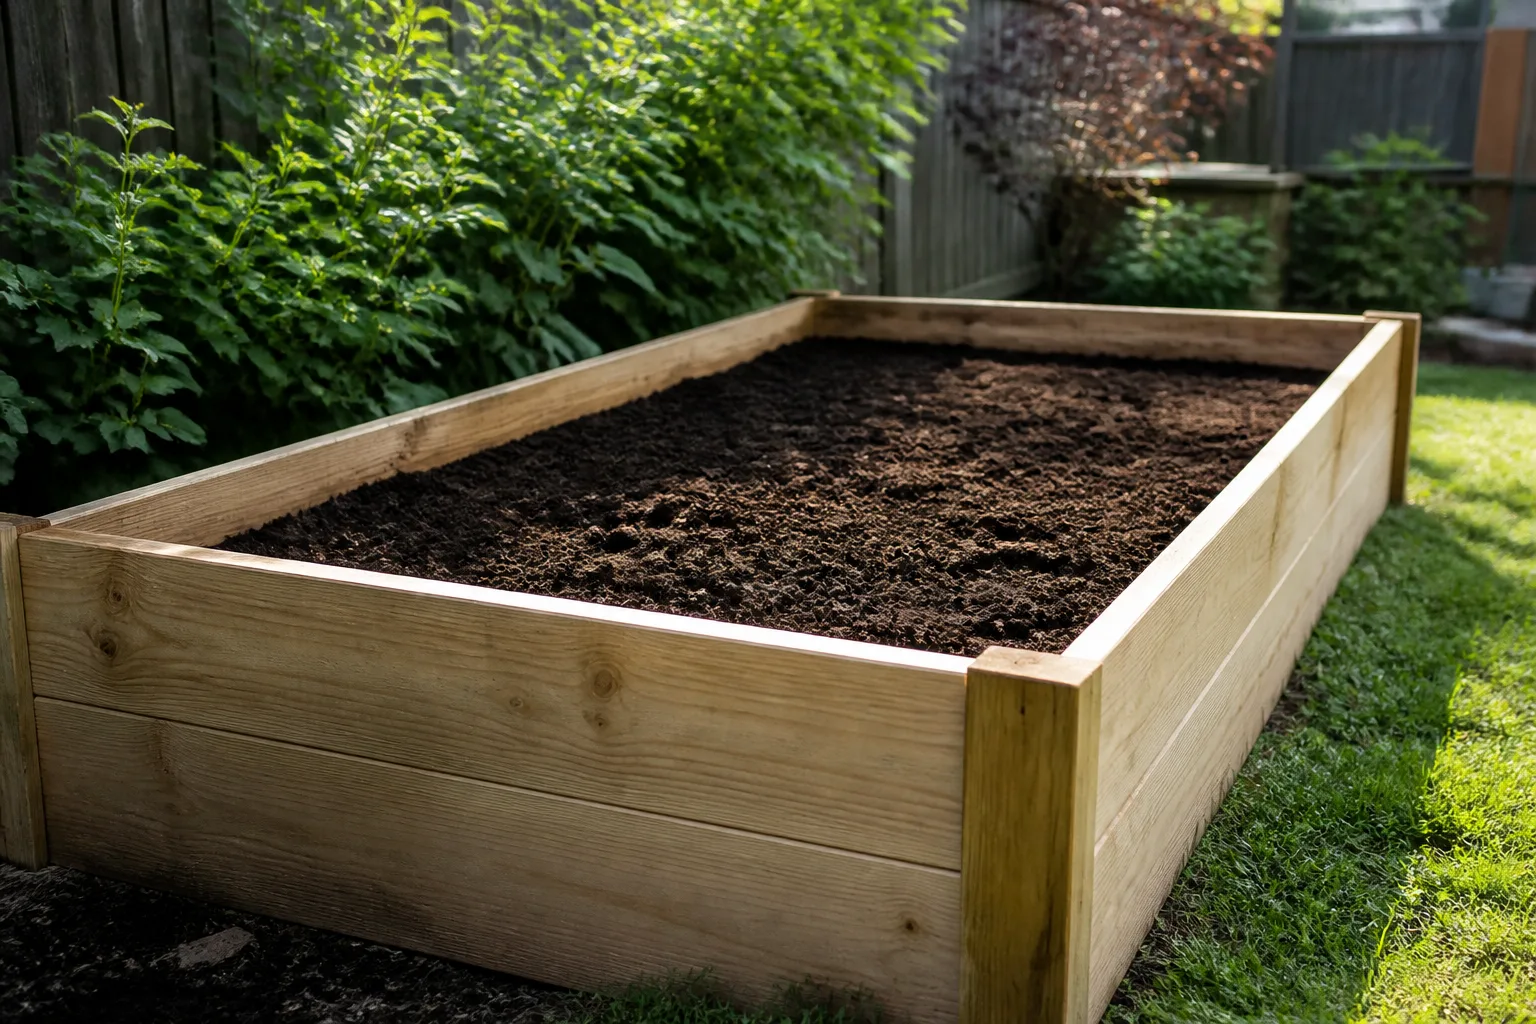
Use a soil mix that can support vegetables, not a random stack of kitchen waste and untested amendments. Clemson Extension suggests good topsoil mixed with compost and gives a compost range of 10 to 20 percent of total bed volume; local soils and available products differ, so use that as a guide rather than a universal recipe. Oregon’s Department of Environmental Quality explains that fertility changes as compost, manure, lime, and crops are added or removed, and recommends soil testing to understand nutrient needs.
If you are filling a tall bed, use clean, stable organic material below the main root zone only when you understand how it will settle and decompose. Finish with enough good growing medium for the deepest-rooted crops you plan to grow. Do not put fresh kitchen scraps in the planting soil and then cover them with a thin cap; keep the scraps in the central basket, and use mature compost in the root zone.
Rake the surface level, then add mulch after planting to reduce exposed soil and slow evaporation. Raised beds can dry more quickly than in-ground plots, so start with well-moistened soil and check it as the bed settles. Leave the compost basket visible and accessible; do not pile soil over its opening.
Choose Crops for the Ring
Plan the bed in a few zones rather than planting by a rigid companion-planting chart. Place crops that need less room or are harvested often—lettuce, spinach, radishes, scallions, and compact herbs—where you can reach them easily. Use the outside edge for low-growing plants that will not shade the rest, and keep taller crops or a small trellis on the side where they will not block the bed’s sun.
Avoid putting every large or hungry crop next to the basket simply because it is in the center. Fresh decomposing scraps are not a finished fertilizer, and moisture can vary around the basket. Give tomatoes, peppers, brassicas, or other larger vegetables the spacing and root depth they need, and place them where you can still reach them for pruning, staking, or harvest. A keyhole garden can grow several crops, but it cannot make a crowded layout productive.
Deep-rooted carrots or long parsnips need a sufficiently deep, stone-free root zone; if the bed is shallow or filled with chunky debris, choose shorter-rooted varieties or another bed. Large pumpkins and winter squash can spill across the path, and sprawling cucumber vines may block the notch unless you plan a trellis. Perennial herbs can be convenient but may occupy the bed for years, so reserve permanent space for them instead of mixing them through every crop rotation.
Succession planting works well in a small garden. As a spring crop of radishes or leaf lettuce finishes, clear it and sow a warm-season crop suited to your climate. Later, replace a spent summer planting with cool-season greens if your frost calendar allows. Keep a simple sketch or note of what grew where; rotating plant families is useful in a compact space, even though the small ring makes a full multi-bed rotation impossible.
Maintain Moisture and Feed the Basket
A keyhole garden is a living raised bed, so it needs routine checks. Look at the soil, plants, and basket rather than following a fixed watering schedule. If the top looks dry, check below the surface near both the center and the outer ring; a basket that is wet does not prove the far edge is moist, and water at the outer edge does not guarantee the basket’s contents are decomposing well.
Add Scraps in Manageable Layers
Use the center basket for fruit and vegetable scraps, coffee grounds, crushed eggshells, spent soft plant material, and dry leaves or shredded plain cardboard. A practical rhythm is to add a modest layer of fresh scraps, then cover them with a layer of dry browns. The dry material absorbs some excess moisture and helps keep the surface from becoming a sticky mat. GrowVeg’s guide to compact composting systems explains why the best small-space method is the one that fits the amount of material you generate and can maintain.
Avoid meat, fish, dairy, grease, and large quantities of oily or cooked food in a simple open basket. These materials can attract animals and smell as they break down. Do not add pet waste, diseased plants, or weeds carrying mature seed; the basket is not a controlled hot-composting system that reliably sanitizes every material. Oregon DEQ’s residential composting guidance explains how finished compost can improve garden soil, but material in an active basket is not automatically finished compost just because it has been sitting there.
Keep the basket near the top of the bed as it settles, but do not heap it so high that scraps tumble into the vegetables. Refill as the contents sink and keep a loose cover over fresh material. A fitted mesh lid can discourage birds or rodents while allowing air and water through. If local wildlife is persistent, use a separate enclosed composter and keep the keyhole bed’s central basket for finished compost or low-attraction plant material.
Water the Basket and the Planting Ring Separately
Watering through the basket can wet the soil around it, but it cannot guarantee even irrigation. During dry weather, water slowly into the center so it can soak rather than run across the top, then check the outer ring. If the perimeter is dry, water that area directly. A drip line or soaker hose around the planting ring can be more reliable than repeatedly flooding the compost basket.
Raised beds often need more frequent irrigation than in-ground beds because they drain and warm more quickly. Clemson Extension notes that raised beds dry faster and may require more watering during dry periods. Mulch the crop surface, water deeply enough to wet the root zone, and adjust for rain, temperature, wind, crop stage, and soil texture. Do not water by calendar alone; feel the soil below the surface or use a moisture meter as a second check.
A basket that remains soggy needs attention, not more water. Add dry browns, break apart compacted material, and confirm the garden itself can drain. If the basket dries into a hard mass, add water in small amounts and mix in moist green material rather than soaking the whole center at once.
Troubleshoot Odors, Pests, and Uneven Growth
A healthy compost basket should smell earthy or like damp leaves, not sour, rotten, or strongly ammonia-like. A foul smell usually points to too much wet green material, poor airflow, or scraps compacted into a dense layer. Add dry leaves or shredded cardboard, loosen the contents gently, and stop adding wet scraps until the mixture becomes less soggy. Oregon DEQ’s composting advice focuses on finished compost as a soil amendment, a useful distinction from the active scraps in the basket.
If fruit flies or rodents appear, cover fresh food scraps with browns immediately and use a secure permeable lid. Remove meat, dairy, grease, and anything that should not have gone in. If animals keep digging through the basket, do not keep fighting them with increasingly tight plastic wrapping; use a closed compost bin elsewhere and preserve the bed as a conventional raised garden.
If plants near the basket look burned, pale, or unusually weak, do not assume they need more compost. Check whether fresh material is touching roots, whether the bed stays waterlogged, and whether the plants are crowded. Move fresh scraps into the basket, restore a clear soil buffer, and use a soil test before applying fertilizer or lime. Oregon DEQ notes that amendments affect soil fertility, and testing can show whether a nutrient or pH adjustment is actually needed.
When only one side of the bed struggles, compare its light, wind, irrigation, and soil moisture with the healthier side. The access notch or a nearby wall can cast shade; the outer edge may dry faster than the center; a roofline may dump water on one section. Solve the local cause before changing the compost recipe for the entire bed.
Inspect the wall and notch at least once each season. Re-seat loose blocks, replace rotting boards, clear the path, and make sure the basket has not collapsed into the planting ring. As the organic fill settles, top up the bed with suitable soil and mature compost; do not raise the grade so high that it buries the basket opening or spills across the notch.
Conclusion
A keyhole garden is a raised vegetable bed with a reachable opening and a permeable compost basket at its center. It can make a small garden more convenient by bringing scraps, growing space, and tending access together, but the basket does not replace good soil, regular watering, or thoughtful crop spacing.
Start with a site that gets enough sun and drains, then size the circle and notch around the person who will use them. Build the basket for airflow, fill the bed with suitable growing medium, and feed the center with modest layers of plant scraps and dry browns. If composting in the garden fits your routine, the keyhole design can be a useful compact system; if it does not, a simpler raised bed is a sound choice.