How to Wrap Trees With Outdoor Lights: A Safe Guide
Learn how to wrap trees with outdoor lights, estimate strand length, protect bark, plan GFCI power, and avoid ladder and weather-related hazards at home.

Wrapping a tree with outdoor lights is easiest when you decide on the design and power route before you start climbing or unwinding strands. Choose a healthy, established tree you can reach safely, use light strings and cords marked for outdoor use, and plan a loose pattern that will come down after the season. The steps below help you estimate how much lighting to buy, wrap the trunk evenly, accent a few branches, and avoid common electrical and tree-care problems.
Choose a tree you can light without stressing it
Start with a healthy tree whose trunk and main branches are easy to see from the viewing angle. A well-shaped deciduous tree can make an especially clear display after leaf fall because its trunk and scaffold branches show against the sky; an evergreen can work too, but dense foliage may hide lights and make wiring harder to inspect. Pick one focal tree rather than spreading a short strand thinly across several large trees.
Skip trees that are newly planted, unstable, visibly damaged, or carrying weak branches. Davey Tree advises against decorating young, newly planted, weak, or damaged trees, and notes that a branch bending toward breakage is a reason to stop. If the tree has cracks, hanging limbs, a damaged trunk, or a recent storm injury, ask an arborist before adding weight or working below it. Lights cannot make a questionable tree safer.
Match the method to the tree’s shape
For a broadleaf tree, wrapping the trunk and one or two strong, visible lower limbs often creates a better silhouette than tracing every twig. Follow the branch’s natural direction and stop where the limb becomes too thin, flexible, or difficult to reach. A dark green wire tends to disappear against bark and foliage; warm white lights read as a soft outline, while a single consistent color keeps a group of trees from looking visually busy. For a practical layout sequence, Sunready Landscaping’s tree-wrapping guide also recommends deciding the tree shape and coverage before unrolling strands.
Evergreens have a different visual job: their foliage already fills the silhouette, so a few lights placed among strong outer branches may be enough. Do not force a strand through dense needles where it can snag, disappear, or become difficult to retrieve. A palm’s straight trunk can be treated as a vertical column, but avoid loading the crown or pulling on fronds. If the shape requires reaching into the canopy, use ground-level uplighting or hire an installer instead.
Know when to stop or call a professional
Choose a tree whose trunk and lower branches can be reached from level ground or a properly positioned ladder. Do not climb the tree, stand on a fence or planter, stretch sideways from a ladder, or throw a live strand over high branches. A tall tree, steep or uneven ground, brittle limbs, nearby roof edges, or overhead utility wires turns a decorative project into professional work.
If branches are near power lines, do not install lights or use a ladder, pole, or cord near them. ESFI advises keeping people and equipment at least 10 feet from power lines; local utility requirements may be more restrictive, so treat any uncertain clearance as a stop condition and contact the utility or a qualified installer. The right decision may be to light the trunk only, choose a smaller tree, or use a landscape spotlight at ground level.
Choose outdoor-rated lights and tree-safe fasteners
Use light strings labeled for outdoor use and bearing a recognized safety-testing mark such as UL or ETL. The U.S. Consumer Product Safety Commission recommends tested lights, checking sets for damaged sockets or wires, using a cord rated for the intended use, and plugging outdoor lights into a GFCI-protected receptacle. Check the light manufacturer’s instructions for which strands may connect and the maximum number of connections; LED strands use less power than many incandescent sets, but that does not make product limits optional.
LED mini lights are usually a practical choice for branches and trunks because the small bulbs and flexible strand are easier to space than large, heavy bulbs. Pick a single color temperature and bulb style for one tree; the exact color is an aesthetic choice, but mixing warm and cool whites can make a small display look accidental. Solar strings can avoid a cord route, but their output and runtime depend on exposure and battery capacity, so test one before designing a whole display around it.
Attachment matters as much as the bulbs. Use light clips intended for the strand or soft, removable ties, leaving enough slack that nothing bites into the bark as it moves. Do not nail, staple, screw, or twist bare wire into a living tree, and do not cinch zip ties tightly around the trunk or a branch. CSU Extension Boulder County Master Gardeners recommend loose, temporary decorative wrapping, breathable materials, periodic checks, and prompt removal; for lights specifically, Davey Tree warns that long-term spiral wraps can girdle branches. This is why a seasonal installation should stay loose and come down on schedule rather than becoming permanent décor.
Measure the trunk and estimate strand length
Measure first instead of relying on a bulb-count rule. Record the trunk circumference at the height where the wrap begins and ends, the vertical height you plan to cover, and the vertical gap (or pitch) between each spiral turn. Also add the distance from the outlet to the tree and enough lead length to reach the first wrap without a plug resting against the trunk.
For a quick estimate, count the number of turns as the covered height divided by the vertical pitch, then multiply by the trunk circumference. A slightly better estimate accounts for the diagonal path of each turn: approximate each loop as the square root of circumference squared plus pitch squared, then multiply by the number of turns. This is still a planning estimate because trunks taper, bark and root flares are irregular, and the route to the outlet adds extra length.
Work through a realistic trunk estimate
Suppose the trunk is about 2 feet around, the planned wrap covers 6 feet of height, and you want each turn about 6 inches (0.5 feet) above the last. That is roughly 12 turns. A simple circumference estimate is 12 × 2 feet, or 24 feet; allowing for the slant of the spiral gives about 25 feet before adding the lead, the outlet route, and a small working margin.
Use a flexible tape, a piece of string, or a measured cord to check the real trunk rather than treating the example as a promise. If you want a denser look, decrease the vertical gap; if you want a lighter outline, increase it. Neither spacing is universal: the tree’s scale, bulb spacing, strand length, and the manufacturer’s instructions determine what looks even and works safely. For branches, measure the selected limbs separately and add their lengths to the trunk estimate instead of guessing by tree height alone.
Plan power, cords, and weather protection
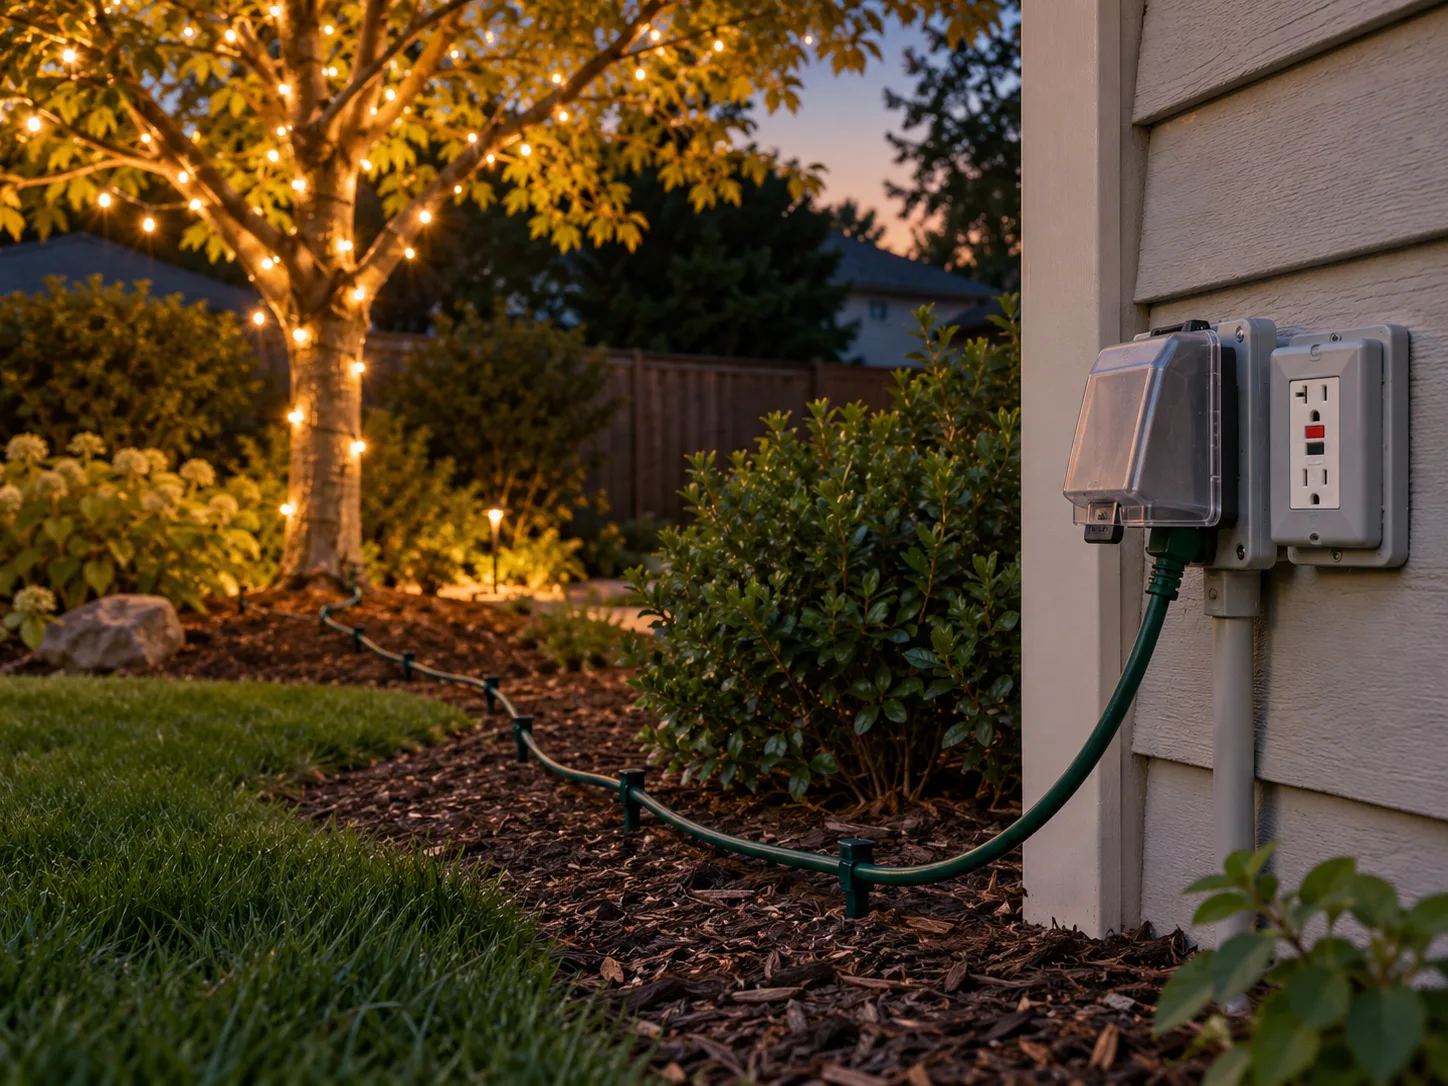
Find the outdoor receptacle before wrapping and confirm it is GFCI-protected. If it is not, use an appropriate portable outdoor GFCI device or ask a qualified electrician to add protection; do not improvise household wiring. The Electrical Safety Foundation International also advises using outdoor-rated cords and decorations, matching the cord’s amperage rating to the load, inspecting equipment, and keeping cords and light strings clear of standing water and snow.
Route the extension cord where people will not trip over it, mow over it, pinch it in a door, or bury it under mulch. Protect plug connections from weather with products rated for outdoor use and keep them out of puddles, snow piles, and wet leaf litter. Use only the number of strands allowed by the manufacturer, and do not overload the circuit by adding roofline lights, inflatables, or heaters to the same run without checking the load. A GFCI helps reduce shock risk; it does not repair damaged insulation, an overloaded outlet, or a wet connection.
A simple timer can turn the display off overnight, which saves electricity and avoids leaving decorative lights on when no one is home. Plug timers and smart controls also need to be rated for the outdoor location and the lighting load. If a GFCI trips, a breaker opens, a plug becomes hot, or a strand flickers after rain, unplug the system and find the fault before using it again. Repeatedly resetting protection without fixing the cause is not a safe troubleshooting method.
Test and stage everything before you start
Lay the strands out on dry ground and inspect each set from plug to end. Replace a strand with cracked sockets, exposed wire, loose connections, or insulation that has been cut or crushed; do not wrap damaged lights and hope they will hold until the season ends. Plug in each strand briefly to check that the bulbs work, then unplug it before you handle, connect, or repair anything.
Read the labels before joining strands. Some products are designed to connect end-to-end and others are not; follow the stated maximum rather than assuming that the same number applies across brands or bulb types. If a strand’s connector will not mate cleanly or needs force, do not adapt it with tape or a non-rated connector. Keep the outlet end accessible so you can shut off the display without pulling on a wire wrapped around the trunk.
Set out a stable ladder, a helper, light clips or soft ties, a flexible measuring tape, and a shallow basket or cardboard spool for the strand. A spool helps prevent tangles, but do not wind it so tightly that the wire kinks. Decide where the first plug and final end will sit before you start. When possible, begin at the end that leaves the strand’s power connection near the cord route, following the product instructions so connectors are not trapped behind the tree.
Wrap the trunk in an even spiral
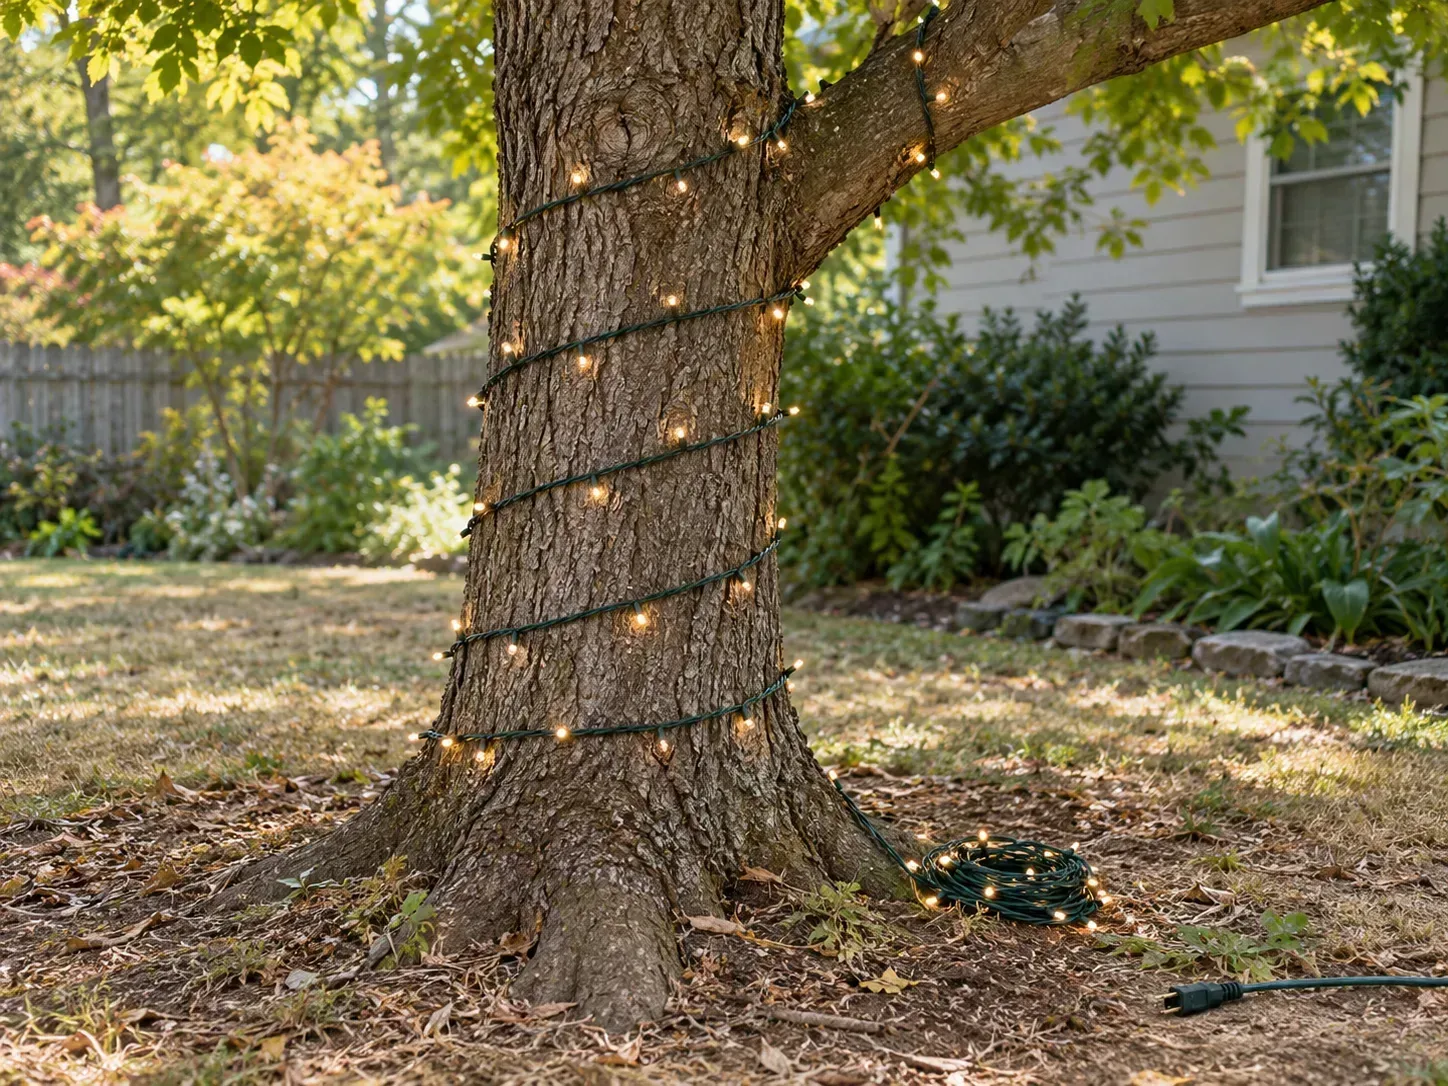
Begin at the visible base of the trunk, not necessarily at the root flare. Leave the root flare and soil line clear enough to inspect, and keep the plug and connector from resting in wet ground. Attach the strand loosely with a light clip or soft tie, then walk the strand around the trunk in a steady spiral while checking the spacing from the front and from the main viewing angle.
Let the wire follow the bark without pulling it taut. The aim is an even visual line, not a tight band around the trunk; leave room for movement and avoid pulling a branch or compressing bark to make the lights appear straighter. Check each few turns by stepping back. A small adjustment early is easier than reworking the entire trunk after you reach the top.
At the planned height, secure the strand with a removable clip or loose tie and leave enough slack to avoid stressing the cord. Do not hide a plug connection beneath bark, inside a dense fork, or where rainwater can collect. If the strand ends mid-trunk, create a deliberate stopping point at a natural branch junction rather than wrapping the leftover wire around the same section several times.
Add only the branches that shape the display
A tree rarely needs every branch outlined. Choose two or three sturdy limbs that lead the eye outward from the trunk, ideally those visible from the street or patio, and wrap each only as far as you can reach without forcing the limb or climbing into the canopy. Keep the same general spacing as on the trunk, but loosen the pattern around forks and changes in branch diameter so the strand does not tighten as it bends.
If you want a brighter branch, use a separate strand rather than bunching multiple tight passes together at one point. Keep connectors accessible, fastened so wind cannot whip the cord, and positioned away from sharp branch stubs. ESFI recommends securing outdoor lights against wind while avoiding any attachment that could damage the cord’s insulation. A branch that flexes noticeably under the light string is telling you the load is too much; remove that strand or choose a more stable limb.
Adjust for evergreen and palm forms
On a conifer, decide whether you are lighting the trunk, a few lower branches, or the outer silhouette; avoid threading a continuous strand deeply through dense needles where you cannot later see or retrieve it. Work from the accessible outside toward the trunk only if each part remains visible and free of sharp bends. If needles conceal the bulbs, a spotlight or a separate ground-level fixture may give a cleaner effect without loading small branches.
On a palm, a trunk spiral can emphasize height, but do not pull on the crown or suspend lights from fronds. Leave a clear route away from the base, and be cautious with smooth trunks where a loose tie may slide. Do not climb a palm or use its fronds as handholds. These adaptations are mainly about access and the tree’s structure; if the correct attachment point is unclear, avoid wrapping it.
Make the finished tree look balanced
Turn the lights on briefly after the strand is secured and view the tree from the place where people will see it. Look for abrupt gaps, doubled sections, and a bright connector hanging at eye level. Fix spacing while the strand is still easy to reach, and keep a little darkness around the tree so the display reads as a form instead of a glowing mass.
Use the same bulb type and color across the focal tree. If several trees share a yard, vary how much of each one you light rather than using the same density on every trunk; a single strongly lit specimen and one or two quieter accents often make the overall composition easier to read. If you only have enough lights for a thin, uneven wrap, light the trunk to a lower height or add a ground spotlight instead of stretching one short strand across a taller tree.
A ground spotlight is also a sensible alternative when branches are high, the tree is young, or you want year-round lighting. Aim the beam from the base to reveal the canopy, and keep the fixture and wiring away from water, paths, and mower routes. This changes the visual effect, but it avoids wrapping a live tree with a strand that would otherwise stay in place for months.
Work from a ladder only within your limits
Use a ladder only on firm, level ground and at a height you can reach without leaning sideways. Inspect it before use and have another adult steady or spot you; do not work alone when a fall could leave you unable to get help. Do not use a metal ladder around overhead electrical hazards, and do not set up in rain, strong wind, ice, or on soft mulch that can shift under a ladder foot.
Keep one hand available for the ladder and move it rather than reaching far across the trunk. Never climb the tree, stand on the ladder’s top cap, or stretch to place lights just beyond your safe reach. If a branch needs the ladder to lean against it, if the base cannot be made stable, or if you would have to work near a power line, stop and hire a qualified holiday-light installer or arborist. No decorative result justifies an avoidable fall or electrical contact.
Inspect the display through the season
Check the display after the first windy night and periodically while it is in use. Look for a tie that has tightened, a branch that is being pulled down, a strand that has shifted into a pinch point, frayed insulation, loose bulbs, or connections exposed to water. Correct a tree attachment only after unplugging the lights, and remove the strand entirely if you cannot secure it without damaging the bark or cord.
Turn the display off and unplug it before changing bulbs, handling connectors, or untangling a section. If lights fail after wet weather, allow the area to dry and inspect plugs and cords before restoring power; replace damaged components instead of covering a fault with tape. A tripping GFCI is a warning to investigate, not a nuisance to defeat.
Keep the lights off while you are away or asleep, consistent with ESFI’s advice for outdoor decorations. A properly rated timer can make this routine easier, but it does not replace inspection. After snow or ice, do not pull on a strand that is frozen to a branch; wait for conditions to improve or have a professional remove it safely.
Remove lights and store them properly
Take temporary tree lights down promptly after the display period, before spring growth makes a tight wrap more likely to bind around a branch. Davey Tree notes that a spiral installation left on a tree long term can girdle branches; CSU Extension’s guidance on temporary decorative wrapping likewise emphasizes slack, periodic checks, and removal at the end of the use period. Outdoor-rated equipment can withstand weather better than indoor-only equipment, but that rating does not make a spiral wrap permanent tree hardware.
Unplug first, then unwind from the uppermost reachable section downward without yanking the strand through forks. Release clips rather than cutting near the bark, and inspect the tree as you go for scuffs, trapped ties, or a strand that has tightened. If a tie is embedded or a branch has been damaged, do not cut into the tree to free it; ask an arborist for help.
Let strands dry fully before packing them, and store them loosely coiled in a labeled container away from heat and pests. Check plugs and insulation again before next season. Discard damaged products according to local guidance rather than saving them for a future repair. A simple note about which tree you used, the approximate strand length, and where the outlet was located can make next year’s setup faster without leaving anything attached to the tree.
Fix common lighting problems
The spiral looks crooked. A trunk narrows as it rises, so the path that looks even at the base may crowd at the top. Step back, loosen a few turns, and judge spacing from the main viewing point rather than trying to maintain a ruler-straight line around a naturally irregular trunk.
You ran out of lights before reaching the planned height. Stop at a visually natural branch junction and finish there; do not stretch the strand tight or add an incompatible extension. Next time, measure the circumference at more than one height and include the outlet lead before buying.
A strand goes dark or flickers. Switch off and unplug the system, then inspect the product-specific connections and visible cord for damage or looseness. Never swap a fuse or bulb while the decoration is energized, and do not keep using a cord that is cracked, hot, wet inside, or exposed.
The GFCI trips after rain. Unplug the lights and inspect the weather cover, connection points, and cord for water entry or damage once conditions are safe. Replace damaged parts and keep connectors out of standing water; if the device trips again with an apparently dry, undamaged setup, leave it off and ask an electrician to inspect the circuit.
The tree looks sparse from the street. First confirm that the lights are visible from the viewing angle. Add a few selected lower branches or adjust the trunk pattern rather than wrapping every small limb. If the tree is too tall or wide for the available strands, a modest, well-finished section looks more intentional than a dim outline that stops randomly.
Conclusion
A successful outdoor tree-lighting job starts with a healthy tree, a reachable design, intact outdoor-rated strands, and a GFCI-protected power plan. Measure the trunk, choose spacing that suits the tree and the bulb pattern, wrap loosely, and add only the strong branches you can reach safely. Use a ladder within its limits, keep cords and connections protected, and stop around power lines or unstable trees.
The most important tree-care step is the one after the lights are glowing: inspect the installation and remove temporary spiral wraps when the display ends. If the tree is too tall, damaged, newly planted, or too close to utility wires, choose a ground-level lighting option or call a professional. A smaller, safe display is better than forcing lights onto a tree that is not a good candidate.