How to Prune a Money Tree: Step-by-Step Guide
Learn when and where to prune a money tree, shape leggy stems without overcutting, and root healthy cuttings after a careful trim.
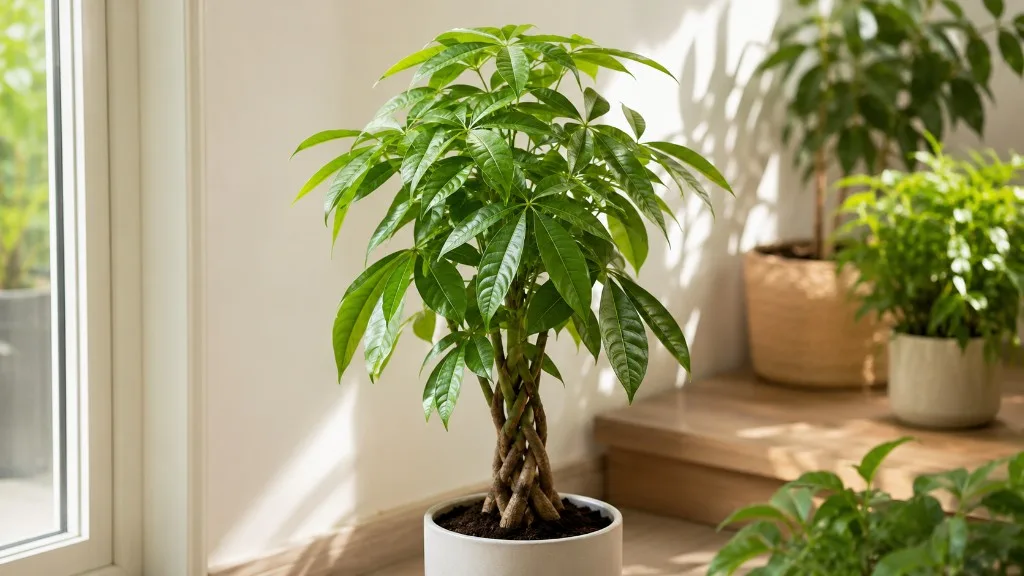
A money tree (Pachira aquatica) can grow into a tall, leafy houseplant, but that does not mean it needs a scheduled haircut. Prune when you have a clear reason—such as a dead stem, a branch crowding the canopy, or a plant that has outgrown its spot—and match the amount you remove to the plant’s current health.
The most reliable approach is simple: use clean, sharp snips, choose a healthy leaf node below the part you want to remove, and make a controlled cut. A conservative trim is easier for the plant to recover from than one dramatic cut, and it gives you time to see how the remaining shoots respond.
Do Money Trees Need to Be Pruned?
Pruning is optional for a healthy money tree. It can keep the canopy within a room’s available space, remove damaged growth, and help a plant look more balanced, but it is not a cure for poor light, overwatering, root trouble, or a bare lower trunk. If the plant already looks healthy and fits the space, routine pruning is not required.
It helps to separate cleanup pruning from shape pruning. Cleanup means removing a dead, broken, or clearly unhealthy shoot; it is a small maintenance task that does not need to wait for a particular season. Shape pruning changes the size or outline of healthy growth, so it calls for more planning and is best done when the plant can actively recover.
Before reaching for the shears, decide what you want to change. If the plant leans toward a window, improve its light and rotate it gradually; if it has one long shoot, shorten that shoot selectively; if a branch is brown and brittle, remove it back to healthy tissue. These are different problems, and treating them as one “make it bushier” task can lead to unnecessary cuts.
When to Prune a Money Tree
For a planned trim, choose spring or the beginning of the plant’s active growth period. The RHS plant profile for Pachira aquatica recommends cutting back shoots in spring as needed to control size, while its profile also notes that the species is commonly grown as a houseplant with several stems plaited together. The RHS plant profile gives a useful species-specific timing cue: wait until the plant is entering growth, not simply until a calendar date says it is spring.
Indoors, light and temperature vary by home, so “active growth” is the more useful test. If your plant is producing fresh leaves and has bright, indirect light, a modest shape correction is more likely to be followed by new growth than the same cut during a dim winter period. In a home where winter light is strong and the plant continues growing, a very small correction may be reasonable, but avoid a major reshaping when growth has slowed.
Dead, broken, or diseased-looking parts are different. You can remove them when you find them rather than leaving them on the plant until spring. Make the cut into firm, healthy tissue, and clean the blade between cuts if you are moving from a suspicious stem to healthy parts of the plant.
Postpone structural pruning if the tree has just been repotted, recently arrived home, is shedding leaves from a care change, or is dealing with pests or root problems. First stabilize watering and light and let the plant settle. Cutting a stressed money tree adds another demand at the moment it has the least capacity to respond.
Tools to Prepare Before Pruning
Use small bypass pruners or sharp precision snips sized for the stem you need to cut. Bypass blades make a clean scissor-like cut on soft green growth; household scissors may crush thicker stems or leave a ragged wound. You do not need a large lopper for a typical indoor money tree, and a tool that is awkward to control makes it harder to protect nearby leaves and the braided trunks.
Clean the blades before you start, then sharpen them if they drag or crush stems. Get Busy Gardening’s money tree pruning guide also emphasizes clean, sharp precision tools; the practical point is to choose a blade you can control at the stem size you are cutting. Wipe away soil and sap between cuts, and disinfect the tool after cutting a diseased or rotting section before moving to healthy tissue. Avoid touching the cleaned blade to potting mix or a dirty surface while you work.
Set the plant where you can see all sides and reach the canopy safely. Put a bag or sheet under the pot if you want to catch clippings, and keep a small container for healthy pieces you may want to propagate. A quick photo from the front and sides can help you notice when the tree’s outline is becoming lopsided; step back after a few cuts rather than trimming continuously from one angle.

How to Prune a Money Tree Step by Step
Work from the least aggressive change to the most structural one. Start by removing growth that is already dead or damaged, then decide whether any healthy shoots need shortening for size or shape. This order makes it easier to see the plant’s natural outline before you remove foliage that is still helping it grow.
Inspect the plant and choose a goal
Look at the plant from several directions before cutting. Identify its main stems, the longest shoots, bare sections, crossing or rubbing branches, and any shoots that point sharply into the center of the canopy. If the tree is braided, distinguish the individual trunk stems from the smaller branches growing above them; most routine shaping can be done on those upper shoots.
Choose one clear goal, such as lowering a single tall branch or removing a lopsided extension. Mark the candidate with a loose piece of string or hold the branch where you imagine the new outline will fall. Check that the cut will leave a healthy node on the plant side and that you are not about to remove most of the tree’s leafy growth in pursuit of symmetry.
A helpful rule is to trim the problem you can describe, not every part that looks imperfect. Money trees naturally have leaves of different sizes and shoots at different angles. A balanced plant does not need to look like a clipped sphere, and repeated small adjustments usually preserve a more natural shape than one rigid outline.
Remove dead or damaged growth first
Follow a brown, brittle, split, or clearly dead shoot back until the stem is firm and green. Cut just above a healthy junction or remove the dead branch at its attachment if that is where the damage ends; do not leave a long stub that will dry back. If a stem is soft, blackened, or wet rather than simply dry, investigate the plant’s moisture and root conditions before treating pruning as the whole solution.
Yellow leaves can have several causes, including normal aging, watering problems, or stress. One yellow leaflet by itself is not proof that the branch needs to go, so look at the whole leaf and the stem before making a decision. If the entire compound leaf is spent or badly damaged, remove its leaf stalk cleanly without cutting into the main trunk.
Work carefully around the woven trunks. Do not pull a damaged leaf from the braid or twist it free, since that can strip bark or loosen neighboring stems. Use the snips to make a controlled cut and remove the debris from the pot surface rather than leaving damp material around the base.
Shorten a healthy shoot just above a node
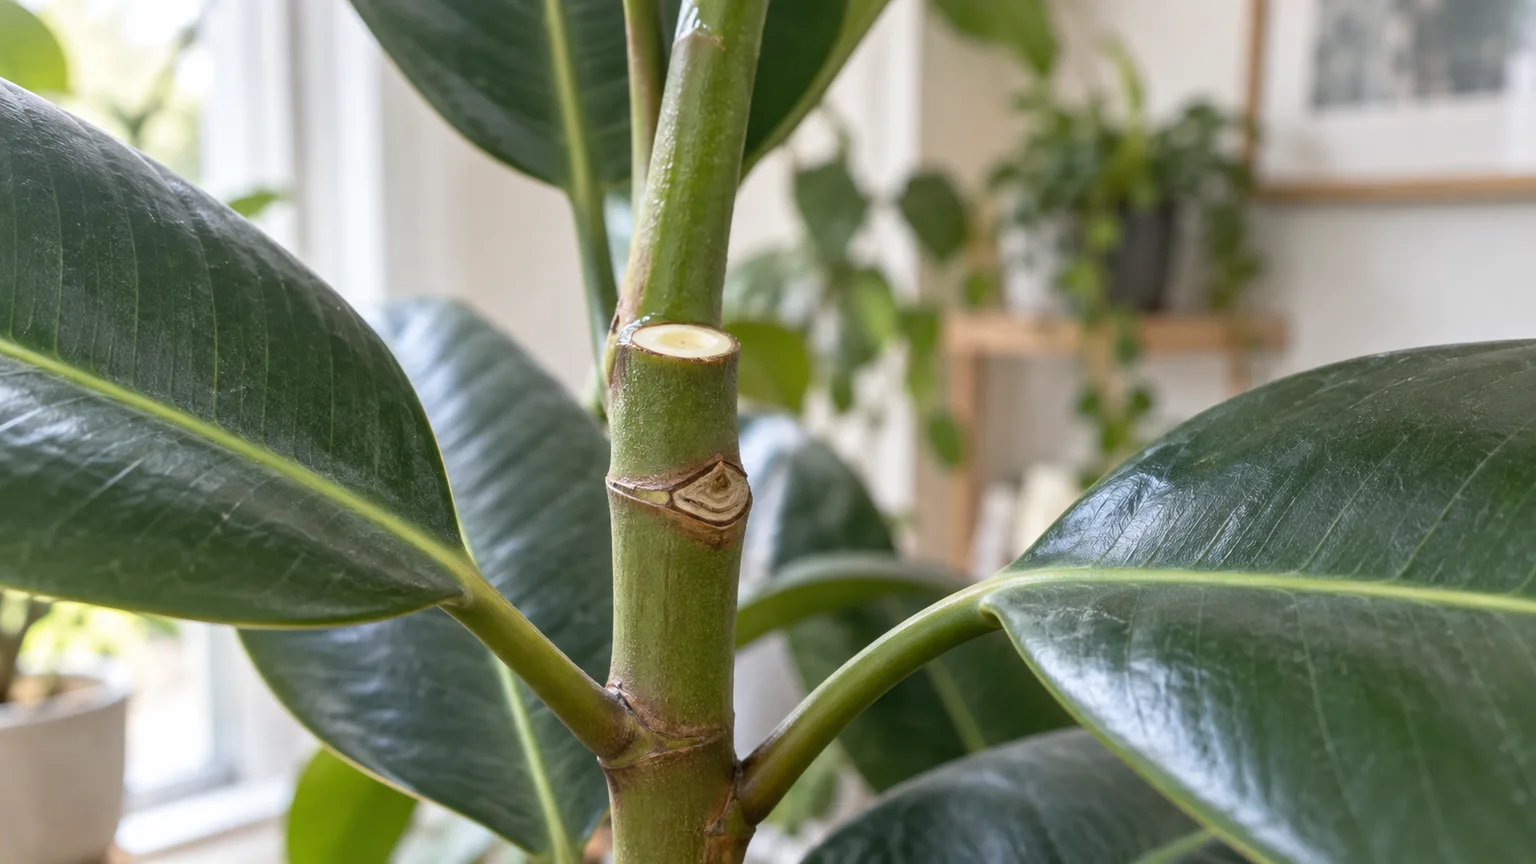
A node is the point on a stem where a leaf or shoot emerges; a dormant bud may sit near the leaf attachment or scar. For a height or shape cut, choose a node on the plant side of the cut that points toward the direction you would like future growth to fill. Then make a clean cut a short distance above that node, leaving the bud intact rather than cutting through it or leaving a long bare stub.
Cutting near a node gives the stem a plausible place to branch, but it cannot guarantee exactly how many shoots will emerge or which way they will grow. Some stems produce a new shoot quickly; others respond slowly or resume growth elsewhere. Nature & Garden’s Pachira guide similarly notes that pruning above an eye in spring can encourage new shoots, which is a useful goal, not a promise of a specific shape. Nature & Garden’s Pachira guide also recommends keeping orientation clear when preparing cuttings, since an upside-down stem has a poor chance of rooting.
Keep the cut proportional to the shoot. To lower one branch, shorten that branch rather than taking the whole crown off at an arbitrary height. If the chosen node is very low and the branch carries several healthy leaves, consider a higher node first; you can always make another cut later, but you cannot put removed foliage back.
Recheck the canopy before making more cuts
After each one or two branches, step back and look at the silhouette again. Compare the tree’s height and width from the same viewing angle, then turn the pot slightly to check that one side has not become much thinner than the other. A few deliberate cuts often solve the practical problem without making the plant look overworked.
If you are removing several branches, alternate sides of the canopy rather than stripping all growth from one side first. Preserve a mix of leafy shoots across the plant so it can continue photosynthesizing and the final shape does not become top-heavy. When two branches cross, keep the healthier or better-positioned one and remove or shorten the other instead of cutting both automatically.
A useful stopping point is when the plant fits the space and light reaches more of the canopy, not when every branch has exactly the same length. If you are unsure whether another cut is necessary, stop for the day and evaluate the tree again after it has settled. This pause is especially helpful for braided plants, whose overall form is harder to judge while you are standing close to them.
How to Fix a Leggy or Overgrown Money Tree
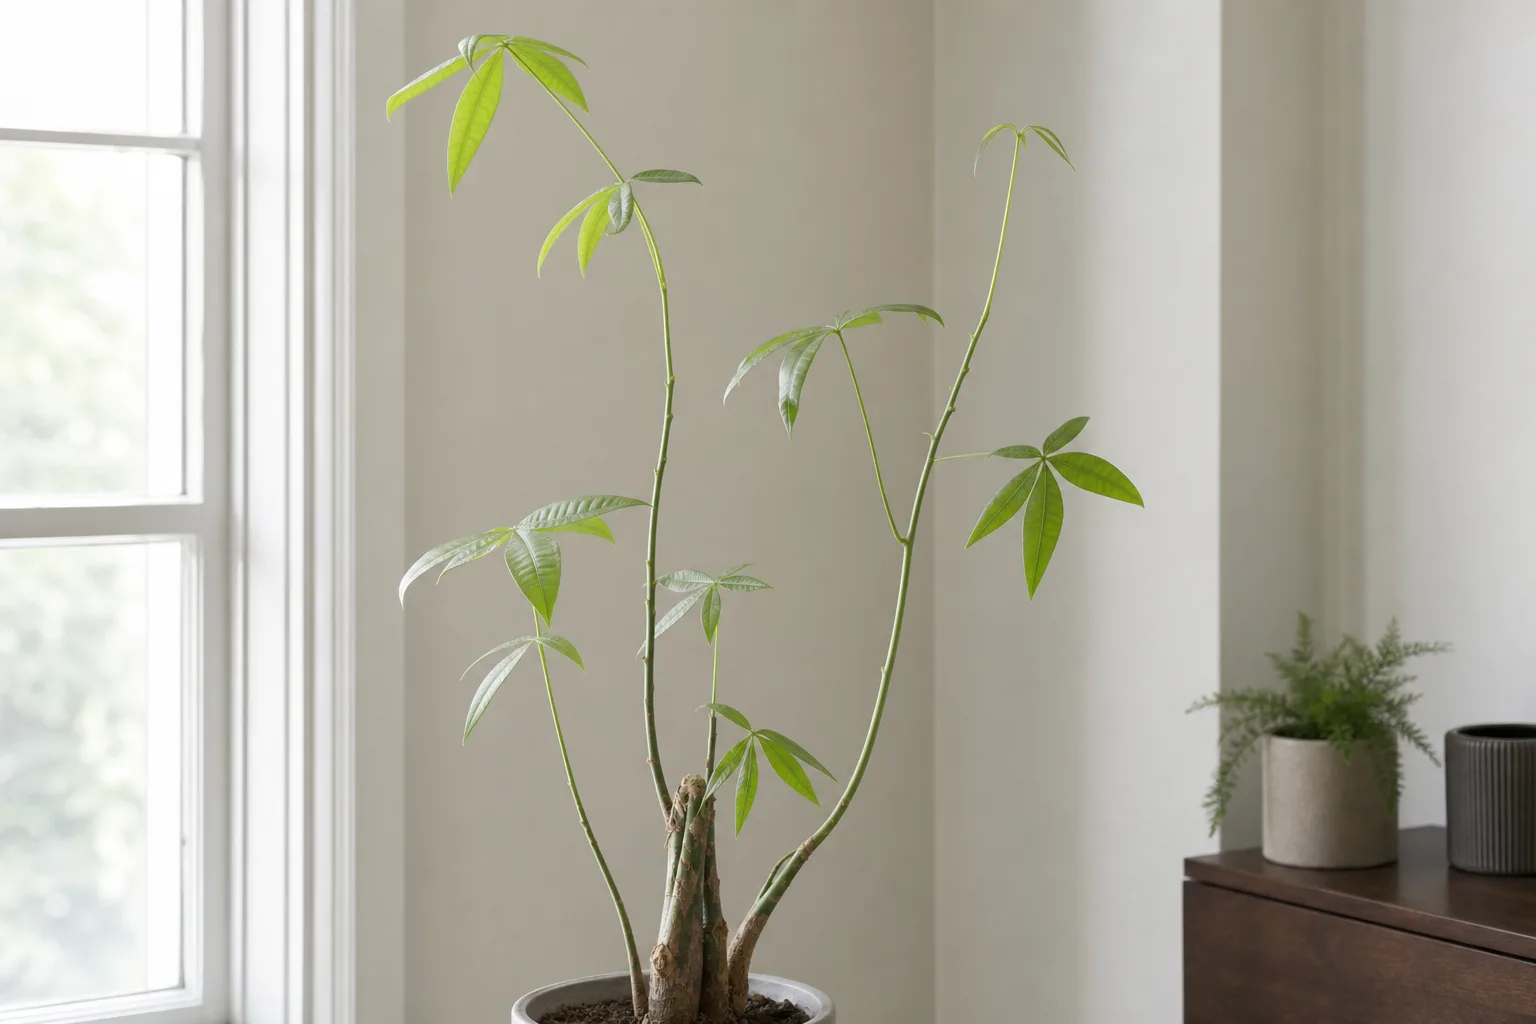
A leggy money tree has long, thin shoots with sparse leaves or most of its foliage concentrated near the tips. Pruning can shorten those shoots and make the plant look more compact, but it does not correct the condition that caused weak, stretched growth. Low or one-sided light is a common reason a houseplant reaches toward a window, so first move the plant toward brighter indirect light and turn it gradually for more even exposure.
Once the plant is stable and actively growing, choose one or two of the longest stems and shorten them above healthy nodes. Do not cut every tall stem to the same low height in one pass; that can leave the plant with too little foliage and no graceful transition from trunk to canopy. If several branches need major correction, spread the work across more than one growth period and wait to see where new shoots appear.
For a tree that has simply outgrown its ceiling clearance, decide whether you want a smaller tree or a shorter but still leafy canopy. Reduce the tallest shoots selectively while keeping enough foliage on the remaining stems. If the plant’s lower trunk is bare, pruning the tips may encourage branching higher up, but it will not make leaves appear along every bare section of old wood.
Improve the light before chasing fullness
A money tree that grows toward one window may keep making uneven shoots even after a careful trim if its light stays one-sided. Move it to a bright position with indirect light, avoiding a sudden shift into harsh midday sun. Turn the pot a little at a time over several weeks so the whole canopy receives light without forcing a sudden change in exposure.
Missouri Botanical Garden describes Pachira aquatica as a tropical evergreen tree that is often grown indoors or as bonsai, and notes that houseplants do best in bright light with moderate, even moisture. The Missouri Botanical Garden Plant Finder is useful context here: a plant needs suitable growing conditions after pruning, not just a new outline.
Do not fertilize heavily in an attempt to force branching. Excess fertilizer cannot compensate for insufficient light and may create additional stress. Keep care steady, watch for healthy new leaves, and make another small shape adjustment only after the tree has responded.
How to Shape a Braided Money Tree
A braided money tree is often sold with several young stems woven together. The braid is a training and display form; it does not mean the trunks have fused into one stem. The RHS notes that Pachira aquatica is often grown as a houseplant with several plants plaited together, while Missouri Botanical Garden likewise describes the common braided-trunk form. That matters when pruning because removing one main stem changes the structure more than shortening one branch.
For ordinary shaping, prune shoots growing above the braid rather than cutting through the braided trunks. Keep the woven stems intact unless one is clearly dead or unsafe and you understand how its removal will affect the other stems. Do not pull apart a tight braid just to make a cut easier; bark can be damaged where stems press together.
If one stem appears unhealthy, check whether it is firm or soft, whether discoloration continues down the stem, and whether the other stems are affected. A dying trunk may point to root or watering trouble, not a need for routine structural pruning. When the diagnosis is uncertain, isolate the immediate care issue and seek species-specific plant-health guidance before making a large cut at the base.
You can still create a balanced canopy above a braid. Shorten a tall shoot to a healthy node, preserve branches on the less full side, and assess the outline from a few angles. Since the trunks themselves cannot be reshaped after they have thickened, the most natural result usually comes from respecting their existing line and adjusting only the more flexible upper growth.
How Much Can You Cut Back Safely?
For routine shaping, use one-third of the leafy canopy as a conservative upper limit for a single session, not as a target. Removing less is often wiser when the tree is small, recently stressed, recovering from leaf loss, or growing in weak light. A healthy, actively growing plant may tolerate more than a stressed one, but a limit cannot guarantee recovery for every plant or indoor condition.
Count the foliage you are removing, not just the number of stems. One long shoot may carry only a few leaves, while a short branch close to the trunk may carry a dense cluster; equal-length cuts do not remove equal amounts of the plant’s working leaf area. If the goal requires taking more than roughly a third of healthy growth, make a staged plan and wait for fresh growth before continuing.
There are exceptions for dead or diseased tissue, which may need to be removed more completely to stop damage from spreading. Even then, make the minimum cuts needed to reach healthy tissue and inspect the remaining plant. If nearly the whole canopy is damaged, prioritize identifying why before removing every remaining leaf; preserving healthy foliage gives the plant more resources while you correct the underlying issue.
Avoid topping a money tree at a random point with no nodes or leaves below the cut. A bare section can remain bare, and the plant’s response may be slower or less predictable than a reader expects. Better cuts leave healthy growth points and keep enough foliage on the plant to support new growth.
What to Do After Pruning
Put the plant back in a stable place with bright, indirect light and avoid moving it repeatedly while it adjusts. Keep its normal watering routine rather than watering extra “for recovery”; check the potting mix and water when it is ready, then let excess drain away. Missouri Botanical Garden recommends moderate, even moisture for indoor plants, which is a better guide than keeping the soil continuously wet after a trim.
Do not rush to fertilize an established money tree immediately after a heavy cut. Wait until you see new growth and then return to a suitable, restrained feeding routine during active growth, following the product label. Extra fertilizer is not a substitute for healthy light, sound roots, or a clean cut.
Watch the cut ends and remaining stems over the following weeks. A clean, dry cut is expected; softening, darkening, or spreading discoloration calls for closer inspection of the stem and the plant’s moisture conditions. A few lost leaves do not automatically mean the tree is failing, but widespread leaf drop, persistent soft stems, or worsening yellowing deserves a care check before further pruning.
Do not schedule the second round by a fixed number of days. Wait for the tree to show steady new growth, then assess which branches actually need more shaping. If no new shoots emerge, review light, watering, temperature, and root health instead of cutting again to force a response.
Can You Propagate Money Tree Cuttings?
Yes, a healthy piece removed during pruning can sometimes become a new plant, so set aside viable clippings before discarding them. Choose a green, healthy stem rather than a brown or weak one, and keep track of which end was closest to the original trunk. Money tree cuttings may root in water or a suitable medium, but rooting takes time and success is not guaranteed.
For propagation, the cutting needs more than a leaf. Nature & Garden recommends a stem section with at least two groups of leaf nodes, with the lower node placed in well-draining mix; Get Busy Gardening’s money tree propagation walkthrough also describes rooting Pachira stem cuttings in water or soil. That is why the best propagation piece is often a small stem tip or branch, not a leaflet removed on its own.
Choose and prepare a viable cutting
Select a healthy green section several inches long with at least two nodes or node groups and a few leaflets near the top. Use clean snips and mark the upper end before setting the piece down, especially if you have cut a section without leaves that make its direction obvious. Remove leaflets that would sit below the medium, but leave some healthy foliage above it to support the cutting.
Avoid taking a large number of cuttings from a small parent plant just because it needs shaping. The main plant still needs enough leaves to recover, and the cuttings may not root even when you follow good technique. If the only available material is damaged, diseased, or very old and woody, discard it rather than trying to root an unhealthy piece.
Root the cutting in a suitable medium
For soil rooting, place the lower node in a light, well-draining propagation mix and keep the medium slightly moist, not waterlogged. A clear cover can help hold humidity, but leave some ventilation and keep the cutting in a warm, bright spot out of direct sun. If you prefer water, submerge the stem nodes while keeping leaves above the water, and refresh the water if it becomes cloudy.
Roots may take several weeks to develop, and a cutting may drop a leaflet while it adjusts. Look for firm stems and fresh growth rather than repeatedly tugging to test for roots. Once roots are established, move the cutting to a small pot with drainage and handle the young root system gently; avoid switching between water and soil repeatedly, which adds unnecessary stress.
Common Money Tree Pruning Mistakes
The most common mistake is making a large cut before deciding what the plant needs. Removing the tallest shoots can make a tree shorter, but it will not solve weak light; stripping lower branches will not necessarily make the plant fill in; and cutting every stem to one height can leave a blunt, unnatural outline. Match each cut to a visible goal and pause when that goal is met.
A second mistake is pruning during a slow or stressful period. If the plant is losing leaves, recently repotted, or suffering from wet soil, stabilize its conditions first. Dead material is the exception, but healthy stems are better left alone until the plant can recover actively.
Other avoidable problems include using dull or dirty tools, leaving a long stub, cutting through a node, removing most of the foliage at once, and cutting braided trunks without understanding the structure. It is also easy to confuse a compound leaf with several separate leaves; follow the leaf stalk back to where it joins the stem before trimming. When in doubt, a little less pruning and a little more observation is the safer choice.
Conclusion
The best way to prune a money tree is to work in spring or during active growth, use clean sharp tools, and make a few intentional cuts above healthy nodes. Remove dead or damaged growth first, shorten only the shoots that interfere with size or balance, and preserve the leafy canopy—especially if the plant is stressed or braided.
Afterward, give the tree steady bright indirect light and normal, well-drained care, then wait to see how it responds before cutting again. Healthy trimmings with nodes can be rooted as an optional second project, but the parent plant’s recovery comes first.