How to Propagate Rubber Plants From Cuttings
Propagate Ficus elastica from cuttings with a practical soil-first method, sap-safety steps, timing guidance, troubleshooting, and air-layering backup.
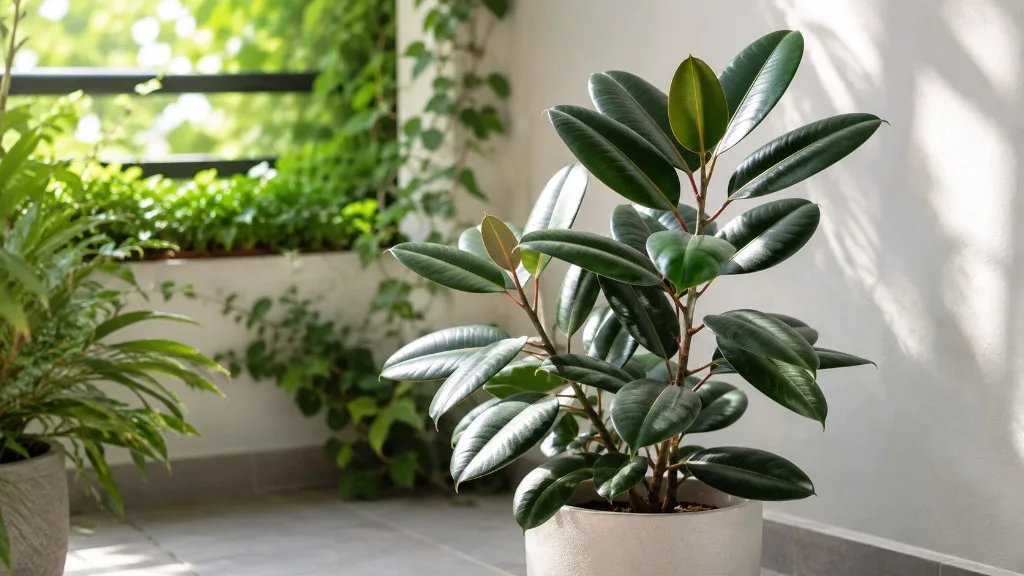
Rubber tree propagation is most dependable when you treat it as a stem-and-node project, not a leaf-in-water experiment. For Ficus elastica, take a healthy stem with at least one viable node, manage the sticky latex, root the cutting in a light, airy medium, and keep the leaves from losing water faster than the stem can replace it. In good growing conditions, you may see roots in several weeks, but a cutting is not ready for a normal pot simply because the calendar says so.
The best default for most indoor growers is a leafy stem cutting rooted in soil or a soilless propagation mix. Air layering is useful when the plant is tall or the branch is too valuable to sever immediately. The sections below help you choose, cut, cover, water, and troubleshoot while checking the two essentials: a viable node and enough roots to live independently.
The short answer: use a stem node and soil
Choose a firm, healthy stem with two or three leaf nodes during active growth, usually late spring or early summer. Make the lower cut just below a node, remove the leaves that would sit below the medium, and leave one or two leaves at the top. Blot or rinse the latex from the wound, place the cutting in a premoistened airy mix, and cover it loosely with a clear bag or propagation dome supported above the leaves.
Set the pot in bright indirect light in a warm, stable room. The mix should stay evenly damp but never waterlogged; high humidity around the leaves does not make up for airless, saturated media around the base. Wait for gentle resistance when you lift the cutting slightly or for new growth before treating it as rooted, and pot it up only after it is anchored.
This soil-first approach is a better starting point than water for Ficus elastica. Some cuttings can make water roots, but Purdue Extension’s cutting guidance notes that water-grown roots may be weaker and adapt poorly when moved into soil. A clean jar can be used as an experiment, but it is not the most reliable default. If you want to keep a tall parent plant intact, air layering is the more appropriate alternative.
Choose the method that fits your plant
The method should follow the plant’s shape and the kind of result you want. A short, vigorous branch is suited to a stem cutting; a tall trunk or woody branch that you cannot spare is better suited to air layering. Water rooting offers visibility, but the roots and the move into potting mix can create extra problems.
| Method | Best when | What to expect | Main risk |
|---|---|---|---|
| Stem cutting in soil | You want one or more new plants from a healthy branch | Roots often begin in several weeks; pot-ready growth takes longer | Wet, cool mix can rot the base |
| Air layering | The parent is tall, woody, or valuable and you want it to keep feeding the branch | Roots form while the branch remains attached; timing can range from weeks to many months | Cutting too soon or keeping moss too wet |
| Water rooting | You want to observe the base and can monitor water closely | It may work, but success is less consistent and the transition to soil can be rough | Stale, low-oxygen water and stem rot |
Stem cuttings in soil
Use this method for the ordinary propagation job: a healthy rubber plant has a branch you can shorten, and you want the cutting to develop roots directly in the kind of medium it will eventually occupy. A node is essential because it contains the growth tissue from which roots and new shoots can develop. A detached leaf may remain green for a while, but a leaf without a piece of stem is not a dependable way to make a complete Ficus elastica.
A soil or soilless mix gives the cutting both moisture and oxygen. Rooting hormone is optional: it may support faster or more abundant rooting, but it cannot rescue a weak, buried, leafless, or rotting piece of stem.
Air layering
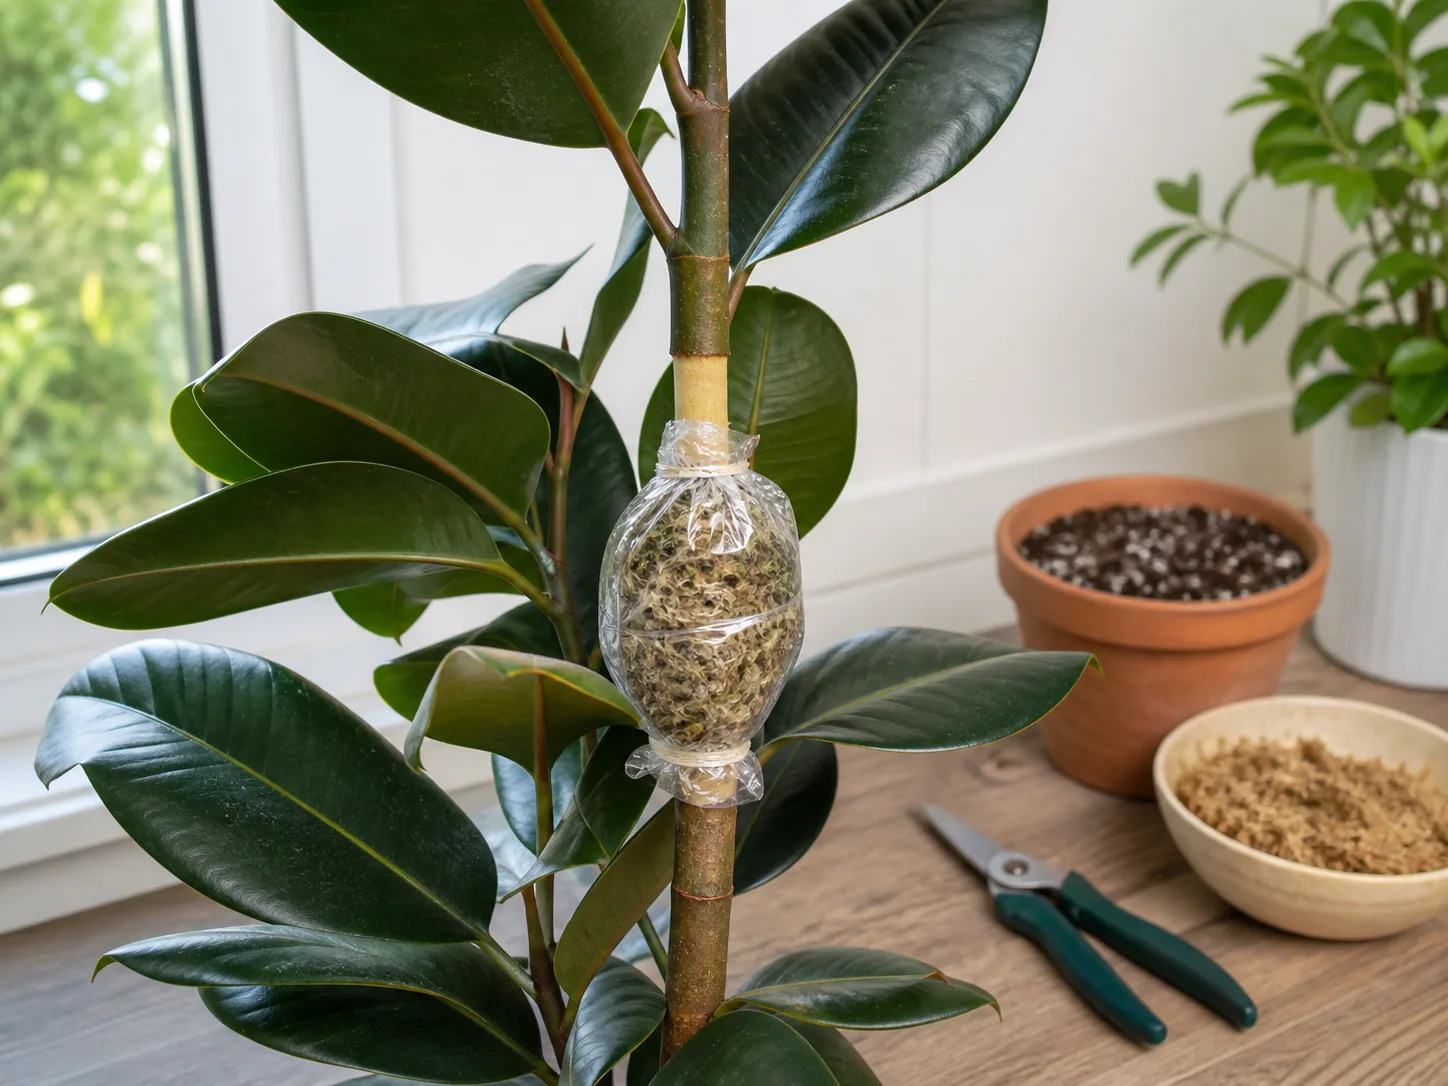
Air layering keeps the prospective new plant attached to the parent while roots form around a wounded section of stem. The attached branch continues receiving water and carbohydrates, so this is a good choice for a tall plant or a thick branch that would wilt badly as a fresh cutting. It also lets you choose a larger, more developed section than you might comfortably place in a small propagation pot.
The tradeoff is time and patience. Air layering requires a ring of bark to be removed, damp sphagnum moss to be held against the wound, and repeated checks so the moss stays damp rather than sour and saturated. The Royal Horticultural Society’s ornamental-fig guide includes rubber plants among figs that can be air-layered and warns that rooting may take about a year, while practical guides sometimes show roots sooner. Use the root mass as your signal, not a promised date.
Water rooting
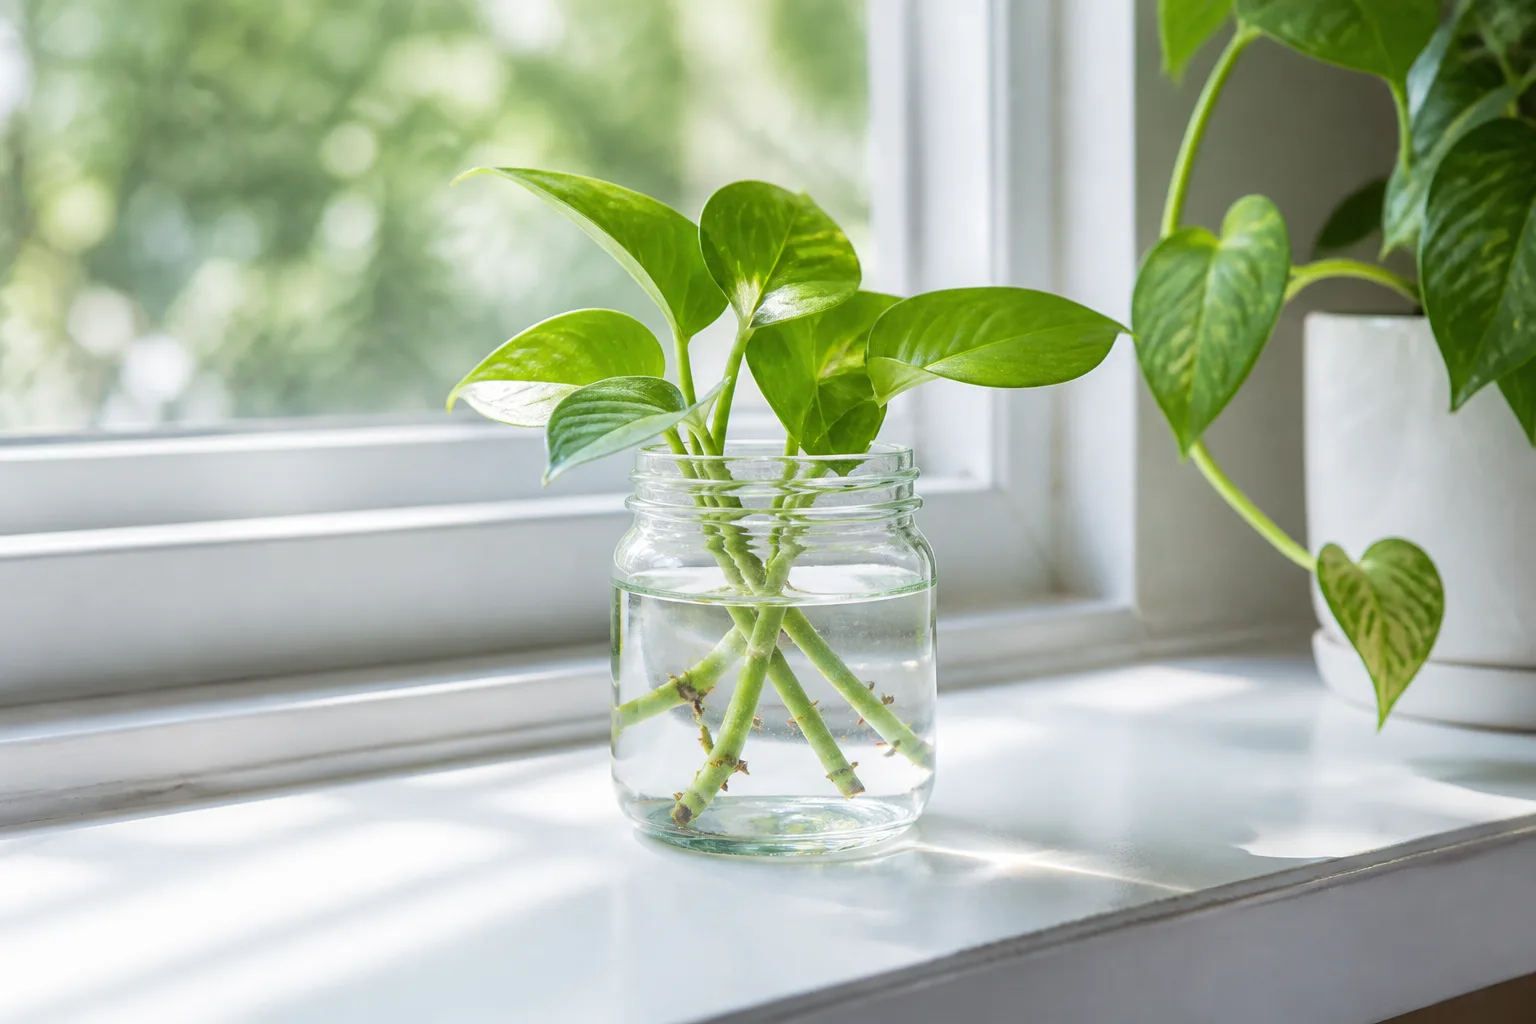
Water rooting is tempting because you can see every change at the base. If you try it, use a clean, narrow container, keep one node under the water, keep all leaves above the waterline, and refresh the water every few days. Bright indirect light and warmth matter here just as they do in soil.
Move the cutting to a small airy pot when it has several roots around 1–2 inches long and is beginning to hold itself upright. Even then, expect a transition period: water roots were formed in a high-water, low-support environment and may not immediately function well in a potting mix. Do not choose water simply because the cutting has no node; water cannot replace the stem tissue needed for a complete plant.
Time the cutting and assess the parent
Late spring and early summer are the easiest windows for rubber plant cuttings because the parent is usually in active growth and indoor temperatures are naturally more supportive. The RHS recommends taking semi-ripe fig cuttings in spring or summer, and its guide notes that a heated propagator can assist rooting. You do not need a specialized propagator in an ordinary warm home, but a cold windowsill in winter will make the process slower.
Start with a parent that is well-watered but not freshly drenched, free of visible pests, and producing firm leaves. Avoid taking a cutting immediately after repotting, moving the plant between very different light levels, or pruning a branch that is already yellowing, stretched, sun-scalded, or soft. A cutting has limited stored energy, so a healthy parent gives it a much better starting reserve.
Look at the whole plant before you choose the branch. If the plant has one long bare stem, air layering may preserve the top and encourage a better-shaped lower plant. If it has several vigorous shoots, a six- to eight-inch stem section with leaves at the tip is usually easier to handle. The parent will branch below a pruning cut when a dormant bud is available, but do not remove more than the plant can comfortably replace.
Gather supplies and protect against sap
Prepare everything before you cut so the fresh wound spends as little time exposed as possible. You will need:
- sharp, clean pruning shears or a knife;
- gloves and a washable work surface;
- a small pot with drainage holes;
- an airy propagation medium such as perlite mixed with coco coir or seed-starting mix;
- clean water and a small stick for making a planting hole;
- a clear bag or propagation dome plus two stakes;
- optional rooting hormone and a separate dish for it;
- labels if you are making more than one cutting.
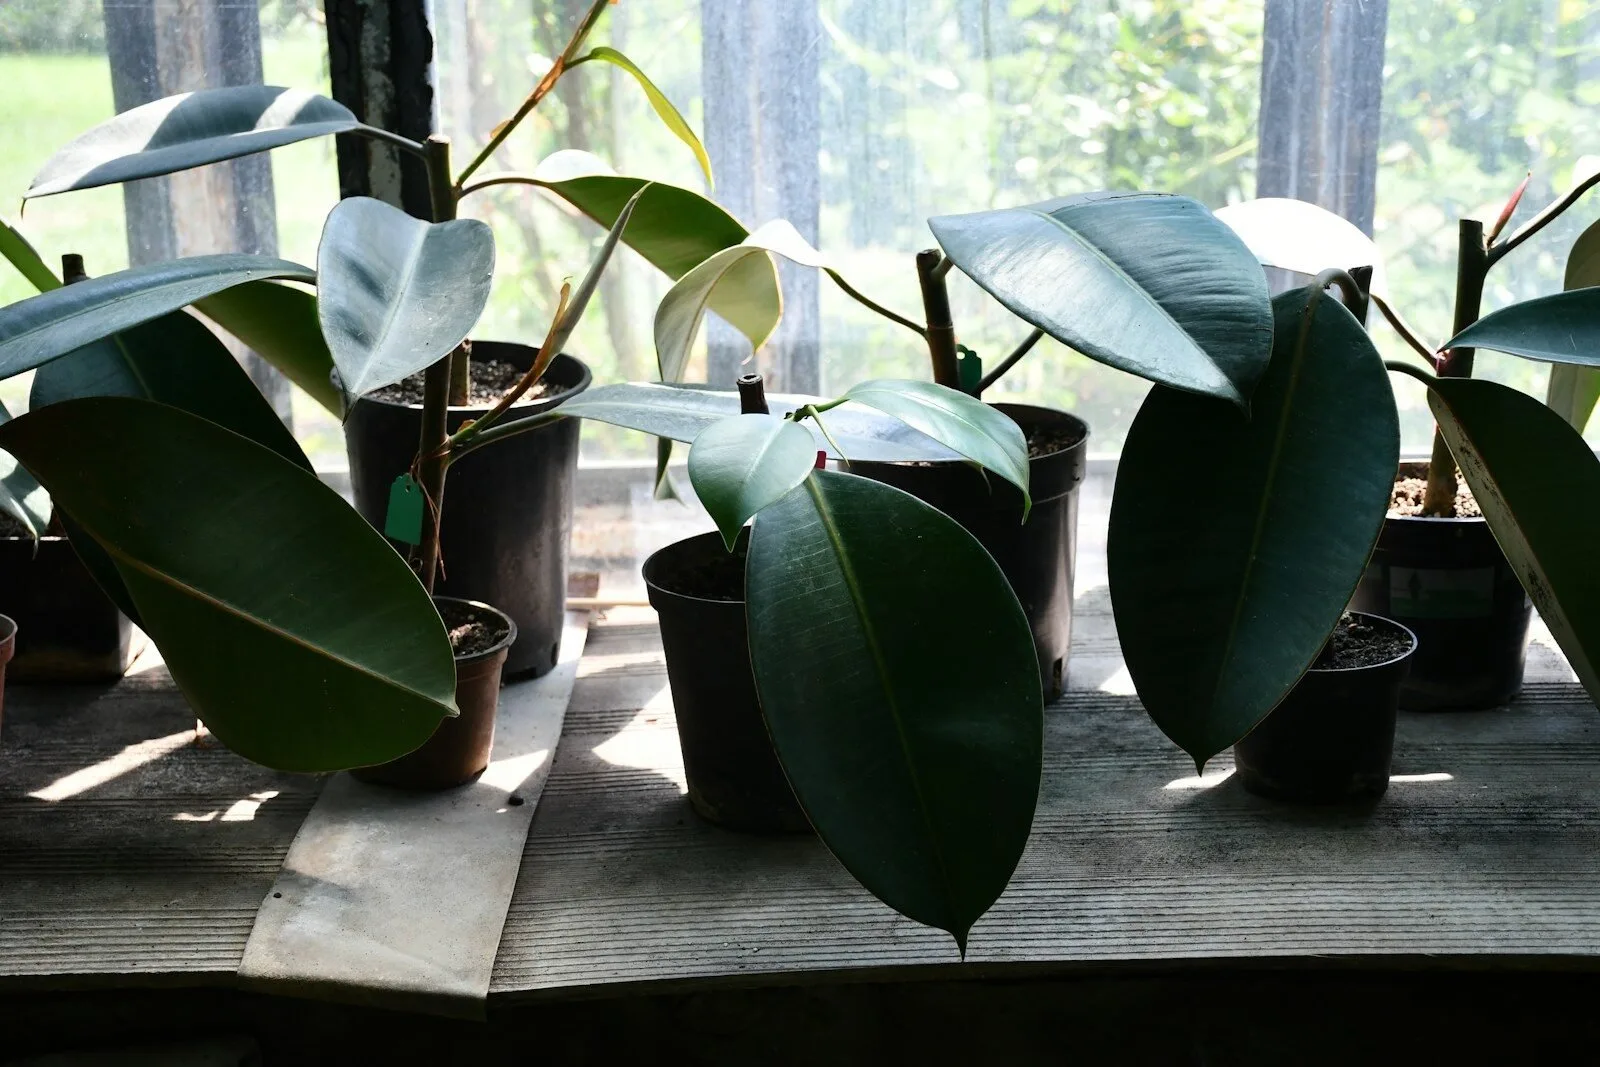
Ficus elastica releases white latex when a leaf, stem, or branch is damaged. The sap can irritate skin, and it can be especially troublesome for anyone with a latex sensitivity or easily irritated eyes. Wear gloves, keep your hands away from your face while working, and wipe the surface promptly; do not let children or pets chew fresh cuttings or discarded leaves.
The Pet Poison Helpline rubber-tree entry identifies Ficus elastica as containing irritating compounds in its sap and describes oral irritation, drooling, retching, and vomiting as possible signs after ingestion. Treat that as a practical reason to keep propagation materials out of reach, not as a reason to avoid the plant. If a pet eats a cutting or shows signs after exposure, contact a veterinarian or the poison service promptly.
Find the node and size the cutting
The node is the slightly raised point where a leaf joins the stem. On some rubber plants it is obvious as a small ring or swelling; on others it is easiest to find by tracing a leaf stalk back to the main stem. The short stretch between two nodes is the internode. Roots and new shoots are more likely to form from node tissue than from a random middle section of stem.
Choose a firm green or semi-ripe section with at least one node that can be buried and one or two leaves that can remain above the medium. A practical size is about 4–8 inches, often with two or three nodes. A shorter cutting can work if it has a clear node and a stable leaf, while a long cutting with many leaves is more likely to wilt before it roots.
The UGA Extension propagation guidance recommends at least two nodes for stem cuttings in its general propagation instructions and placing the lower cut just below a node. That is a useful rule for rubber plants, but the more important principle is that at least one viable node must be positioned in the rooting zone.
Take and prepare the cutting
Once the parent, branch, and pot are ready, work in this order:
- Clean the blade and set the prepared pot within reach.
- Make a decisive cut just below the lowest node you intend to bury.
- Hold the cutting over the work surface while the white latex slows; do not smear it across the leaves.
- Remove the lower leaves, leaving the rooting node and the upper leaves intact.
- Trim or halve an oversized leaf if the cutting has more leaf area than the small stem can support.
- If using rooting hormone, place a little in a separate dish, coat only the prepared base, and discard the excess rather than returning it to the container.
Do not crush the base with dull shears. A clean, slightly angled cut gives you a clear wound and makes it easier to tell later whether the tissue is still firm. If the branch is very thick, make sure the cut surface is not split; a damaged edge can invite decay.
Rinse the latex before rooting
Freshly cut rubber plant stems can continue to ooze latex for a short time. Blot it with a clean paper towel, or briefly rinse the basal end with room-temperature water until the flow has slowed, then let the surface air-dry for a few minutes before planting. The goal is to keep the wound manageable and prevent a thick film from being carried into the medium; it is not necessary to scrub the cutting or repeatedly recut it.
Use the same care when pruning the parent. The RHS specifically recommends gloves for pruning figs because their sticky white sap can irritate skin and aggravate allergies. Keep a damp cloth nearby for the blade and a separate bin for leaves, and wash tools after the work is complete.
Reduce leaf area to limit wilting
An unrooted cutting loses water through its leaves while it has no roots to replace that loss. Strip off any leaf that would be buried, because decaying leaf tissue can spread rot through the rooting zone. Leave one or two healthy leaves at the top so the cutting can continue photosynthesizing without carrying an unnecessary canopy.
If a large rubber-plant leaf is broad, fold it gently or cut it across the middle with a clean blade. Do not remove every leaf unless the cutting is unusually large or the leaves are damaged. A green leaf is useful stored energy; the aim is to reduce the load, not to turn the stem into a bare stick.
Plant the cutting in an airy mix
Use a small pot with drainage rather than a large container. A simple mix of equal parts perlite and coco coir, or perlite with a light seed-starting mix, holds enough moisture around the node while leaving air spaces around the new roots. The Purdue Extension guidance likewise recommends a moist, porous rooting medium such as vermiculite, perlite, or potting mix for cuttings.
Pots with old fertilizer salts or leftover roots can make a small cutting harder to read, so use a clean container and fresh medium. Moisten the mix before planting and let excess water drain; starting with a thoroughly saturated pot makes it difficult to tell whether later moisture is helping or hurting.
Make a hole with a stick so the medium does not scrape hormone from the base. Insert the cutting 1–2 inches deep, with at least one node below the surface and all leaves above it. Firm the mix lightly around the stem, then water once until a little drains from the bottom. Empty the saucer immediately.
The cutting should stand upright without being packed tightly into the pot. If it leans, stake it loosely so movement does not disturb the base. Do not add fertilizer at planting time; salts in a small, damp pot can stress a fresh wound.
Build humidity without trapping rot
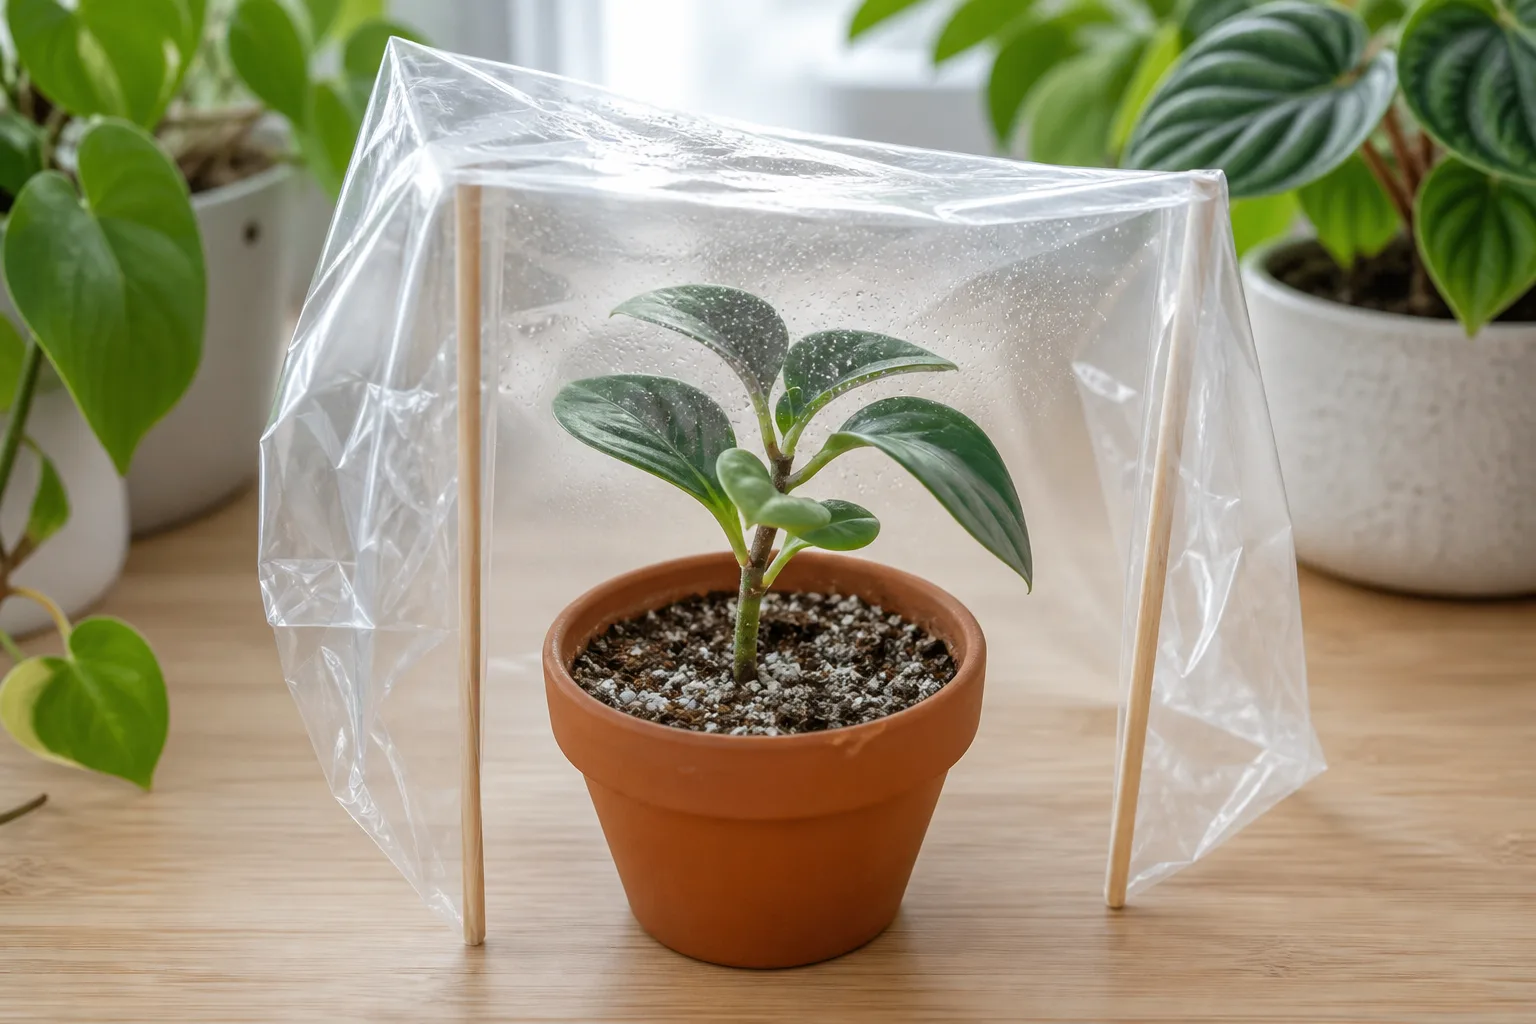
Place two stakes around the cutting and drape a clear bag over them, or use a propagation dome that does not press against the leaves. Leave an air gap at the bottom or open the cover briefly each day. The cover slows water loss from the leaves while the stem is rootless, but it should not become a sealed, dripping greenhouse.
Condensation on the plastic is not a watering schedule. If droplets run down the sides, open the cover for longer and check the mix with a finger; if the medium is already damp, do not add more water. A constantly wet base plus still air is the combination most likely to turn a promising cutting black or mushy.
Keep the leaves from touching wet plastic, remove fallen leaves promptly, and inspect the stem and soil every few days for sour smells, fuzzy growth, or a darkening base. If the cutting remains firm and the leaves are stable, steady conditions are more useful than frequent handling.
Give it the right light, warmth, and moisture
Bright indirect light is the useful middle ground. A spot near a bright window with a sheer curtain can provide enough energy for rooting, while direct midday sun under a plastic cover can overheat the leaves and boil moisture out of the cutting. The RHS describes rubber plants as preferring bright but not direct light, which is also a practical way to protect a covered cutting.
Keep the pot warm and away from cold drafts, air-conditioning outlets, and heaters. A stable room temperature is more valuable than chasing a high number with a heat mat. If you use bottom heat, make sure it does not dry the small pot rapidly or create a hot, stagnant root zone.
Check moisture every few days rather than watering by habit. The surface may look dry while the interior remains damp, so feel below the top layer or lift the pot. Add a small amount only when the mix is beginning to dry, and let excess drain fully; roots need oxygen as well as moisture.
Under good conditions, roots may begin in roughly 3–8 weeks, but that is a range, not a deadline. Soft, actively growing stems often move faster than old woody pieces; winter light, cool temperatures, variegated growth, and a heavy leaf canopy can all slow the process. The Better Homes & Gardens rubber-plant guide reports roots in about three weeks for its stem-cutting method, while broader cutting guidance supports allowing more time.
Rooting hormone can be used as an optional aid, especially on a semi-ripe cutting, but it does not replace a viable node, a clean wound, or the right moisture level. Follow the product label, keep powder out of the air, and never dip a fresh cutting directly into the original container.
Confirm roots and pot up
Rubber plant cuttings dislike repeated tugging. After several weeks, hold the stem close to the medium and give it a tiny upward test. Gentle resistance suggests roots are gripping the mix; a new bud or fresh leaf is another encouraging sign. If it slides out freely but remains green and firm, reset it and give it more time.
Pot up when the cutting is anchored and has either visible new growth or a modest network of roots. For a water-rooted cutting, wait until it has several roots around 1–2 inches long. For a soil-rooted cutting, you do not need to excavate the entire root ball; disturbing a small cluster to satisfy curiosity can undo the progress you are trying to measure.
Move the rooted cutting to a small pot only one size larger than its root system, using a well-draining houseplant mix. Keep the original depth, water thoroughly once, and return it to bright indirect light. If it was covered, open the bag for progressively longer periods over about a week so the leaves can adjust.
Wait for clear new growth before feeding. Then use a balanced houseplant fertilizer at the label’s diluted rate, and avoid fertilizing a stressed, recently potted, or rootless cutting. A small plant that is quietly making roots is progressing even if its top does not change for a while.
Diagnose wilt, rot, and stalled growth
Most failed rubber plant cuttings fail because the balance between leaf water loss, humidity, and root-zone oxygen was lost. Match the response to the symptom instead of adding more water to every problem.
| What you see | Likely cause | What to do |
|---|---|---|
| Leaves droop but the stem is firm | Too much leaf area, direct sun, heat, or low humidity before roots formed | Move to bright indirect light, reduce one large leaf if needed, and use a vented humidity cover |
| The base is black, soft, or sour-smelling | Waterlogged medium, a damaged wound, cold conditions, or stagnant air | Remove the cutting; if firm tissue remains above the damage, recut with a clean blade and restart in fresh mix; discard a stem that is soft well above the base |
| No roots after 6–8 weeks but the stem is green | Low light, cool conditions, a buried section without a viable node, or naturally slow woody/variegated growth | Confirm the node and conditions, then wait if the stem is firm; restart during active growth if it is declining |
| Water turns cloudy or the submerged stem softens | Stale water or too much stem below the waterline | Refresh the jar, rinse the cutting, and remove any soft tissue; soil propagation may be the better next attempt |
| Latex keeps appearing at the cut | Normal sap flow from a fresh Ficus wound | Blot or briefly rinse it, protect your skin, and avoid repeatedly cutting the base |
| A leaf yellows but the stem is firm | Stress, natural shedding, or a leaf area the cutting cannot support | Remove the failing leaf if it is decaying, keep the node and remaining leaf clean, and review light and moisture |
Wilt in wet soil deserves special attention. A rootless stem can wilt because its leaves are losing water, while the wet mix simultaneously prevents oxygen from reaching the base. More watering makes that combination worse. Reduce the leaf load, improve the cover and light, and wait for the mix to begin drying before watering again.
If rot is limited to the very base, a clean recut back to firm, pale tissue can sometimes save the cutting. Only attempt that when there is still a viable node above the new cut and enough stem to plant; do not keep shortening a stem into soft or discolored tissue. Wash the pot and replace the medium before restarting.
Use air layering for tall or woody plants
Air layering is the best backup when a rubber plant has a tall bare trunk, a thick upper branch, or a shape you do not want to sacrifice. It is still propagation from stem tissue, but the new root zone is created on the branch before you sever it. The parent continues supplying the branch while the wound develops roots.
Choose a vigorous section 10–18 inches from the shoot tip, ideally between nodes and away from damage. Have gloves, damp squeezed-out sphagnum moss, clear plastic wrap, ties or tape, a sharp blade, and a pot ready. Work during active growth when the plant is hydrated but not waterlogged.
- Remove a leaf around the selected section if necessary so the work area is visible.
- Make two ring cuts around the stem about 1–1.5 inches apart, cutting through the bark to the woody center.
- Connect the rings with one lengthwise cut, peel away the strip of bark, and lightly scrape the exposed surface so a narrow cambium bridge is not left to reconnect.
- Wait for the strongest latex flow to slow, then apply rooting hormone to the exposed area only if you choose to use it.
- Pack the wound with damp—not dripping—sphagnum moss and wrap it in clear plastic. Tie both ends firmly enough to hold moisture but leave the stem supported.
- Check the wrap every few days. The moss should stay evenly damp, and the plastic should not fill with standing water or hide a spreading dark, soft wound.
- Leave the branch attached until the wrap contains a useful root mass, then cut below the rooted section and pot it with the roots and moss intact or with only loose moss removed.
Air layering timelines vary more than stem-cutting timelines. Gardeners Path’s rubber-tree guide and the Better Homes & Gardens method describe visible roots sooner, but the RHS gives about a year as a possible rooting time for rubber-plant air layers. Inspect the root mass rather than severing on a fixed date.
When roots have filled several inches of moss, cut the stem just below the wrap with a clean blade. Pot the new root ball in a small draining pot, keep it in bright indirect light, and maintain moderate humidity for the first week. Steady moisture is more useful than heavy feeding or repeated repositioning.
Conclusion
For the most predictable rubber plant propagation from cuttings, take a healthy stem with a clear node, cut just below it, remove the lower leaves, manage the latex, and root the piece in a damp but airy medium. Bright indirect light, warmth, and a loose humidity cover support the cutting while it is rootless; saturated soil, direct sun, and constant handling do not.
Use water only as a monitored experiment, and choose air layering when preserving a tall or woody parent branch matters more than speed. Once the cutting resists a gentle lift and begins new growth, pot it up gradually and let the young Ficus elastica establish before asking it to grow quickly.



