How to Grow Potatoes in a Bucket
Set up a bucket potato garden with the right volume, drainage, mix, spacing, and care schedule—and know when to harvest a small or mature crop.

A bucket can grow a real potato crop, but a standard five-gallon pail is a small growing system, not a shortcut to a huge harvest. It works best when you plant sparingly, use a loose mix with open drainage, and keep the root zone evenly moist through warm, windy weather. For a first try, use one healthy seed potato in a clean five-gallon bucket; choose a larger container if you want to grow more plants or make watering less demanding.
Potatoes (Solanum tuberosum) form tubers on underground stems. They need darkness around those developing tubers, enough foliage to supply energy, and a consistent root environment; the bucket gives you control over soil and harvest access but also limits water, nutrients, and room. The decisions below are designed around that trade-off.
Can you grow potatoes in a bucket?
Yes. Potatoes can grow in buckets, grow bags, and other deep containers if the container drains freely and holds enough mix for roots and tubers. A bucket also makes it easier to empty the crop onto a tarp than to search through a garden bed, and you can move it if a cold snap or an unusually hot patch threatens the plant.
That convenience comes with a ceiling. One bucket will not match a well-managed row for total yield, and a small volume dries and heats faster than garden soil. Treat a bucket as a manageable crop for a balcony, patio, or experiment—not as a dependable way to supply a household with potatoes.
Choose a bucket size that leaves room for tubers
A deep container matters more than a tall, narrow one. A food-safe five-gallon bucket can support one potato plant with enough soil to start and hill, while a 10-gallon tub gives more room for a second plant and a larger moisture reserve. Wider containers are easier to manage because tubers have lateral space and the surface does not dry as quickly around a single crowded stem.
Do not assume the “two plants per five gallons” rule guarantees a better harvest. Two plants may fit physically, but they compete for water, nutrients, and light; if they do produce, their tubers are more likely to be small. Use one seed potato in a standard pail when reliability and size matter, then experiment with two only if the bucket is broad, the mix remains moist, and you are content with smaller potatoes.
How many seed potatoes fit in a five-gallon bucket?
Start with one seed potato or one seed piece per five-gallon bucket. That conservative density makes hilling and moisture control simpler and gives the plant the best chance to use the limited growing volume. In a larger, wider container, space seed pieces about 8 to 10 inches apart and allow enough surface room to cover stems without burying neighboring growth.
The exact tuber count and weight cannot be promised from container size alone. Variety, seed-piece health, sunlight, temperature, water consistency, and the length of the growing season all affect yield, so use the first bucket to learn how your site performs rather than planning meals around a fixed pounds-per-pail estimate.
Pick a variety and healthy seed potatoes
Look for early or midseason varieties if your warm season is short or you want to harvest before summer heat. Small- to medium-sized tubers and fingerling types are often easier to manage in containers than a long-season russet that needs more time and space to size up. A potato sold for planting as “certified seed” is the most dependable starting point because it is produced for propagation and inspected for quality; grocery potatoes may be treated to delay sprouting or may carry disease, so they are an uncertain substitute.
Choose firm seed potatoes without soft spots, shriveling, or active rot. If a large tuber must be cut, make pieces that each have at least one or two strong eyes and enough flesh to support the sprout; let the cut surface dry for a day or two in a cool, airy place before planting. Whole small seed potatoes avoid the cut-surface rot risk and usually make a clean first trial.
If you want a head start, “chit” seed potatoes by setting them in bright indirect light in a cool room until short, sturdy sprouts appear. Long, pale shoots are fragile and snap easily, so do not keep them in darkness or warm storage for weeks. Chitting is optional; planting a healthy dormant seed potato can still produce a crop.
Prepare a clean bucket with real drainage
Use an unused food-grade bucket or a container with a clearly known history. Do not grow food in a pail that held paint, solvents, pesticides, automotive fluids, or an unknown product, even if you scrub it; residues can remain in scratches and seams. If the container once held food, wash it with hot soapy water, rinse thoroughly, and let it dry before adding mix.
Drainage holes at the bottom are essential because roots and tubers need air as well as water. Penn State Extension advises that containers need bottom holes so excess water can escape, and that a soilless mix is preferable to dense garden soil in pots (Penn State Extension). Set the bucket on a stable, slightly raised surface so holes are not blocked by a flat patio; a few small spacers under the base can help runoff leave.
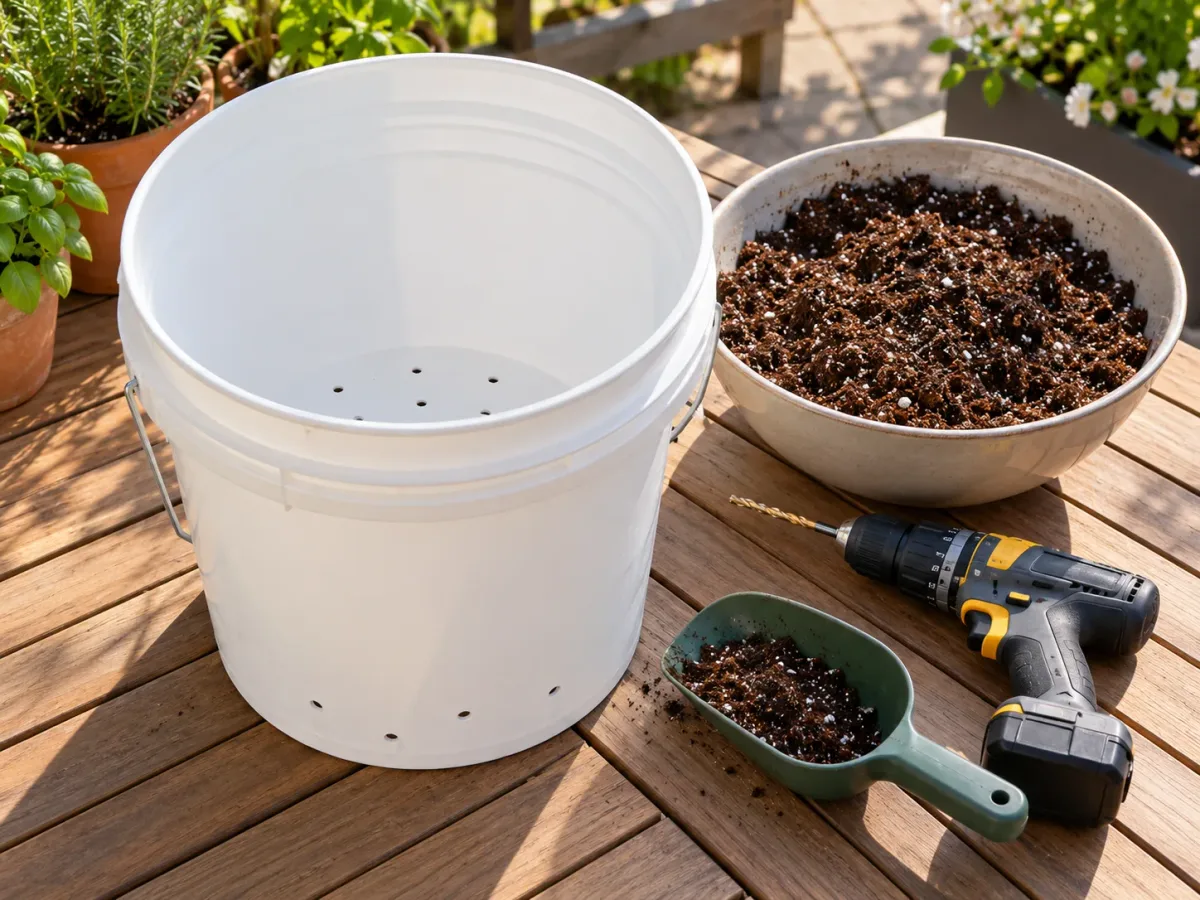
How to make drainage holes without weakening the pail
Drill several evenly spaced holes across the base using a bit appropriate for the plastic, leaving a rim of intact material around the edge. The goal is distributed drainage, not one large opening that cracks the bottom under the weight of wet mix. Remove plastic shavings, check that each hole is open, and place a small piece of mesh over the openings if mix escapes; do not line the bottom with gravel.
A gravel layer does not make a container drain better. It reduces the space available to roots and can leave a saturated zone above the material boundary, so keep the bottom open and use a mix that drains through the holes. If the bucket sits on a deck, put a saucer beneath it only if you empty standing water after each irrigation.
Choose a loose mix and calculate how much to buy
Do not fill the bucket with native garden soil. In a container, heavy soil compacts and drains slowly; a soilless potting mix containing materials such as coir or peat, bark, and perlite or vermiculite gives roots both air and water storage. Penn State Extension describes this kind of mix as lighter and better suited to container drainage than straight garden soil (Penn State Extension).
A modest amount of finished compost can improve nutrient and moisture-holding capacity, but do not turn the bucket into a dense compost bin. A practical blend is a quality potting mix with roughly 10 to 20 percent finished compost by volume; if the potting mix already contains compost and fertilizer, add less. Avoid fresh manure and large doses of high-nitrogen fertilizer, which can push leafy growth at the expense of tuber development.
A five-gallon bucket will not hold five gallons of mix once you leave space to plant and hill. Start with about 3 to 4 inches of mix at the bottom, place the seed piece, then cover it with another 3 to 4 inches. Keep extra mix nearby for hilling as the plant grows, and do not fill to the rim at planting.
Plant at the right time for your climate
Potatoes are cool-season crops, but new shoots can be damaged by frost. Plant when the soil is workable and no longer waterlogged, then protect or move the bucket if a hard freeze is forecast for emerged foliage. The advantage of a container is mobility; the limitation is that a full wet bucket is heavy, so decide on a sheltered, sunny location before the plant is tall.
In regions with hot summers, plant early enough for the crop to bulk before sustained heat, or choose a fall planting window where the local season permits. Do not blindly follow a calendar date from another state: last frost, soil warmth, day length, and the onset of summer heat vary. Colorado State Extension notes that container vegetables demand more regular water and nutrients because roots cannot spread into surrounding soil, while full-sun exposure supports productive warm-season crops (CSU Extension).
Plant the bucket in layers
Use this sequence for one standard five-gallon bucket:
- Moisten the potting mix before planting so it is damp throughout but not dripping.
- Add 3 to 4 inches of mix to the bucket bottom.
- Set one seed potato with the strongest eye or sprouts facing up; if using a cut piece, keep the cut surface oriented down or to the side.
- Cover it with 3 to 4 inches of mix, water gently until a little drains from the base, and label the variety and planting date.
- Place the bucket where it will receive about six or more hours of direct sun, while avoiding a heat-trapping corner against a dark wall.
Do not water again just because the surface looks lighter after planting. Check the mix with a finger or wooden skewer below the surface, because the top can dry while the center remains damp. Once shoots emerge, let the plant establish before beginning to add more mix.
Hill gradually to keep tubers covered
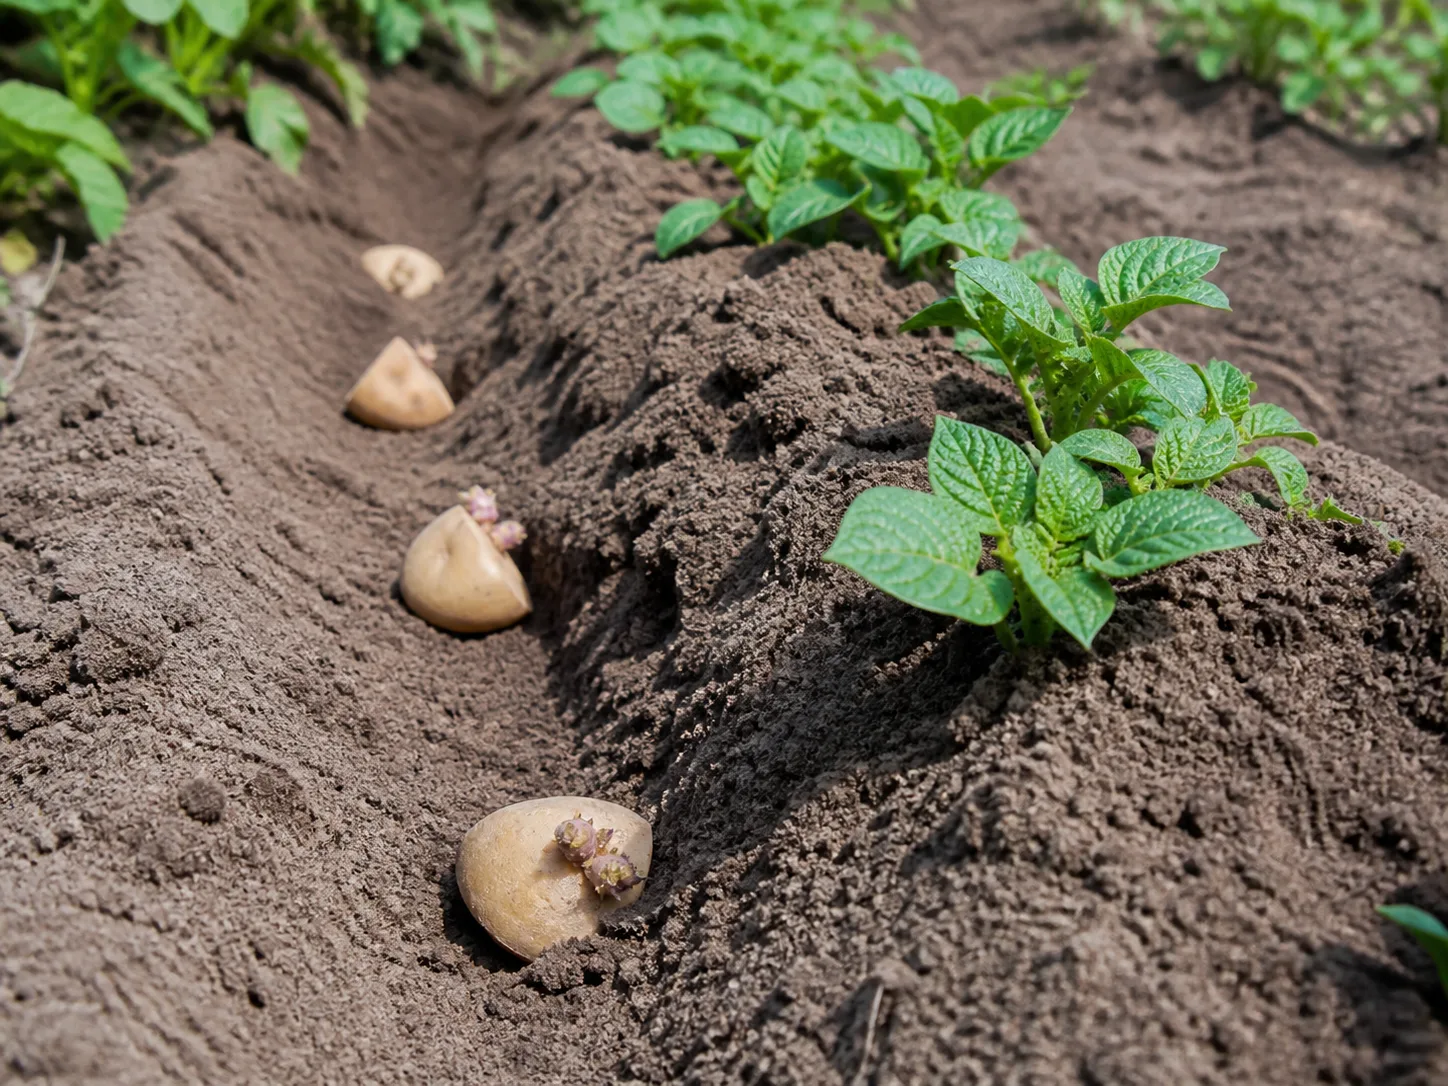
Hilling means adding mix around the lower stems as the plant grows so developing tubers stay covered and protected from light. When shoots are roughly 6 to 8 inches tall, add 2 to 3 inches of mix around them, leaving the leafy tops exposed. Repeat once or twice as the plant grows and the container still has room; stop when the soil is a few inches below the rim or the plant begins to flower and set its crop.
Do not bury the whole plant in one heavy fill. Covering too much foliage at once reduces the leaf area that powers growth, and packed wet mix can smother stems. Hilling protects tubers from light and can provide additional underground stem area, but it does not guarantee more potatoes; the seed piece and the plant’s growing conditions still determine how many tubers form. A bucket-specific growing guide from Epic Gardening also recommends staging the fill and hilling as shoots grow, which is easier to manage when you leave headroom from the start.
Give the bucket sun without overheating it
Choose a spot with at least six hours of direct sun; more morning sun is useful, but a dark surface that bakes in afternoon heat can warm the root zone. CSU Extension’s container guide emphasizes that vegetables need reliable light, water, and nutrients, and that container roots have less buffering capacity than garden-bed roots (CSU Extension). If the pail becomes hot to the touch in afternoon sun, shade the outside of the bucket or move it where it gets bright morning sun and lighter afternoon exposure.
Avoid placing it under a tree, behind a solid railing, or in a wind tunnel that strips moisture from leaves and mix. A few feet of air movement helps foliage dry after rain, but constant strong wind can topple a light bucket and accelerate water loss. Keep the bucket on a firm, level surface and leave enough access to inspect leaves and water without tipping it.
Water by checking the root zone
There is no dependable “water every day” schedule for every bucket. A five-gallon pail may need water daily during a hot, breezy spell and far less often in cool, cloudy weather; rainfall, soil texture, plant size, and the bucket material all change the interval. Penn State Extension recommends keeping container media moist but not waterlogged and watering until water exits the bottom holes, a practical way to confirm the full root zone has been reached (Penn State Extension).
Check the mix 1 to 2 inches below the surface. If it feels dry at that depth, water slowly at the base until runoff begins, then let the bucket drain completely; if it is damp, wait and check again later. During tuber formation and enlargement, avoid repeated dry-to-flood cycles, which stress roots and can contribute to misshapen or undersized tubers.
As the plant yellows naturally near maturity, reduce watering and let the mix become less wet before harvest. Do not stop water simply because a few lower leaves turn yellow; first check moisture, heat, and the rest of the plant. A yellowing canopy can signal normal aging, but a soggy, sour-smelling bucket or limp leaves in wet mix points to poor drainage or root trouble.
Feed lightly and avoid leafy overgrowth
Potatoes need nutrients to build both foliage and tubers, but more fertilizer is not automatically better. If your potting mix contains a starter charge, wait until the plant is established before adding more; otherwise use a balanced, label-directed vegetable fertilizer at planting or early growth. Container guidance from Penn State recommends slow-release fertilizer at planting and soluble feeding every two to four weeks for vegetables generally, but adjust to the product label and the mix because different formulas vary (Penn State Extension).
Avoid repeatedly applying a high-nitrogen lawn fertilizer or fresh manure. Excess nitrogen can produce lush tops while delaying tuber maturity, a trade-off also noted in practical potato-growing guidance from Homes & Gardens (Homes & Gardens). If foliage is deep green and vigorous but tubers remain small, review light, spacing, heat, and nitrogen before adding another feed.
Prevent pests and read plant symptoms
A bucket does not make potatoes pest-proof. Inspect leaf undersides and stems every few days, especially when nearby potatoes or other nightshades are growing; hand-pick visible beetles and egg clusters, and remove badly damaged leaves into household waste. Keep the foliage dry when watering and space containers so air can move, since prolonged wet leaves and dense growth favor disease problems.
Do not spray a pesticide based on one yellow leaf or an unidentified insect. First identify the pest or disease, then use a product labeled for edible potatoes and follow its label exactly, including harvest intervals. For a small patio crop, regular inspection and removal of a few pests is usually more sensible than routine treatment.
What yellow or wilting leaves can tell you
A few lower leaves yellowing late in the season may simply reflect the plant’s natural decline. Sudden yellowing across the plant, soft stems, or wilting while the mix is wet suggests root stress; a dry, light bucket with leaves drooping in afternoon heat points more toward water shortage. Check the mix before diagnosing from leaf color alone.
Brown or black lesions that spread after warm, wet weather deserve closer attention. Remove affected foliage, avoid wetting leaves, and do not keep a diseased canopy packed against other plants; if you suspect blight, ask a local extension office for diagnosis before saving the tubers for long-term storage. Homes & Gardens’ potato problem guide likewise highlights blight, frost, moisture swings, and green tubers as separate problems with different causes (Homes & Gardens).
Harvest new potatoes or wait for mature skins
You can take a small “new potato” harvest while the plant is still green by gently feeling near the side of the bucket and removing only a few tubers, then replacing the mix. These thin-skinned potatoes taste delicate but bruise easily and do not store well, so cook them soon. Harvesting early sacrifices some size and storage life, so leave the bucket undisturbed if you want a mature crop.
For a main harvest, wait until most foliage has yellowed and died back, then withhold water for several days if the mix is still wet. Flowering can signal that tubers are developing, but it does not prove they are full-size or ready for storage; variety and weather affect timing. When in doubt, test one tuber carefully: a mature potato has a skin that does not rub off with light finger pressure.
Tip the bucket onto a tarp rather than digging with a fork. Sift through the mix by hand and keep tools away from tubers, since punctures and cuts shorten storage life. Separate damaged, green, or soft potatoes for immediate evaluation rather than putting everything into long-term storage together.
Cure and store the harvest safely
If the potatoes are mature and intact, brush off loose dry mix and cure them in a dark, cool, humid but ventilated place for about one to two weeks so minor skin scrapes can toughen. Do not wash before storage; moisture trapped on the skin encourages decay. New potatoes with delicate skins should be eaten promptly rather than cured as if they were fully mature.
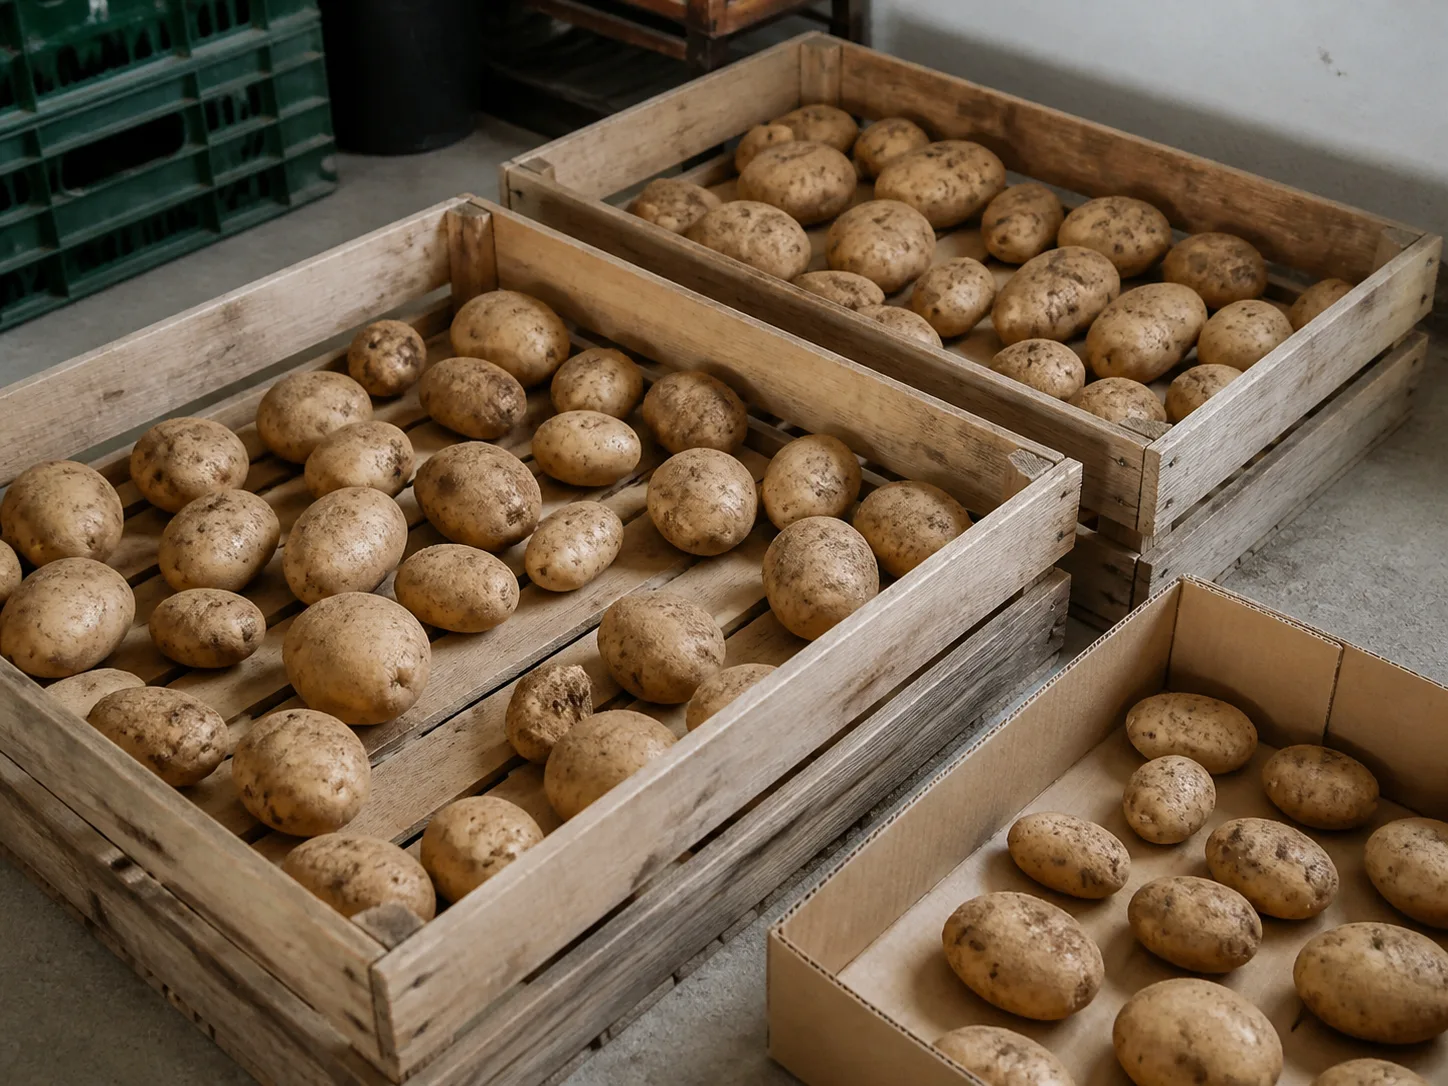
Store sound potatoes in darkness with airflow, away from direct sun and heat. Light can trigger greening and increased glycoalkaloids; the Hong Kong Centre for Food Safety explains that glycoalkaloids occur naturally in potatoes and that prolonged light exposure promotes both green coloration and glycoalkaloid formation (Centre for Food Safety). Discard potatoes that are extensively green, bitter, soft, or heavily sprouted; do not taste-test a suspicious tuber.
After harvest, empty and clean the bucket before reusing it. Do not automatically reuse the same potting mix for another potato crop, especially if foliage showed disease; rotate crops and refresh the medium so the next planting does not inherit a concentrated disease or pest problem.
Fix common bucket-growing failures
The plant is tall but the harvest is small. Check whether the bucket held too many seed pieces, whether it received enough direct sun, and whether high-nitrogen fertilizer drove leafy growth. A small container, early heat, and a short season can also limit tuber sizing; no late-season feed can replace lost growing time.
The mix dries by midday. The bucket may be too small, dark, exposed to wind, or resting on a heat-reflecting surface. Grouping containers, adding a thin layer of clean straw, or moving the pail out of intense afternoon heat can slow evaporation, but mulch should not keep a cool, rainy bucket soggy.
The plant wilts even though you watered. Check whether the water is running straight down the sides while the center stays dry, or whether the holes are blocked and the root zone is saturated. Re-wet hydrophobic mix slowly in two passes; if it smells sour and remains wet, stop watering and improve drainage rather than adding more.
Tubers are green. They were exposed to light because the soil level fell, the bucket was not hilled, or tubers formed near the surface. Keep future tubers covered, and do not eat green or bitter potatoes as though cooking will make them safe.
Shoots are black after a cold night. Frost can kill tender foliage even when the underground seed piece survives. Move the bucket to shelter before the next frost if it is small enough to move safely, then wait to see whether new shoots appear instead of immediately discarding the container.
Conclusion
A productive potato bucket starts with one sound seed piece, a food-safe container, open drainage, and loose mix—not a crowded pail or a promise of an enormous crop. Keep the bucket sunny but watch for overheating, water when the root zone begins to dry, and add mix gradually so tubers stay out of the light. Harvest new potatoes for immediate eating or wait for the foliage to die back and skins to firm for a more storable crop; either way, the first bucket teaches you how your climate and patio conditions affect the next one.