How to Get Rid of Mice in Your Attic Safely: Step by Step
Learn how to get rid of mice in your attic: inspect safely, set traps, seal entry gaps, disinfect droppings, and replace insulation only when it is contaminated.
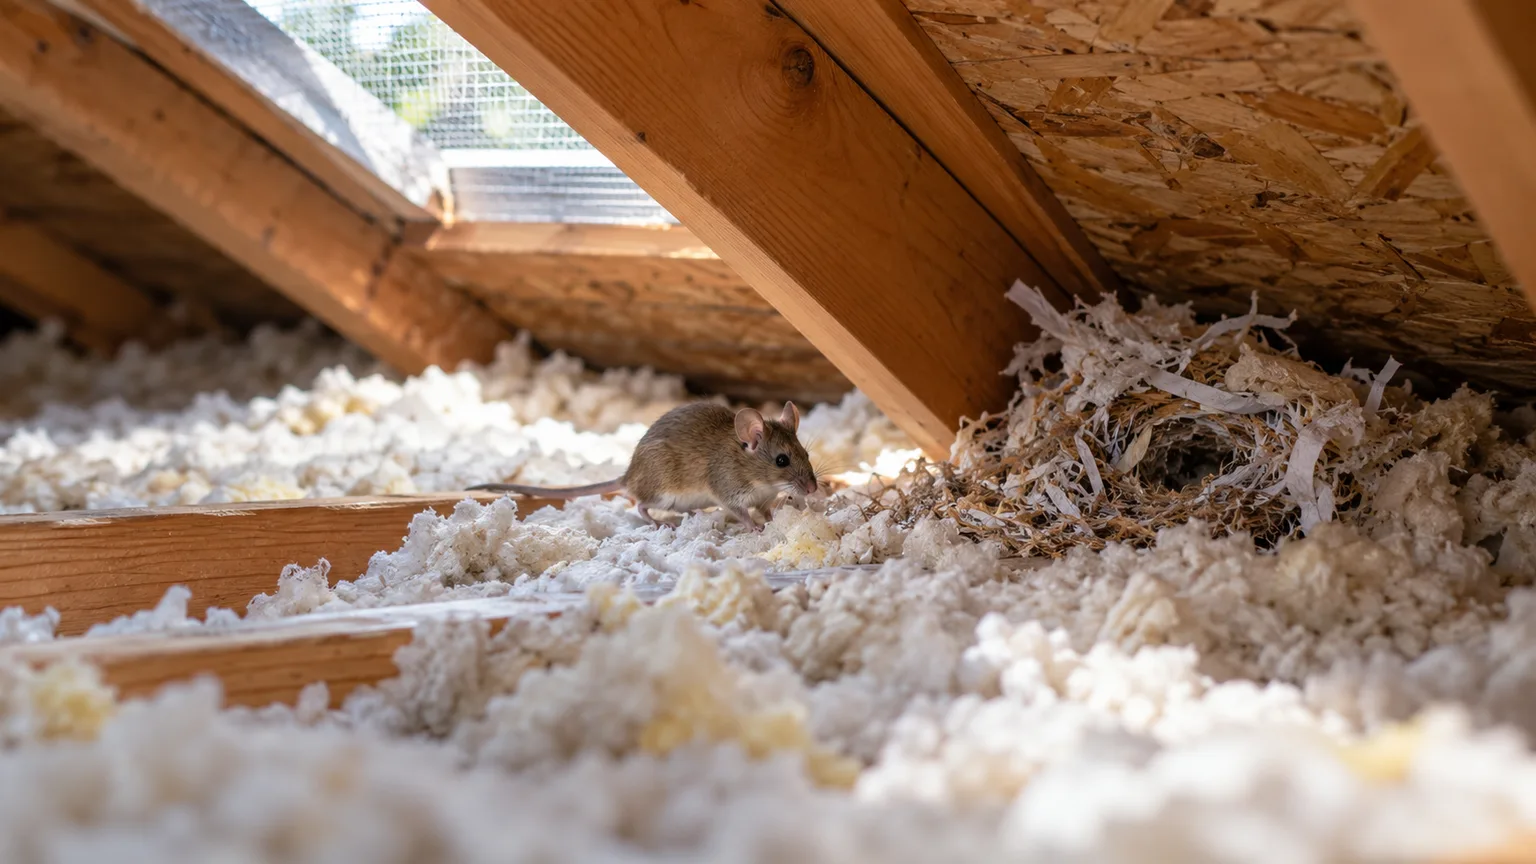
The reliable way to get rid of mice in an attic is to confirm the animal, trap mice already inside, close the openings they use, and clean contamination without stirring dust. Doing only one part leaves a gap: traps do not stop new mice from entering, and sealing the roofline does not remove mice that are already nesting above the ceiling.
Start with fresh signs rather than noise alone. Scratching can come from rodents, but branches, squirrels, birds, and other animals can make sounds in the roof or walls too. If you find droppings, gnaw marks, or nesting material, map those signs and the likely route before moving anything.
The safest order of operations
Think of attic mouse control as a short cycle, not a one-time product purchase: identify, trap, exclude, clean, then monitor. Penn State Extension’s household mouse IPM guide describes this kind of integrated pest management as a way to solve the conditions that support a pest while limiting unnecessary pesticide use.
- Confirm that the signs are from mice and note where activity is fresh.
- Set appropriately sized snap traps on stable runways, away from children and pets.
- Close confirmed openings with chew-resistant material while continuing to trap any mice still inside.
- After control, disinfect droppings and remove contaminated nesting material safely.
- Recheck the same routes and repairs for new signs.
Keep the sequence visible while you work. Write down the date, the location of each fresh sign, the trap locations, and the repairs you make. That record prevents a common mistake: treating old droppings as proof that a mouse is still present or assuming that one quiet night means the problem is over. It also gives a pest professional a useful starting point if the evidence keeps appearing.
Do not block every hole the moment you see it. A gap may be a route into the house, an attic vent that must stay open, or a passage used by a bat or other wildlife; trapping and exclusion need to fit what the opening actually is. If you cannot tell, pause and get a pest professional or wildlife specialist to identify the animal.
Signs of mice in your attic
The strongest evidence is a combination of small, pointed droppings, gnawed edges, shredded nesting material, or repeated activity along one route. Mice may use insulation, paper, fabric, and cardboard for a loose nest, then travel beside rafters, walls, pipes, or stored items. Fresh droppings near a gap or along a runway are more useful than a single distant sound because they connect the animal to a location.
Scratching or scurrying at night can support the diagnosis, but it is not enough by itself. Check the exterior for a loose branch tapping the roof, and consider whether daytime movement, heavier thumps, chirping, or fluttering might point to squirrels, birds, or bats instead. Do not disturb a suspected bat roost; local wildlife rules and safe handling differ from mouse control.
Other clues include a musty odor, greasy rub marks along a beam or wall, gnawed packaging, small holes near stored belongings, and damaged insulation. Chewed wires, a tripped circuit, or a new HVAC problem need prompt attention even if you have not seen a mouse. Stop working near damaged wiring and call an electrician or qualified technician.
Look at the pattern, not just the list. Several signs clustered beside a wall, pipe, or roofline gap suggest a route worth checking; one old dropping in an unused corner is less conclusive. Photograph the area before moving boxes or insulation, and compare those images with a later check. Avoid touching or sweeping evidence merely to decide whether it is fresh. If you need to investigate a heavily soiled area, let a trained professional assess it.
Mouse or rat? Confirm what you are dealing with
House mice are much smaller than adult rats, with large ears, a pointed snout, and a long tail; their droppings are usually small and pointed. Rats leave larger, more blunt-ended droppings and often make broader gnaw marks, but age, species, and the location of the evidence can blur those clues. Penn State Extension gives useful size comparisons, while also recommending identification before choosing a control method.
Do not use one dropping or one sound as a perfect identification test. If droppings look substantially larger than a grain of rice, the gnawing is heavy, or a trap sized for mice is not working, switch from guessing to an inspection by a professional. Rats, squirrels, and other animals may need different traps, exclusion details, or wildlife handling.
Inspect entry points without creating a new hazard
Begin outdoors at ground level with a flashlight or binoculars. Trace the route upward from the foundation to siding, utility lines, eaves, soffits, fascia, gable vents, and roof openings. Mice can use openings around a quarter inch wide, so a gap that seems too small to matter may still deserve a closer look.
From inside, inspect the attic hatch, corners, stored boxes, pipe and cable penetrations, and the edges where the roof meets the exterior walls. Look for droppings, shredded insulation, rub marks, gnawed mesh, and paths through dust. A simple sketch or a few photos helps you connect interior signs with exterior gaps later; it also lets you compare the same locations after cleanup.
Keep the inspection controlled. Use a stable ladder, a headlamp, long sleeves, and shoes with grip; step only on joists or installed walk boards, never on drywall hidden under insulation. Do not move dusty insulation, handle droppings, reach into dark voids, or touch exposed wires. If the attic has widespread rodent waste, a strong odor, poor access, or signs near ductwork, leave the material undisturbed and ask a professional to assess it.
On the outside, pay special attention to places where two building materials meet: the edge of a vent frame, the joint between siding and trim, and the point where a cable or pipe passes through a wall or roof. On the inside, compare those locations with the dust paths and rub marks you can see without disturbing material. A mouse may use more than one opening, so inspect the whole roofline rather than repairing the first gap you find and stopping there. Do not climb onto a roof or lean from a ladder to reach a high vent; take a photo from the ground and arrange safe access instead.
Seal access gaps without blocking attic ventilation
Exclusion is what prevents the next mouse from using the same route. Penn State Extension recommends rodent-resistant material such as hardware cloth, copper mesh, and sealant; a recent attic-prevention feature in Real Simple also highlights checking roof vents, utility penetrations, and branches that reach the roofline.
Repair the entry route, not the ventilation system. Cover damaged screens at gable or roof vents with durable corrosion-resistant mesh sized to keep rodents out while preserving the vent’s intended airflow. Do not pack soffit openings, ridge vents, or other intake and exhaust areas with foam, insulation, or loose mesh. If you cannot tell whether an opening is a vent, flashing gap, or construction detail, have a roofer or pest professional identify it before sealing.
If mice are already inside, set traps before or while you close confirmed exterior gaps, and keep checking after the repair. That prevents an exclusion-only job from leaving animals behind in an inaccessible part of the attic. Do not seal an opening that may contain an animal or connect to a bat roost; get help with the order of work.
Some openings serve more than one purpose. A gap around a plumbing line may need a patch, while a screened roof vent needs a repair that preserves its designed opening. Keep insulation away from soffit intake paths and other ventilation channels, and do not cover a combustion-air opening or chimney clearance with mesh or foam. If the repair affects ventilation, fire safety, roofing, or wiring, have a qualified contractor specify the right material and installation before you close it.
Choose a durable repair for the opening
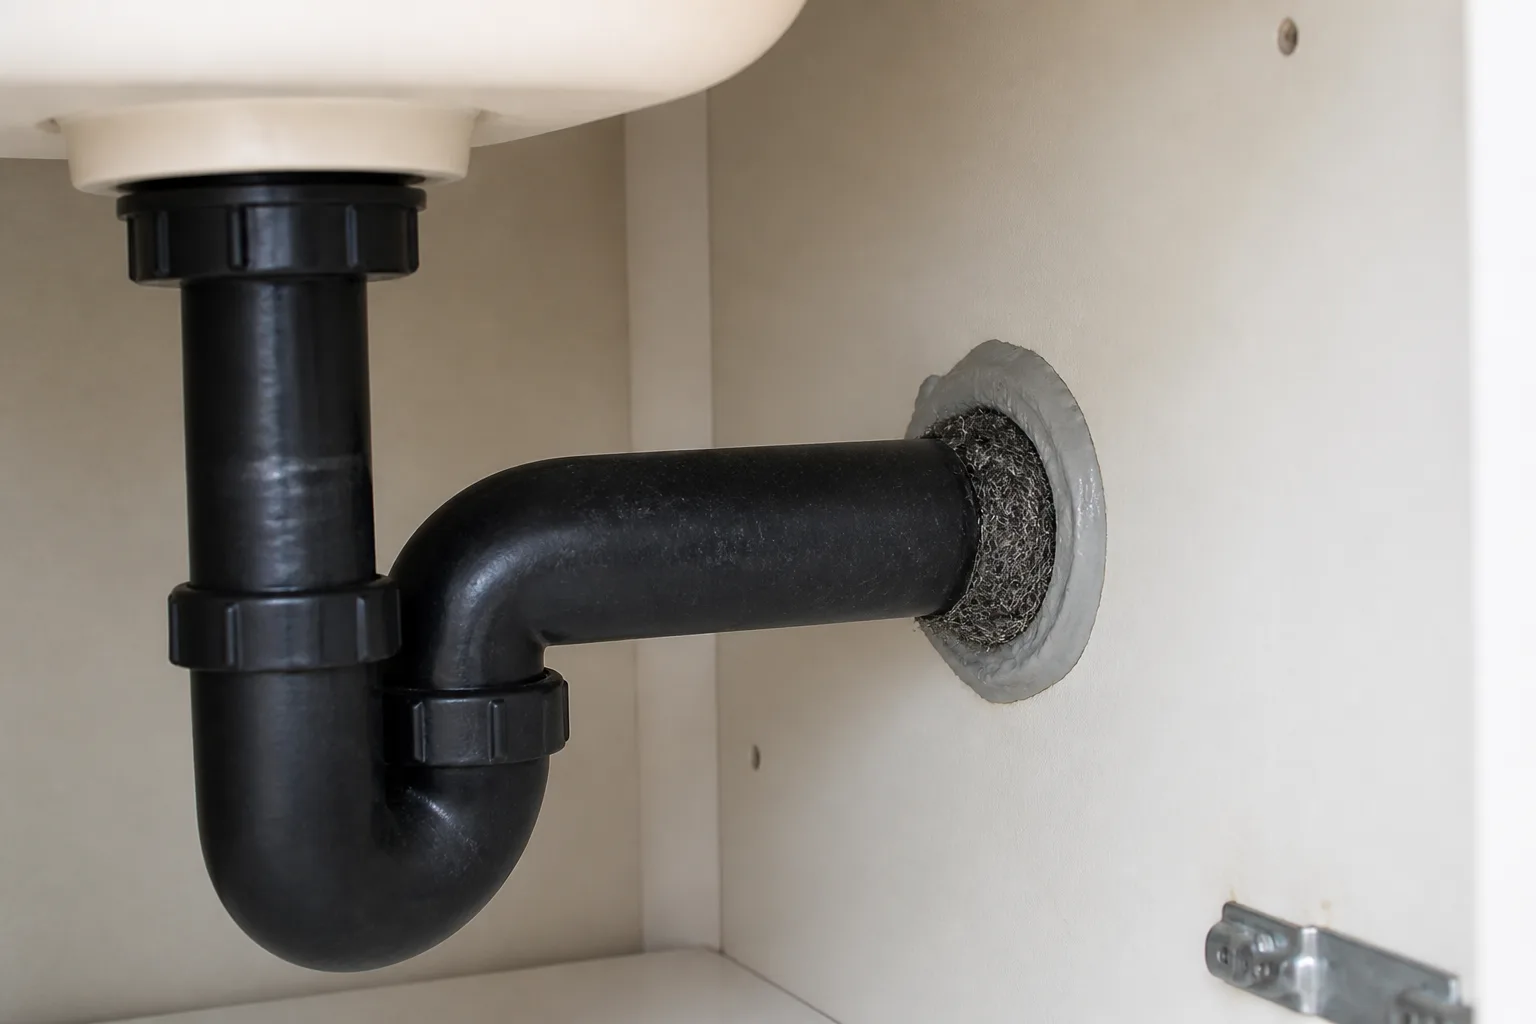
For a small, non-vent gap around pipe or cable, pack in a chew-resistant barrier and secure it with a suitable sealant or patch. For a larger hole, fasten galvanized hardware cloth or metal flashing over the opening; a mesh opening of about 1/4 inch is a common starting point for rodent exclusion. The patch should be tight around the edges, anchored to sound material, and difficult to pull loose.
Spray foam alone is not a rodent barrier. It can close drafts, but mice may chew through it; if foam is used as part of a repair, pair it with an appropriate metal barrier. Around wiring, chimneys, hot surfaces, and fire-rated assemblies, use materials approved for that location and follow building requirements. Do not stuff metal mesh into electrical penetrations or cover a wire you cannot inspect—ask an electrician or contractor to make that repair.
Set mouse traps in active runways
For a small, confirmed mouse problem, correctly sized snap traps are a practical first choice because you can see whether they catch anything and remove the animal without leaving bait in a wall. Penn State Extension favors snap traps for household use and cautions against glue boards, which can leave a live animal to be handled. If children, pets, or frequent attic access make traps hard to secure, use a tamper-resistant setup or hire a professional rather than leaving exposed traps in a walkway.
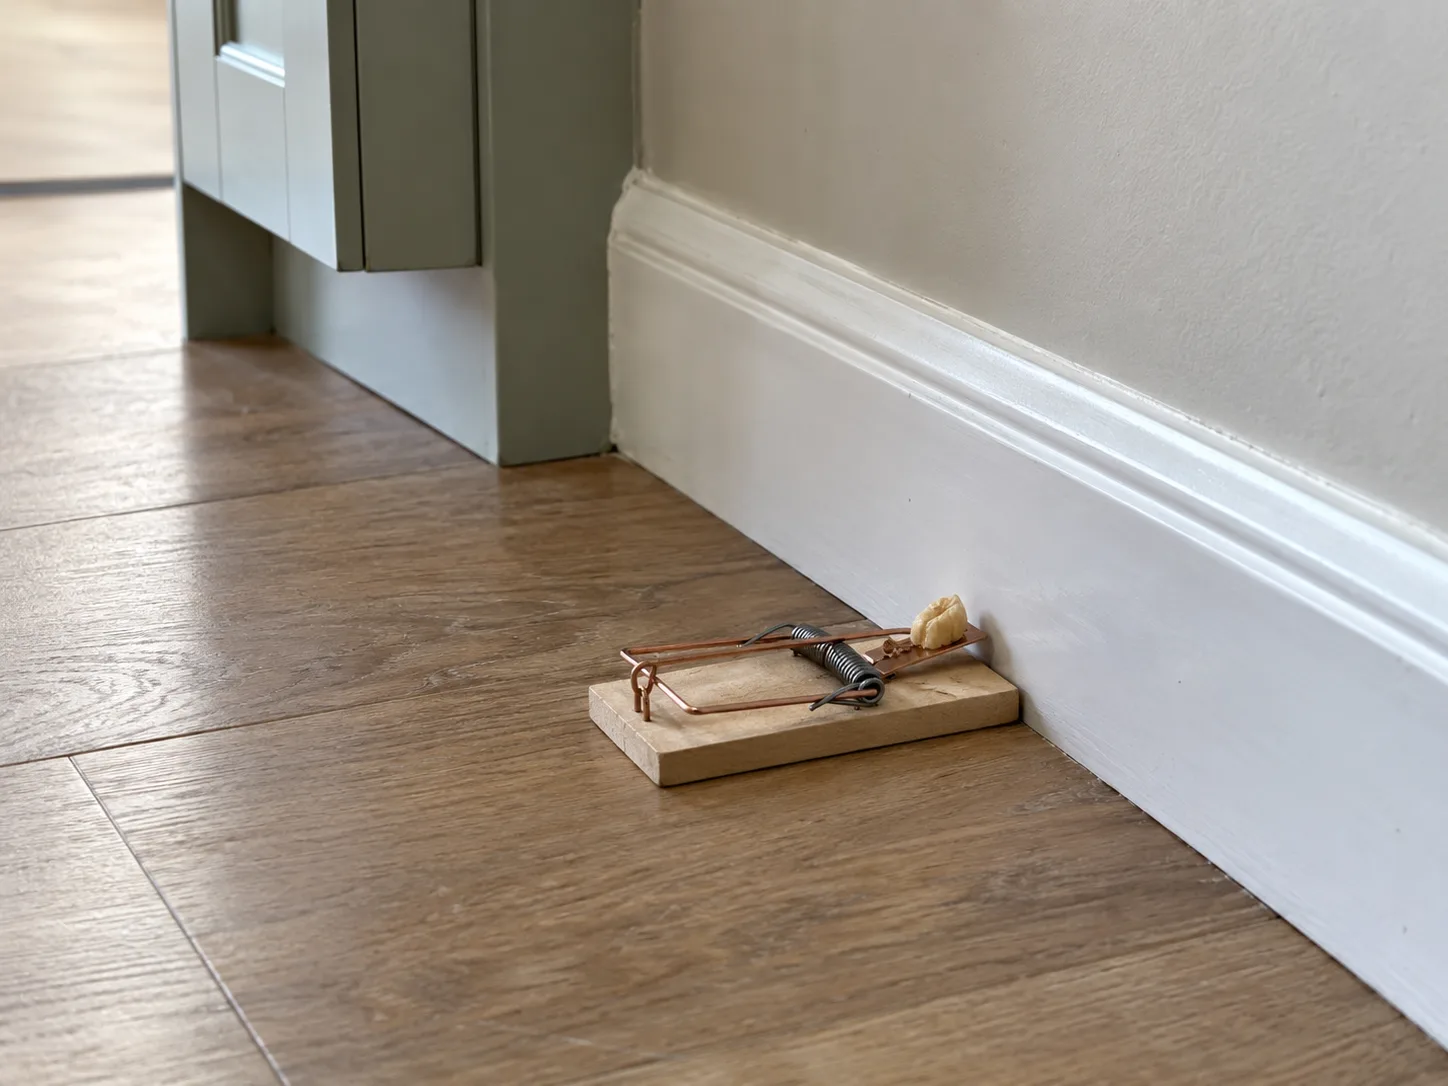
Use the trap maker’s instructions and bait it lightly; a large blob of bait can let a mouse feed without triggering the mechanism. Place several traps where you found fresh droppings or gnawing instead of spacing them randomly across the attic. The goal is to intercept the route a mouse already uses, not to lure it from every corner of the house.
Place traps where mice already travel
Set traps on a stable board, joist, or other firm surface beside a wall or beam, with the trigger end at the route mice follow. Keep the trap out of the open center of the attic, where mice are less likely to cross it, and do not balance it on loose insulation. If you have a pet or child who could reach the attic, keep the hatch locked and use a covered or secured trap approved for that situation.
Check traps at least daily and handle catches with gloves. Keep a simple log of the location, date, and result; that tells you whether activity is concentrated near one opening or spread across the attic. Do not place baited traps outdoors or where they can catch wildlife, and do not leave a catch to decompose in warm insulation.
Before setting a trap, read its instructions and make sure the trigger moves freely. Put it where you can reach it for daily checks without stepping across loose insulation or stretching over a hazard. If the only evidence is on top of unstable or contaminated insulation, do not make a makeshift walkway or place traps where you cannot retrieve them safely. A pest professional can set and monitor devices without asking you to work in an unsafe part of the attic.
If traps stay empty, recheck the plan
An empty trap does not prove the attic is clear. First ask whether the signs are fresh, whether the trap is stable and working, and whether it sits on a mouse route rather than beside one. Move a trap only after comparing it with the droppings or rub marks you mapped, and use a small amount of fresh bait.
If new droppings continue but traps remain untouched for several nights, reconsider the animal identification and entry route. A larger rodent can ignore a mouse-sized trap, while a squirrel or bat requires a different response. If you keep finding fresh signs, hear activity in multiple areas, or cannot set traps without disturbing contaminated insulation, arrange a professional inspection instead of adding more devices at random.
Remove food and shelter around the house
An attic can provide warmth and nesting material even when it contains no food. Mice may leave through wall voids to reach a kitchen, garage, pet-food container, birdseed, trash, or a leaking pipe, so reduce the resources they can find in the rest of the home. Store dry goods, pet food, and seed in rigid containers with tight lids; close trash and compost containers, clean spilled feed, and repair leaks that provide water.
Outside, move firewood and clutter away from the siding, keep dense vegetation from touching the house, and trim branches that meet the roof where it is safe to do so. The tree-to-roof route is easy to overlook in an attic inspection. The Royal Horticultural Society also notes that mice and voles are part of garden wildlife, so focus on excluding animals from the building and reducing attractants rather than scattering poison across a yard where other animals may encounter it.
Clean droppings, nests, and carcasses safely
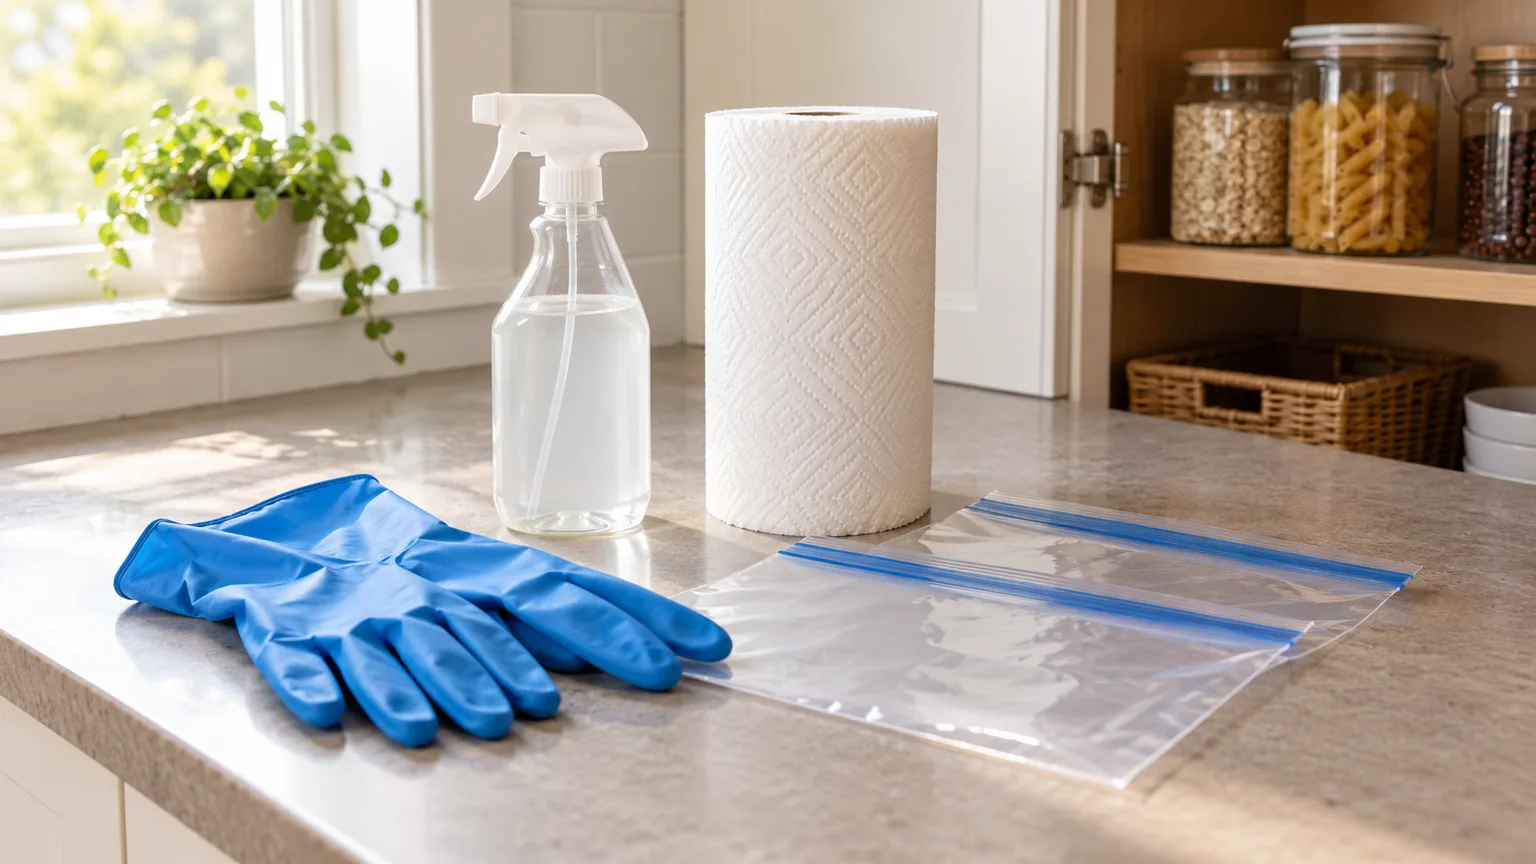
Do not sweep or vacuum dry droppings, urine, or nesting material. Disturbing contaminated dust can put particles into the air; the CDC’s rodent cleanup guidance advises wetting rodent waste with disinfectant first, then wiping it up. In a closed attic, open the access and any safe windows or vents, leave the space to air for 30 minutes, and wear rubber or plastic gloves before cleaning a small, localized area.
Use an EPA-registered disinfectant according to its label, or follow the CDC’s current bleach-solution directions. Spray the droppings until thoroughly wet, wait five minutes or the label’s stated contact time, pick them up with paper towels, and place the waste in a covered trash container. Disinfect the surface afterward, wash gloved hands before removing gloves, then wash bare hands with soap and water. Never mix bleach with ammonia or another cleaner.
The CDC recommends extra precautions for heavy infestations, including appropriate respiratory protection and protective clothing. That is a good reason to stop rather than improvise with a household dust mask when droppings, nests, or odor cover a large area. The CDC also advises contacting a professional if rodents have accessed heating or cooling ducts. Keep HVAC equipment off until it has been assessed if you find waste or nesting in or beside ductwork.
Bag used paper towels and small amounts of waste securely, then follow local household-waste rules for disposal. Remove gloves carefully so the contaminated outside does not touch bare skin, and clean reusable tools according to their labels. Do not take contaminated insulation or nesting material through living spaces uncovered; a contractor can plan containment and removal when more than a small, localized patch is involved. Keep children and pets away from the work area until surfaces are clean and dry.
Do you need to replace attic insulation?
Not automatically. A few droppings on top of undisturbed insulation do not mean every section of the attic needs to be removed. The decision depends on whether urine, droppings, or a nest has contaminated the material, how far the activity spread, and whether the insulation can be removed without sending dust into the home.
The CDC says insulation contaminated with rodent urine or droppings should be bagged for removal. Do not rake, vacuum, or blow contaminated material around; avoid compressing it into the living space. If contamination is widespread, the insulation is loose-fill, the attic is difficult to ventilate, or you cannot identify how far it extends, ask an insulation or remediation professional for an assessment and cleanup plan. Clean insulation elsewhere can often remain in place.
Skip scent repellents, glue boards, and casual poison use
Peppermint, dryer sheets, ultrasonic devices, and similar deterrents may make an area smell different, but they do not close a hole or remove a nest. A scent can fade, and a mouse can simply travel by another route; use any repellent only as a supplement if it does not delay trapping or exclusion. Glue boards are not a humane shortcut and can leave a live rodent stuck where you must handle it.
Rodenticide is a pesticide, not a shortcut around inspection. Penn State Extension recommends avoiding rodenticide inside homes because of risks to children and pets and the possibility that rodents die in inaccessible spaces. The National Pesticide Information Center’s rodenticide fact sheet explains that bait can poison pets or wildlife directly, and that animals can also be exposed by eating poisoned rodents. If a licensed professional decides bait is necessary, ask which product is labeled for the site, how it will be secured in a tamper-resistant station, who will inspect it, and how dead rodents will be found and removed. Keep all products in their original packaging and follow the label exactly.
Confirm activity has stopped
After trapping and exclusion, clear old signs safely so they cannot be mistaken for new activity. Photograph or mark the spots before cleanup; then check those same routes and your traps daily at first. New droppings, fresh gnawing, displaced mesh, or another catch means the control plan still needs work, even if you have sealed one obvious hole.
As a practical homeowner checkpoint, look for no new signs during a couple of weeks of regular trap checks and repeat inspections. That is not a universal clearance standard or a promise that mice can never return; it is a way to test whether the repairs are holding. Recheck roof vents and utility penetrations after storms and during seasonal maintenance, and investigate again if scratching or fresh droppings return.
Leave the monitoring points easy to inspect. Do not immediately bury repaired gaps behind stored boxes or replace every old sign before you have photographed and mapped it. Once you have cleaned a localized area safely, a later fresh dropping or new gnaw mark is easier to recognize. If a trap catches another mouse, check the nearby entry points and the condition of the patch rather than assuming the original repair failed everywhere.
Know when to hire a professional
Call a licensed pest-control professional if the species is uncertain, activity persists despite correct trap placement, multiple areas of the home are involved, or you cannot reach an entry point safely. Ask for an inspection that identifies access routes and distinguishes mice from rats or wildlife, plus a written plan for trapping, exclusion, cleanup, and follow-up. A plan that only adds bait without addressing access may leave the cause in place.
Bring in an insulation or remediation specialist for widespread contamination, heavy nests, or insulation that must be removed. Contact an HVAC professional if rodents reached ducts or equipment, and an electrician if wires are chewed or exposed. A roofer can repair vents, flashing, and eaves when ladder work or roof access is unsafe. If the animal may be a bat or another protected wildlife species, use a qualified wildlife-control provider who follows local rules rather than sealing the opening yourself.
Conclusion
To get mice out of an attic and keep them from returning, confirm the signs, trap active mice on safe runways, seal confirmed entry gaps without closing ventilation, and clean waste only after wetting it with disinfectant. Check the same locations again so you catch a missed route before it becomes a second infestation.
Leave widespread contamination, HVAC access, dangerous roof repairs, uncertain wildlife, and damaged wiring to the right professional. The goal is not just a quiet attic tonight; it is a repaired route, a safe cleanup, and no fresh evidence that mice are still using the space.