20 Gardening Hacks That Save Time and Protect Plants
Make seed starting, mulching, and garden maintenance easier with 20 practical gardening hacks—plus the risks that can turn a shortcut into a plant problem.

Good gardening shortcuts do one of three things: prevent a recurring chore, reuse a material that suits the job, or make a small problem easier to spot. The best ones are reversible and easy to inspect. A cover that traps heat, a pot that lets mint escape, or a layer that blocks drainage can create more work than it saves.
Use the ideas below as starting points, not rules for every climate or crop. Check the plant’s needs, the weather, and the material’s condition; then remove the shortcut as soon as it stops helping.
Protect outdoor seed rows with a removable screen and skewer labels
A piece of clean window screen can shield freshly sown seed trays and short outdoor rows from birds that scratch or pick at the surface. Lay the screen over a rigid frame or support it above the soil so it does not press on the seed bed, then weigh down all four sides. Use a mesh fine enough to block birds but not so fine that it traps heat or prevents rain from reaching the mix. Check the bed daily and lift the screen as soon as seedlings emerge or need thinning; tender stems can grow into the mesh.
For a quick label, push a bamboo barbecue skewer into the soil beside each row and attach a cork with a deep hole drilled into it. Write the crop and sowing date on the cork with a weather-resistant marker. A label is most useful when it answers a later question, so include the variety or planting date if you sow more than one batch. Keep corks and skewers above the soil line to avoid losing them during weeding.
Reuse a grow light and clear tote to start seedlings
If a hydroponic unit or adjustable LED grow light is sitting unused, it can serve as a seed-starting station. Use a clean tray with drainage holes and fresh seed-starting mix rather than putting soil directly into a recirculating hydroponic reservoir. Set a timer for a consistent daily light period, follow the fixture maker’s recommended distance, and raise the light as the seedlings grow. A sunny window may supplement the setup, but it often produces one-sided, stretched seedlings if the light is weak or comes from only one direction. Fine Gardening’s practical seed-starting guidance stresses clean containers, drainage, and airflow because persistent wetness and stagnant air invite seedling problems.
A clear storage tote can also act as a temporary outdoor cover for a seed tray. Turn the tote over the tray, secure it against wind, and add ventilation holes near the sides before use. The clear plastic warms quickly in direct sun, so treat it as a cold-night or mild-weather cover, not a sealed greenhouse: prop it open during warm days, check the temperature and moisture, and remove it before seedlings touch the lid. Do not place a closed tote over plants in full sun and leave it unattended.
Make short-lived seed pots from paper tubes
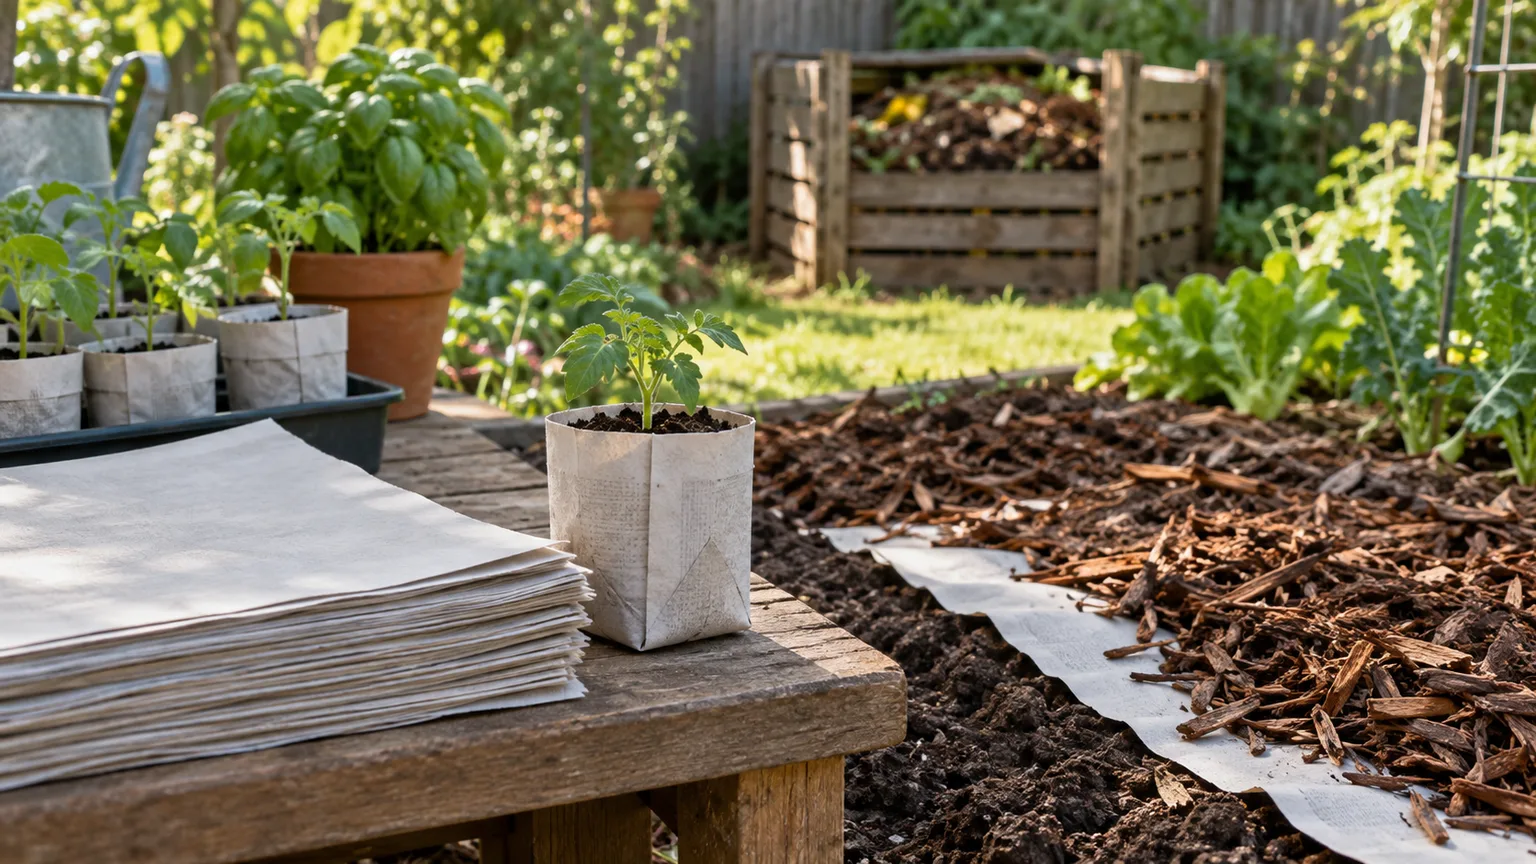
Cut toilet-paper or paper-towel tubes into short sections, stand them together on a waterproof tray, and fill with pre-moistened seed-starting mix. These inexpensive cells are useful for seeds that can be transplanted while young, but they have no built-in reservoir: the paper sides wick moisture and small volumes dry fast. Check them at least once a day, and water from below when possible so the tube stays upright without washing seed away. A tube that becomes bone-dry can pull moisture from the root zone.
At transplant time, soak the tube thoroughly, tear or slit the bottom if roots are circling, and bury the entire rim below the soil surface. Any exposed cardboard can wick water away from the seedling. Egg cartons work for very small starts, but their shallow cells dry even faster and are cramped for plants that need a longer indoor growing period. GrowVeg’s egg-carton guide likewise recommends drainage holes and regular moisture checks, then tearing the cups apart at planting so roots can enter surrounding soil. GrowVeg
Give transplants a temporary protective collar
A bottomless nursery pot, cut plastic bottle, or short wide tube can shield a newly planted seedling from wind and provide a little shade while it settles in. Press the collar only slightly into the soil and leave enough clearance so leaves do not rub against the edge. Remove it once the plant is established or when it begins to restrict airflow. A narrow collar can collect water, shelter slugs, or heat the stem, so it should not become a permanent barrier around a growing plant.
This is a short-term buffer, not a substitute for hardening off. Plants raised indoors need gradual exposure to outdoor sun, wind, and temperature changes before transplanting. Penn State Extension advises a gradual outdoor transition over at least a week when starts have not already been hardened off; water at the base after planting and keep the root zone evenly moist while roots establish. A collar can reduce exposure on a rough day, but shade cloth or a sheltered position is easier to adjust when heat or strong sun is the bigger risk. Penn State Extension
Build a pea trellis from pruned branches
Save healthy, sturdy branches from dormant pruning and use them as a free support for climbing peas. Choose twigs with side shoots that tendrils can grip, and push their thick ends into the bed deeply enough that the support does not rock when the vines load it. Space branches close together to make a loose, upright wall; pea tendrils need a reachable surface, not a perfectly straight fence. Put the support in before sowing so you do not stab seeds or disturb roots later.
Avoid branches from plants with obvious disease, dead brittle wood, or a species you do not want to spread by cuttings. A branch that is too smooth or too thick may not give tendrils enough grip, and a row of unsupported twigs can topple in wind. If the bed is exposed, brace the ends or add a crosspiece. For a small container, a simple bamboo frame or string net may be more stable than a large branch structure.

Mulch around tomatoes with clean cardboard
Plain, unwaxed corrugated cardboard can suppress weeds and slow evaporation around tomatoes, where shallow cultivation risks damaging surface roots. Remove tape, staples, glossy coatings, and labels; cut an opening wide enough for the stem to move and for water to reach the root zone. Wet the cardboard before laying it so it sits flat, overlap seams so light cannot pass through, and cover it with a loose organic mulch such as leaves or straw. Keep the material off the stem and inspect beneath it occasionally for slugs, standing water, or roots growing into the barrier.
Cardboard works best as a temporary surface layer or as part of a planned sheet-mulch bed, not as an impermeable permanent floor. Penn State Extension’s sheet-mulching method uses overlapping cardboard, moisture, and several inches of organic mulch, then allows time for the covered vegetation and materials to break down before planting. Its guidance is for bed preparation, so a gardener using a small collar around an established tomato should keep the layer thinner and preserve access to water and soil. GrowVeg also recommends clean cardboard, keeping it moist, and avoiding dry cardboard piled close to a house. Penn State Extension and GrowVeg

Raise row cover with yard sign stakes
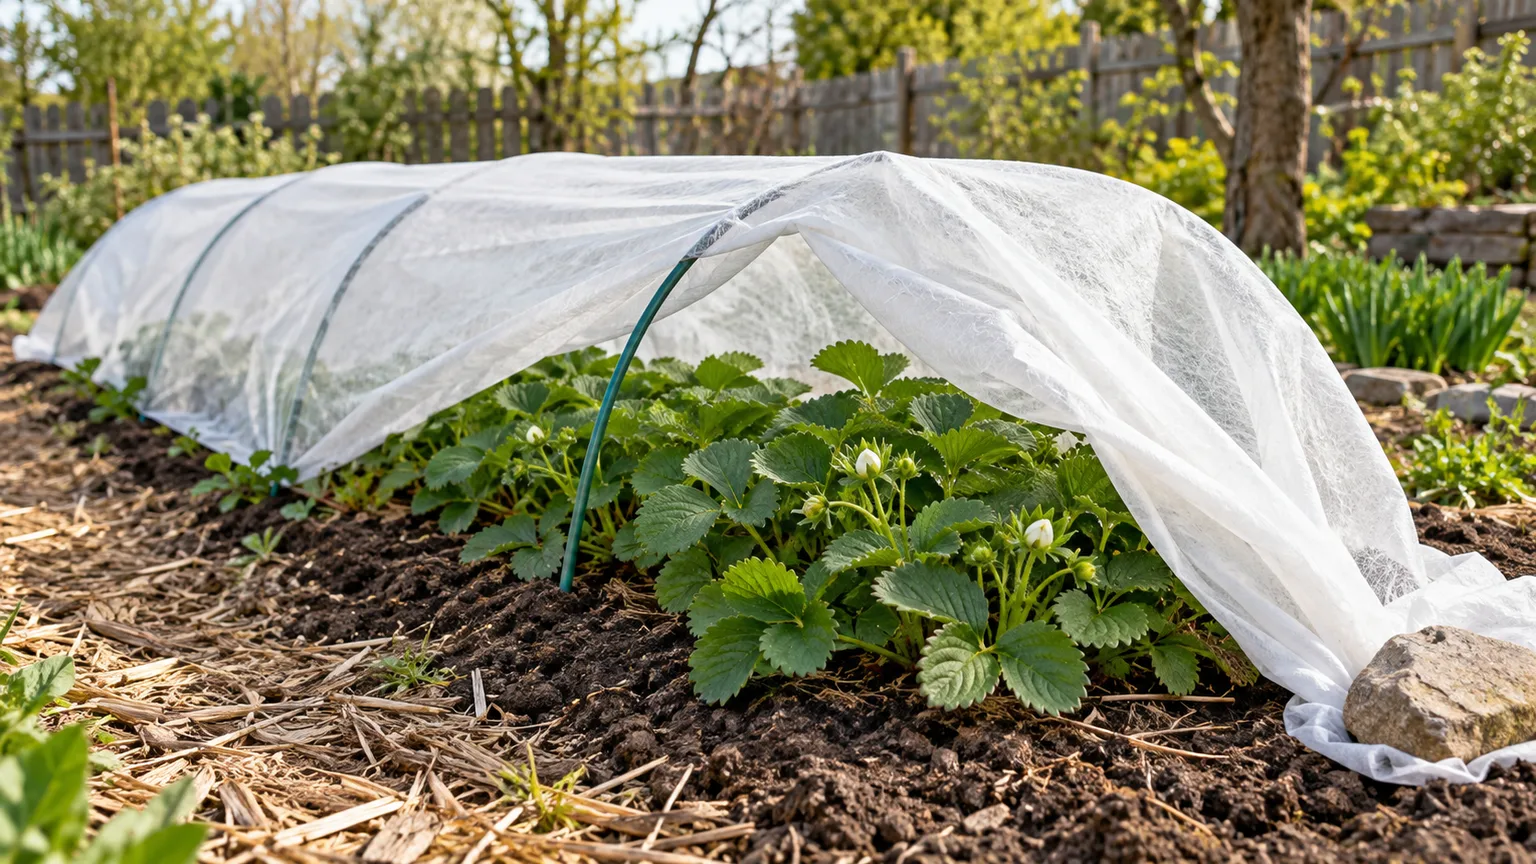
Metal yard-sign frames can become supports for a low tunnel when you already have them and need to keep lightweight row cover from resting on foliage. Insert the frames along the row at intervals that keep the fabric from sagging, then drape the cover over the top and secure its edges with pins, soil, or weights. Check for gaps at the ends; a cover that lifts in wind can expose the plants and may snag or tear.
Row cover is useful only while the crop benefits from exclusion or frost buffering. Match the fabric weight to the job, leave enough slack for growth, and monitor temperature beneath it on sunny days. For crops that depend on insect pollination, remove the cover when flowers open or hand-pollinate if the cover must stay in place. Check pest pressure under the fabric before sealing a bed, because a cover can protect pests already present as effectively as it blocks new ones.
Rest melons and winter squash on a flat support
A tile, flat stone, or spare plate can lift a developing melon or winter squash off damp soil. The benefit is separation from wet mud, not a guarantee against rot: the fruit still needs airflow, and prolonged rain or a damaged rind can cause trouble even when it is raised. Choose a support wider than the fruit, set it level before the vine grows heavy, and avoid pinching or twisting the stem while you lift the fruit onto it. For large fruit, use a second support so the weight does not tip the first one.
This shortcut is most useful in a bed that stays wet or where fruit rests on mulch that holds water. Do not use a sharp-edged or unstable tile that could cut the rind, and check beneath the fruit during harvest rounds. If the vine is already tangled, move the support under the fruit rather than pulling the fruit away from its attached stem.
Make stretchy fabric ties that leave room for growth
Soft strips cut from an old T-shirt or nylon stocking can secure a tomato stem, young tree, or climbing vine without the hard edge of a zip tie. For a heavier stem, use a wider strip; for a light vine, a narrow one is enough. Loop the fabric around both plant and support in a loose figure eight, which separates the stem from the stake and reduces rubbing. The tie should support the plant without squeezing it, and you should be able to slip a finger between the fabric and the stem.
Check ties every week or two during fast growth and after storms. A knot that felt loose in spring can girdle a stem by midsummer, especially on a vigorous tomato or a tree trunk that is thickening. Reposition rather than tighten when the plant leans. Wash reusable ties before moving them between plants if they are dirty or have touched diseased foliage, and discard any strip that has become brittle or abrasive.
Cover an idle bed with plastic as a seasonal tool
A reusable sheet of opaque agricultural plastic can keep weeds from taking hold in a bed that will sit empty for a defined period. Pull it taut over cleared soil, secure all edges so wind cannot lift it, and label the bed with the date and reason for covering. Unlike organic mulch, plastic does not break down into soil-building material, so use it as a removable barrier and take it up before planting. Inspect underneath if rodents, slugs, or persistent weeds are a concern.
Do not use a plastic cover as a set-and-forget fix. Water cannot enter through many sheets, so irrigate before covering if the soil is dry and uncover before sowing or transplanting. Black plastic can warm soil, which may be useful in some seasons but too hot for roots or surface wildlife in others. If the bed is not bare for long, a living cover crop or organic mulch may provide more lasting soil benefits with less plastic handling.
Sift only the soil you need with a kitchen basket
An old salad-spinner colander or sturdy wire basket can screen a small amount of soil for a seed tray or container. Place it over a bucket and break dry clumps through the mesh, removing stones or large debris that would interfere with tiny seeds or shallow roots. Work with a modest batch and stop when the mix is fine enough for the task; the goal is not to pulverize an entire garden bed.
Sifting is a poor substitute for fixing compacted or poorly structured soil. Wet soil smears and clogs a kitchen colander, while repeated screening can remove useful coarse particles and soil organisms. For root crops, loosen the planting zone and remove stones you can see rather than trying to manufacture uniform soil through a household sieve. Use only a basket that is clean and no longer needed for food preparation, and wash it after handling soil.
Contain mint in a pot that cannot leak runners
Mint spreads by underground stems and can move beyond the spot where you plant it. A pot is an easy way to keep it reachable for harvest, but a nursery pot buried flush with the soil is not reliable containment: runners can escape through drainage holes or over the rim. The safer version is to keep the pot above ground or set it into a larger decorative container, then trim stems before they root where they touch soil.
If you bury a container to blend it into a border, use a sturdy pot with intact sides and a bottom, leave the rim just above the soil, and inspect the holes and surrounding soil regularly. Do not block drainage to stop roots; waterlogged mint roots can decline, and a buried pot is harder to monitor. This method also restricts the root zone, so the plant may need dividing or repotting when growth slows. A separate pot on a patio is usually simpler to control than a buried root barrier.
Make hand tools easier to find with bright handles
A vivid band of outdoor-rated tape or paint on a hand-tool handle can make dropped pruners or a trowel easier to spot in mulch. Apply color only to the handle, not to the blade, spring, locking joint, or surfaces that contact cut stems. Let paint cure fully before use and keep it away from edible plant parts. Tape is faster and reversible, but check that it has not loosened and become litter in the bed.
Bright color is most useful when paired with a routine: return the tool to one bucket or hook whenever you move to another bed. It will not prevent rust or keep a pruner sharp, so clean off soil and plant residue after use and store tools dry. If a tool has a loose joint or damaged blade, marking it does not make it safe; repair or replace it before pruning.
Keep container drainage open instead of adding loose filler
Leaves, bark, and packing material are sometimes suggested as a way to fill the bottom of a large pot and save potting mix. That shortcut can settle unevenly, decompose, change the amount of root space, and leave the plant sitting at an unpredictable depth. A container needs unobstructed drainage holes and a consistent growing medium; a layer of rocks or coarse material at the bottom does not improve drainage and can make water movement worse. Penn State Extension’s container guidance recommends removing coarse material and using quality potting mix, with mesh over holes if mix is washing out. Penn State Extension
If a pot is too large to fill economically, choose a smaller pot sized for the root ball or use a removable nursery pot inside a decorative outer container. Keep the inner pot’s holes open, empty standing water from the cachepot, and make sure the arrangement does not tip. This preserves root volume and makes watering easier to judge. A light filler may have a place in a sealed decorative planter that holds a separate plant pot, but it should not replace the plant’s actual root medium.
Insulate a sun-heated pot with a larger outer pot
A nursery pot exposed to afternoon sun can heat and dry faster than the same plant in a shaded position. Nest it inside a second container that is a little wider, leaving an air gap or filling the gap loosely with bark mulch to shade the sides. The outer container should not trap rainwater around the inner pot; confirm drainage after watering and lift the nursery pot out if the cachepot collects water.
This is a buffer, not a cooling system. In a heat wave, move the container out of reflected afternoon heat, group pots, water according to the mix’s moisture rather than a fixed schedule, and use temporary shade cloth if leaves scorch. Keep insulation away from the crown and drainage holes, and avoid compressing material so tightly that air cannot circulate. In winter, pot insulation may reduce rapid temperature swings, but it does not make a tender plant hardy in a climate it cannot tolerate.
Mark fall plantings with painted stones
A bright stone beside a dormant bulb or perennial can remind you where new growth will emerge in spring. Choose a stone that is easy to see but does not sit directly over the plant’s crown, and paint only a short label or symbol you will recognize. The marker is most useful for scattered bulbs, newly planted perennials, and gaps where you plan to add spring annuals.
Treat it as a marker, not a permanent garden label. Frost, mulch, pets, and garden tools can move stones, so place them just to the side of the planting and confirm the location on a simple bed map or photo. Avoid using a rock large enough to compact the soil over a shallow bulb or block emerging shoots. A weatherproof plant tag is more precise for several varieties in one bed; a painted stone is a low-cost visual cue for the larger planting area.
Edge a straight bed with a board
A straight, sturdy board gives you a guide for cutting a clean lawn edge. Lay it along the intended line, secure it with one hand or a foot in sturdy footwear, and slice down the edge with a spade. Move the board forward in short sections rather than stretching across a long distance, and check that the edge stays aligned with the bed before each cut. A narrow soil knife can do the same job in a small space.
This works best when the soil is moist enough to cut but not saturated or sticky. Before digging, check for irrigation tubing, shallow cables, and other buried lines; do not force a spade through an obstruction. A board is a guide, not a safety shield, so keep hands and feet clear of the blade path. Reuse untreated, sound lumber and store it flat so it stays straight for the next edging session.
Skip rocks around new trees; support only when needed
Surrounding a new tree with heavy rocks is not a dependable way to anchor its roots. Stones can shift, compact the planting area, make watering awkward, and press against the trunk as it grows. A newly planted tree with a stable root ball generally does not need staking; Penn State Extension notes that natural movement helps a stable tree develop, while staking is reserved for cases such as a root ball that cannot remain upright or an exposed, unstable site. If staking is needed, use a flexible attachment and remove the support as soon as the tree stands securely.
A better low-cost help is careful planting and aftercare: keep the root flare at soil level, water the root ball thoroughly after planting, and apply a modest mulch layer over the root zone while leaving a clear gap around the trunk. Do not build a rock or mulch “volcano” against the bark. Penn State Extension warns that excess mulch against the trunk can contribute to rot and other tree problems; the point is to protect soil moisture without burying the stem. Penn State Extension and Penn State Extension
Conclusion
The most dependable gardening hacks are small systems you can inspect: labels that stay readable, supports that do not pinch, covers you can remove, and recycled materials that let water and air reach roots. A cheap item is only a bargain when it fits the plant and the season. Before using a shortcut, ask what it blocks, traps, or touches, then check it again after weather changes or new growth.
Start with one job you repeat often, such as keeping seed rows labeled or making a tomato bed easier to weed. Use clean materials, monitor the result, and retire the hack when it begins to interfere with growth. That approach keeps gardening practical without turning the garden into a collection of improvised devices.