How to Grow Elephant Garlic: Planting, Care & Harvest
Grow elephant garlic in a sunny, well-drained bed. Get practical planting depth, winter care, harvest timing, curing steps, and fixes for small or single-round bulbs.
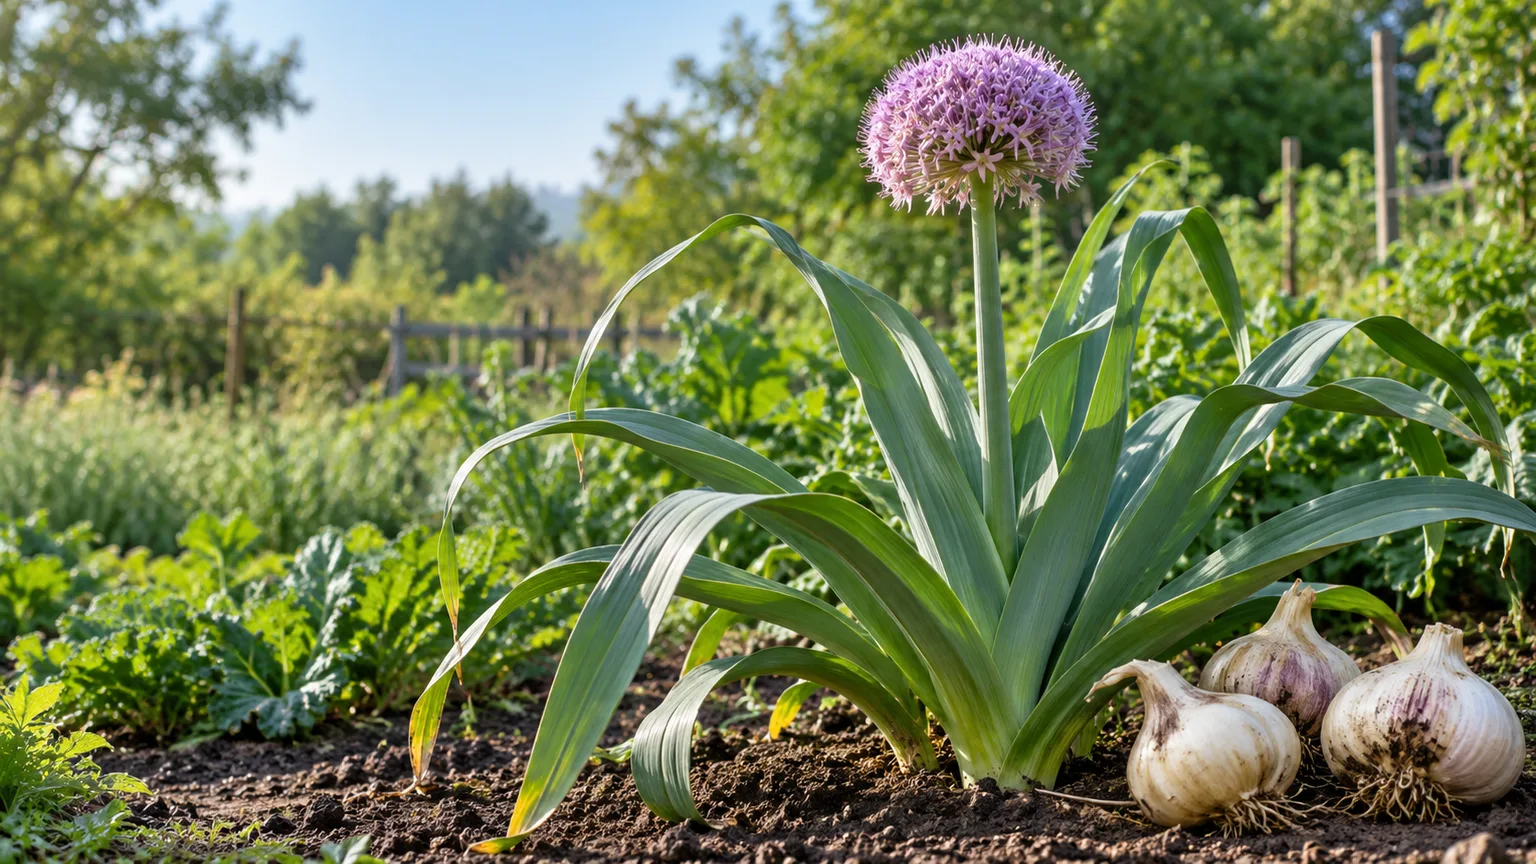
Elephant garlic grows best when you treat it as a large, long-season allium rather than a giant version of grocery-store garlic. Give it a sunny site, loose soil that drains after rain, enough room for the bulb to swell, and time to mature before you lift it.
The biggest surprise is that a first harvest may be one large, undivided bulb instead of a cluster of cloves. That does not automatically mean the crop failed: planting date and winter conditions affect whether a bulb divides, and a healthy solo bulb can be replanted for another season.
Elephant garlic in one minute
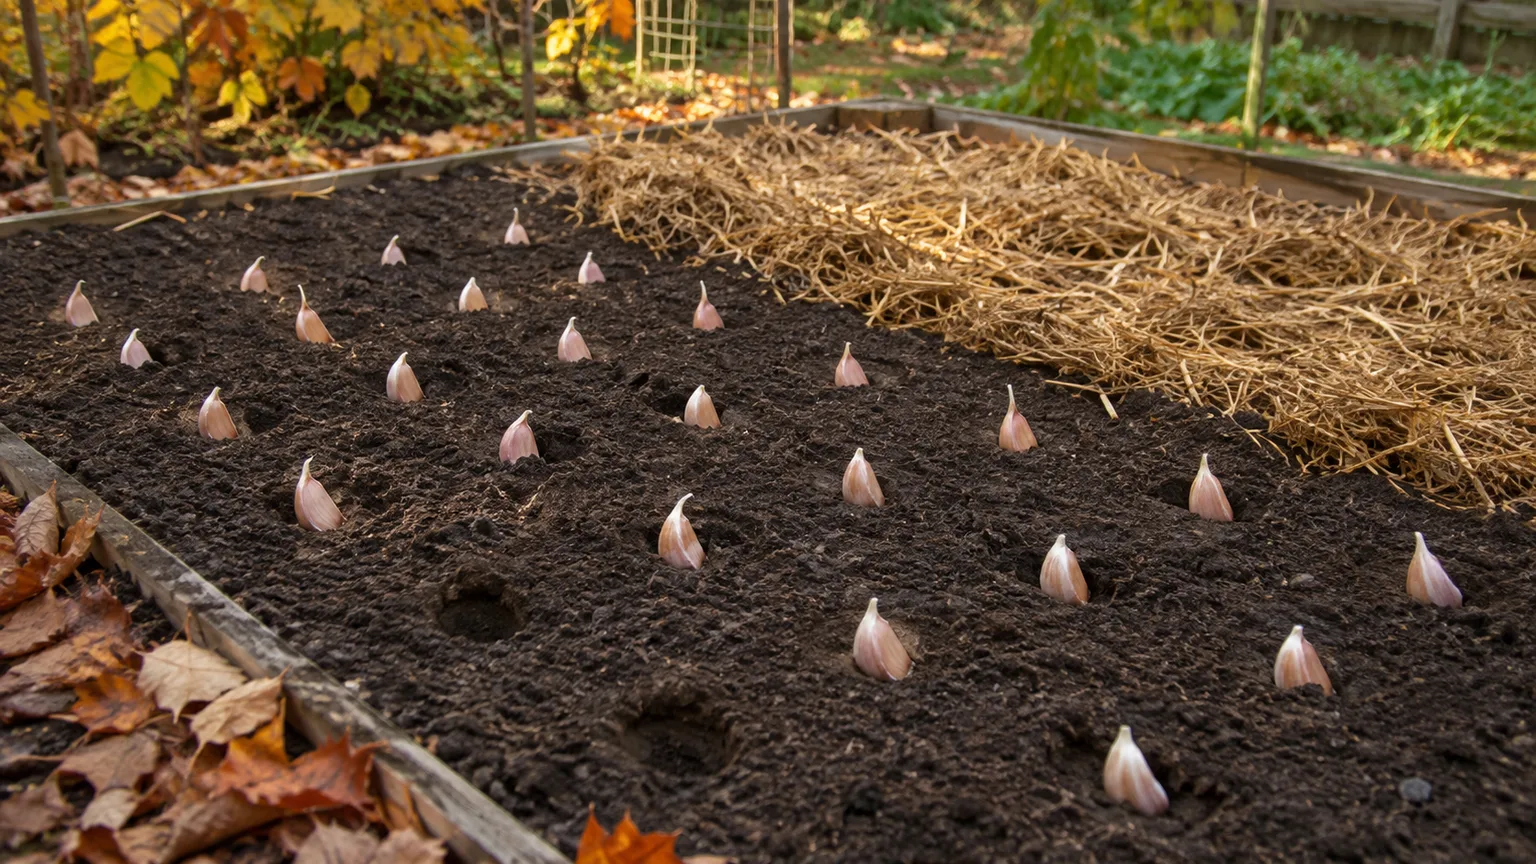
Plant individual cloves in fall, preferably early enough for roots to establish before winter and for the plant to receive a long growing season. Set them point-up in loose, fertile, free-draining soil, give each one more space than ordinary garlic, and keep the bed weed-free while the leaves are actively growing.
Water during prolonged dry spells rather than on a fixed weekly schedule. Stop when the leaves begin to yellow and the bulb is approaching maturity; then lift gently, cure in a shaded, airy place, and store only after the wrappers and neck are dry. The calendar varies by region, so use leaf and soil conditions as well as the date.
Know what you are growing
Elephant garlic is Allium ampeloprasum, a leek relative rather than a true garlic, which is Allium sativum. It makes fewer, much larger cloves and has a milder flavor; mature plants can also send up a tall flower stalk with a rounded purple-pink flower head. The Royal Horticultural Society describes it as a bulbous perennial that prefers full sun and moist but well-drained soil. (RHS plant profile; RHS garlic guide)
That distinction matters in the garden. Elephant garlic wants room and a long, warm growing season, and a bulb may remain a single large “round” if it does not get the conditions needed to divide; the RHS notes that earlier planting often reduces solo bulbs and that a solo bulb can be replanted the following autumn. Think of the first crop as a potential two-step harvest: eat a mature divided bulb, or replant a sound round to try for separate cloves next year.
When to plant elephant garlic
Fall is the reliable starting point for most gardeners. The RHS says elephant garlic needs a long, warm growing season and recommends October in its UK guidance; in other regions, translate that into a fall window that leaves time for root growth before the ground freezes, without pushing shoots into a vulnerable stage too early. Local winter patterns matter more than copying a calendar date from another climate.
If fall has passed, plant as soon as the soil is workable in spring rather than storing planting stock until it dries out. Expect a spring-planted crop to be less predictable: it may stay as one large bulb or finish smaller because it has had less time to establish and grow. For a first attempt, plant a few cloves in fall and a few in spring only if you want to compare results in your own garden; keep the planting dates labeled.
In places with prolonged winter saturation or very cold exposure, protect the crop with a raised bed or a container that drains freely. University of Maine Cooperative Extension notes that elephant garlic is not reliably hardy throughout Maine, a useful reminder that ordinary garlic hardiness claims should not be assumed to apply everywhere. (RHS garlic guide; University of Maine Cooperative Extension)
Choose a sunny, well-drained bed
Choose a spot with at least six hours of direct sun, ideally more, and soil that sheds excess water after rain. A deep, crumbly loam is convenient, but the practical test is whether the clove can expand without sitting in a cold, airless pocket. If a puddle remains in the planting area long after surrounding soil has drained, use a raised bed or a large container instead of trying to fix the problem by adding a little compost to the surface.
Work in finished compost before planting if the soil is poor or compacted, and loosen the bed so the cloves can root easily. Avoid fresh manure and heavy fertilizer additions without a soil test; excess fertility can produce plenty of leaves without solving bad drainage, and a lush top is not a substitute for a healthy bulb. In pots and heavy soils, drainage holes and an open mix matter more than feeding.
Do not plant the crop where alliums have repeatedly grown if you have seen persistent rot or other soilborne disease. Rotate the bed when possible, remove diseased plants with their debris, and begin with clean planting stock. These steps reduce the chance that a problem is carried forward from one season to the next.
Pick good planting stock
Buy elephant garlic bulbs specifically for planting from a reputable nursery, seed supplier, or local grower, and choose firm bulbs without soft spots, mold, or shriveled cloves. Garlic sold for eating may be an unsuitable variety for your climate and can carry pests or disease; the RHS and University of Maine Extension both recommend sourcing planting material carefully rather than assuming a supermarket bulb is a good seed bulb. (RHS garlic guide; University of Maine Cooperative Extension)
Separate the bulb shortly before planting, not weeks in advance, so the exposed cloves do not dry out. Keep each clove’s papery wrapper intact, discard any soft or damaged pieces, and plant the largest sound cloves where you want the best chance of large bulbs. University of Maine Extension reports that smaller garlic cloves tend to produce smaller bulbs; that is a useful rule of thumb for choosing elephant-garlic planting stock, though the eventual size still depends on season, spacing, water, and soil.
Use the cloves for planting rather than expecting seed from a flower head. The RHS lists seed and offsets as propagation options for ornamental alliums, but for a home food crop, planting sound cloves or replanting a solo bulb is the most direct route to another harvest. Label the variety and source so you can keep track of which stock performs well in your climate.
Plant cloves at a depth and spacing that fit the bulb
Orient each clove with its flat basal plate down and pointed tip up; the roots emerge from the flat end and the shoot from the point. For elephant garlic, a specialist growing guide recommends setting cloves roughly 4 to 6 inches deep and 8 to 12 inches apart. General RHS garlic guidance is shallower, with the tip about an inch below the soil surface, so treat depth recommendations as crop- and soil-specific rather than one universal number. In loose, well-drained soil, use the deeper elephant-garlic range; in heavy or wet ground, choose the shallower end and improve drainage instead of burying a clove in cold mud. (GrowOrganic elephant garlic guide; RHS garlic guide)
Space cloves about 8 to 12 inches apart, with rows around 12 to 18 inches apart so large plants are easier to weed and harvest. The closer spacing saves bed area but can limit bulb size and make lifting harder; use the wider end if your main goal is large bulbs and you have room. Press the soil back gently, water once to settle it if it is dry, and mark the row so you do not disturb the cloves while the shoots are dormant.
A simple planting sequence keeps the details straight:
- Break the bulb into firm cloves just before planting.
- Loosen the soil and set each clove point-up at a consistent depth.
- Leave a handspan or more between plants, then cover with soil.
- Water the bed lightly if the soil is dry and add a loose mulch where winter swings or weeds are a concern.
- Mark the row with the variety and planting date.
Care for the crop through the seasons
After planting, the crop needs little attention while growth is slow, but the bed should not be allowed to become a dense mat of weeds. A light mulch can moderate soil temperature, limit weed pressure, and retain moisture; use a loose layer that does not stay soggy against the cloves. In areas with wet winters, drainage and airflow are more important than adding a thick, wet blanket over the bed.
As leaves appear in spring, clear mulch back if it is holding water or keeping the soil cold, then restore a thinner layer if it helps control weeds. Check the bed after heavy rain and after freeze-thaw cycles, because cloves can heave or exposed shoots can be damaged. If a clove is pushed above the soil surface, gently cover it again without compacting the bed.
The University of Maine’s garlic guide recommends mulch and early weed control for its cold-climate crop, while the RHS emphasizes keeping garlic weed-free and watering during dry spells. These principles transfer well to elephant garlic, but the exact calendar and mulch depth should follow your local winter and soil rather than a single national schedule. (University of Maine Cooperative Extension; RHS garlic guide)
Grow elephant garlic in a container
A container can work if you cannot provide a freely draining bed, but it must be large enough for both the root zone and the unusually wide bulbs. Choose a sturdy pot at least 12 to 16 inches deep with several unobstructed drainage holes; use a loose potting mix, not garden soil that settles into a dense mass. Plant one or two cloves per large container, leaving roughly 8 inches between them and room around the edges.
Keep the pot outdoors in full sun for the crop’s seasonal cycle. A container dries more quickly than a bed in warm weather, so check the mix with a finger and water when the upper layer is beginning to dry, then let excess drain away completely. In cold regions, place the pot where it is sheltered from harsh wind but do not bring it into a warm room for the winter; warmth can disrupt the outdoor seasonal rhythm.
Container culture is especially useful when native soil is heavy and wet, but it is not automatically easier. A small pot warms and dries rapidly, and cramped spacing can produce a healthy-looking top with undersized bulbs. If the pot cannot hold the clove depth and spacing you plan to use, grow fewer cloves rather than crowding them.
Manage water, weeds, and nutrition
During active leaf growth, aim for soil that stays lightly and evenly moist, not constantly wet. Water during a prolonged dry spell, especially in a container or sandy bed, and water at the soil rather than repeatedly soaking the foliage. The RHS advises watering in dry spring and early summer conditions to support bulb size, then easing off as the leaves yellow and the bulbs mature; stop routine irrigation when the tops begin to die back. (RHS garlic guide)
Weed early and by hand near the bulbs. Alliums do not compete well with weeds, and pulling a large weed late in the season can disturb developing roots or loosen a bulb that is close to maturity. A thin mulch, shallow hand cultivation, and consistent checks are safer than aggressive hoeing directly over the row.
Feed based on soil condition, not a calendar habit. Compost worked into the bed before planting is enough for many home gardens; if growth is weak and a soil test shows a deficiency, follow that test’s recommendation. Do not add a strong dose of nitrogen late in the season, when the plant should be shifting from leafy growth toward bulb maturation, and do not use fertilizer to compensate for waterlogged soil or shade.
Decide whether to remove scapes
A scape is the flowering stalk that rises from the center of the leaves. Elephant garlic can produce a tall stalk with a rounded flower head, which can be attractive in a garden; if your priority is a larger edible bulb, cut the stalk while it is still young and tender, before the flower opens. The RHS advises removing garlic flower stems so the plant directs more resources toward the bulb, and notes that young scapes can be cooked. (RHS garlic guide; RHS plant profile)
Use clean snips and cut the stalk above the top leaf without tearing the plant. You can eat the tender stem, but the flavor is milder than a true garlic scape; older stalks become fibrous, so compost them or leave a flower on a plant you are keeping for ornamental value. If you leave the stalks, accept that flower production may compete with bulb development, and do not expect a full-size bulb just because you removed every scape.
A flower head may also reveal small offsets or bulbils, depending on the plant. Treat those as slow propagation material, not a quick replacement for a mature clove; label them and give them their own space if you want to experiment with growing them on.
Recognize harvest readiness
Harvest when several of the lowest leaves have yellowed or browned while the upper leaves are still green enough to support the plant. Do not wait for every leaf to collapse: by then, the protective wrappers around the bulb may be breaking down, leaving cloves exposed and shortening storage life. The RHS describes yellowing as a maturity signal and cautions that late lifting can reduce storage potential; University of Maine Extension uses the lowest leaves as its harvest cue for hardneck garlic. (RHS garlic guide; University of Maine Cooperative Extension)
Treat the calendar as a checkpoint, not a command. Fall-planted elephant garlic often finishes in summer, but a cold spring, late planting, shade, or a short warm season can delay maturity. If you are uncertain, loosen soil beside one plant and inspect the bulb; the wrappers should be intact and the clove pattern should be developing. If it is still a tight solo bulb, you can harvest and eat it or leave it longer if the plant is healthy and the soil is dry enough.
If foliage yellows early across the whole bed, check moisture and roots before assuming the bulbs are ready. Premature yellowing can reflect waterlogging, root injury, disease, or a nutrition problem; maturity is more likely when lower leaves die back gradually while the upper leaves remain green and the plant is near its expected seasonal window.
Lift the bulbs without bruising them
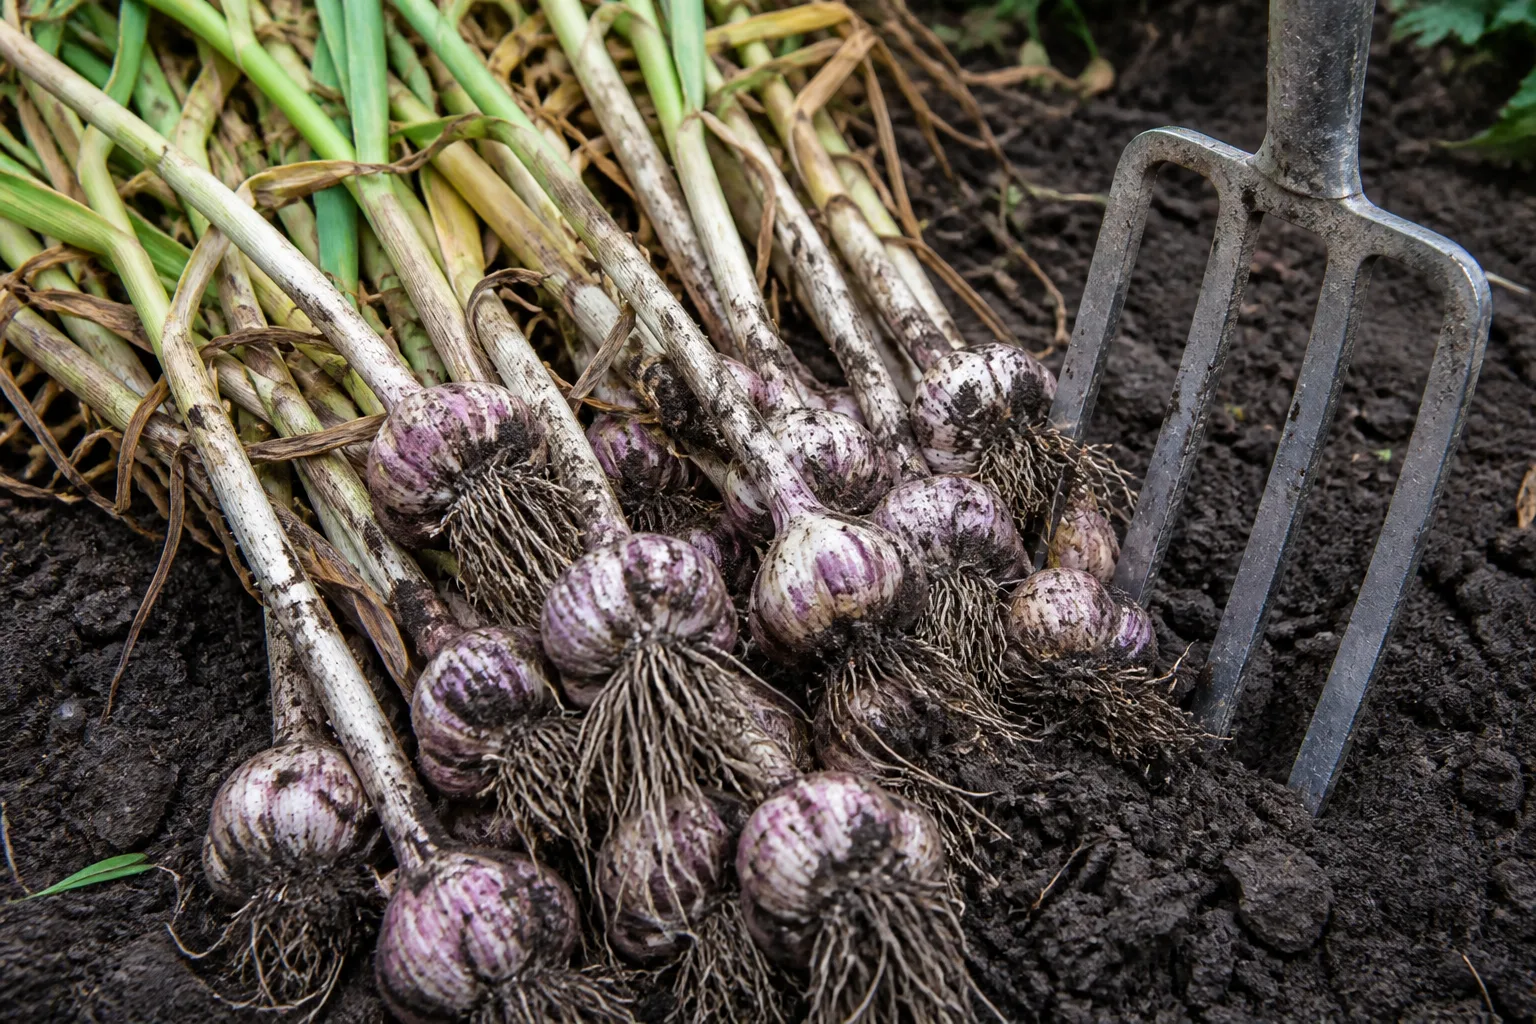
Loosen the soil well outside the plant with a garden fork or spade, then lift from underneath rather than pulling hard on the stalk. Elephant garlic bulbs are large and can be cut or bruised by a blade driven too close to the stem; damaged bulbs should be used first because cuts create entry points for decay. Shake off loose soil gently, but do not scrub the skins or wash the crop before curing.
If the soil is compacted, work around the entire plant before raising it. Pulling by the top can separate the stem from the bulb, tear off the wrapper, or leave the bulb buried; the extra minute spent loosening soil protects months of storage life. Lay each plant in a single layer in a sheltered spot while you bring in the rest of the crop.
Cure the crop for storage
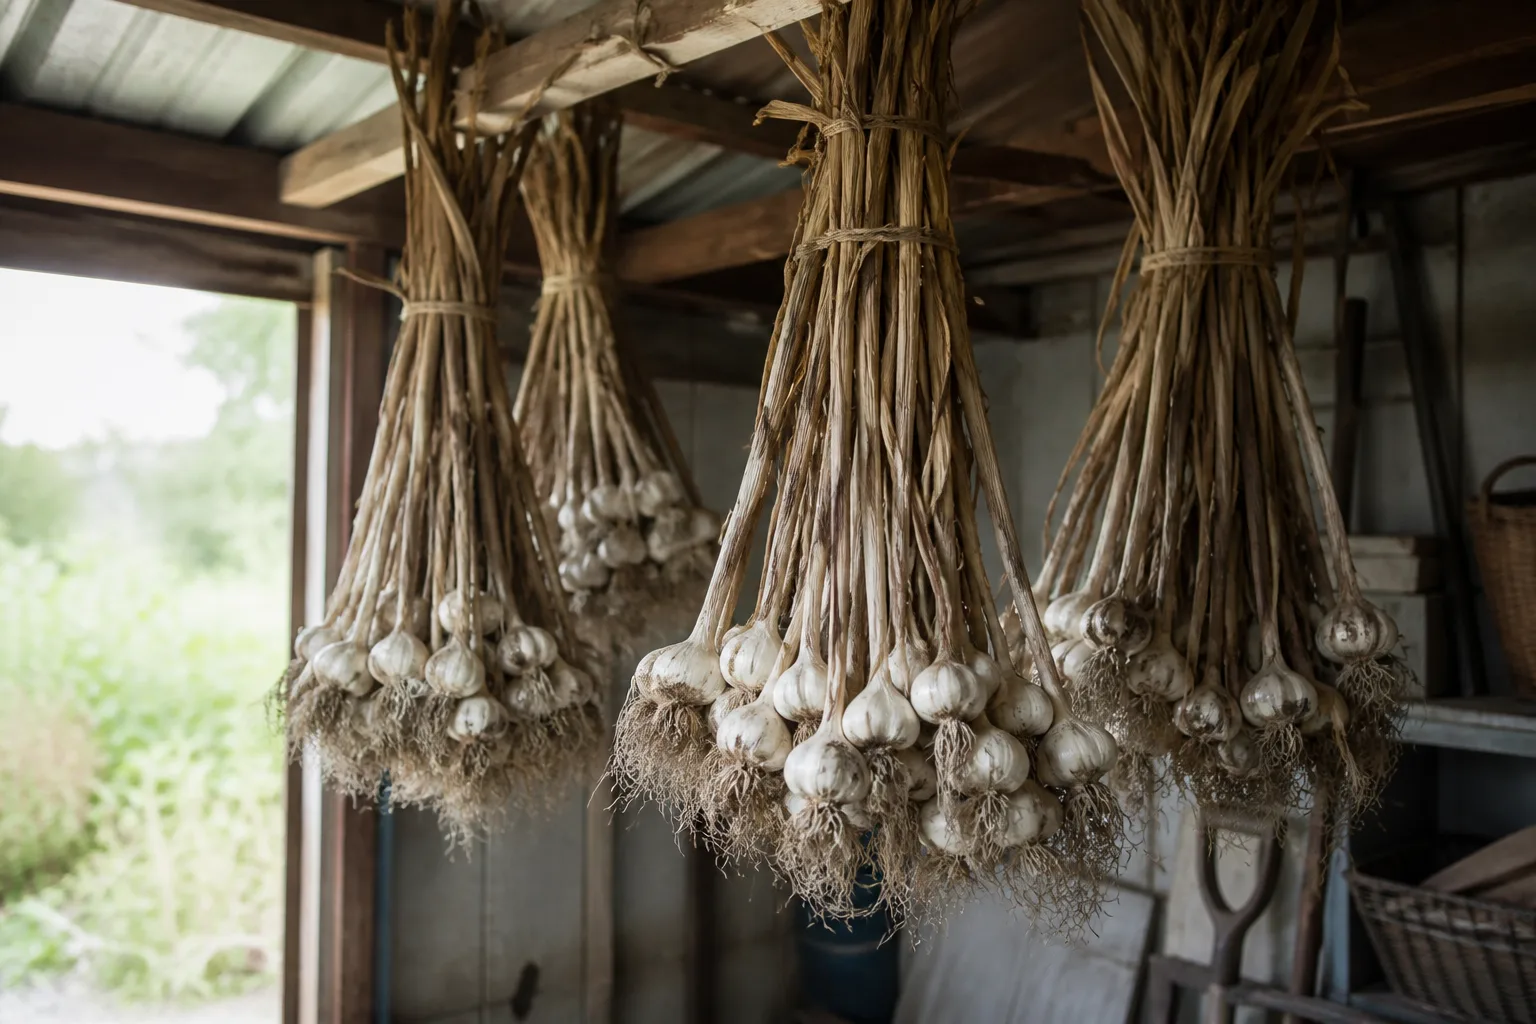
Curing dries the outer wrappers and neck so the bulb can store without trapping moisture. Lay plants in a single layer or hang small bunches in a shaded, dry place with steady airflow; leave space between bulbs and keep them out of rain, condensation, and direct heat. Depending on humidity and airflow, curing can take two to four weeks, and thick elephant-garlic bulbs may need the longer end.
Sources differ on sun exposure: the RHS says garlic can be dried in the sun, while University of Maine Cooperative Extension cautions against direct sunlight and very hot spaces. For a home crop, the safer choice is shade with moving air, especially in hot climates or where the bulbs could overheat; a bright, dry shed or covered porch is more predictable than a closed greenhouse or attic. (RHS garlic guide; University of Maine Cooperative Extension)
Do not wash the bulbs before curing, and avoid piling them in a bucket or sealed box where moisture cannot escape. They are ready when the neck feels dry, the outer skins are papery, and roots no longer feel damp; then brush away loose soil and trim the roots and tops if you prefer. A fan can help in a humid room, but it should move air around the crop rather than blow dust directly onto it.
Store cured bulbs and save planting stock
Store only sound, fully cured bulbs in a cool, dry, dark, well-ventilated place. A mesh bag, open crate, or wire basket is better than a plastic bag or closed container because it allows air to circulate; check the bulbs every few weeks and use any that soften, sprout, or show decay first. Storage life depends on variety, harvest maturity, curing, and room conditions, so do not rely on a fixed number of months.
Keep the largest healthy bulbs aside for the next planting, and keep eating bulbs separate so they are not used accidentally. Label the saved stock with the planting date and the bed or container it came from; if it repeatedly makes undersized bulbs or rots in your soil, replace it with clean stock rather than carrying the problem forward. The University of Maine extension guide recommends saving the healthiest large bulbs for a future crop, and GrowVeg likewise advises choosing planting material suited to the garden’s climate. (University of Maine Cooperative Extension; GrowVeg)
Use elephant garlic in the kitchen as a mild allium, not as a one-for-one flavor substitute for true garlic. Its large cloves are convenient for roasting, mashing, and slicing, but a recipe may need more cloves to reach the same pungency; taste as you cook rather than assuming one elephant-garlic clove equals one ordinary clove.
Troubleshoot rounds, small bulbs, and rot
A single large round is the most distinctive elephant-garlic outcome and often reflects planting timing or winter conditions rather than a dead plant. The RHS explains that elephant garlic may fail to divide and that earlier planting can reduce the chance of a solo bulb; if the round is firm and healthy, eat it or replant it in fall to encourage a divided bulb in its next cycle. Keep a note of when it was planted and whether the winter was mild, because that context helps you adjust timing next year. (RHS garlic guide)
Small bulbs usually have more than one possible cause, so start with the easiest checks rather than adding fertilizer blindly. Compare the plant’s sunlight, planting date, clove size, spacing, weed pressure, and soil moisture; fix the factor that differs from a healthy area of the bed. A late-planted small clove crowded by weeds in shade is unlikely to respond to extra water, while a dry pot in active spring growth may simply need more regular checks.
Soft bulbs, bad smells, or roots that pull away easily point to rot or damage, especially if the soil stayed wet. Remove affected bulbs and surrounding debris, improve drainage before replanting, and do not save soft or discolored bulbs as planting stock. If the same disease keeps returning in a bed, rotate alliums away from it and seek a local extension diagnosis before choosing a treatment; avoid applying pesticide without an identified target and label directions.
Rust-colored leaf spots, slug chewing, and other allium pests can occur, but an isolated leaf mark is not enough to diagnose a serious disease. Check whether the damage is spreading, whether the crown and bulb remain firm, and whether neighboring plants show the same symptoms; remove slugs by hand where practical and keep the bed open enough for airflow. The RHS lists slugs, snails, allium leaf miner, onion white rot, and downy mildew among possible problems for elephant garlic, so persistent symptoms deserve a closer identification rather than a guessed spray. (RHS plant profile)
Keep pets from eating elephant garlic
Do not assume elephant garlic is pet-safe because it is milder to people than true garlic. It is a leek relative, and the ASPCA lists both garlic and leek as toxic to dogs, cats, and horses; the species-specific risk for elephant garlic is not stated on those pages, so use the relationship as a reason to keep bulbs, leaves, flowers, and cut scapes out of reach rather than as a precise toxicity estimate. If an animal eats any part, contact a veterinarian or animal poison-control service promptly. (ASPCA garlic listing; ASPCA leek listing)
Conclusion
For a dependable elephant-garlic crop, start with firm planting stock, plant early enough for a long season, and choose sun and drainage over a complicated fertilizer routine. Give the cloves room, keep weeds down, water when active growth needs it, and follow the plant’s leaves when deciding to lift the bulbs.
If your first crop makes a single round, keep it: a sound solo bulb can be replanted for a later divided harvest. Cure every bulb with airflow, store it dry, and save only the healthiest stock; those simple records and choices make it easier to improve the next season.