How to Grow and Care for Asplenium Antiquum
Learn how to grow Asplenium antiquum with practical light, water, humidity, soil, repotting, and troubleshooting advice for healthy, wavy fronds indoors.
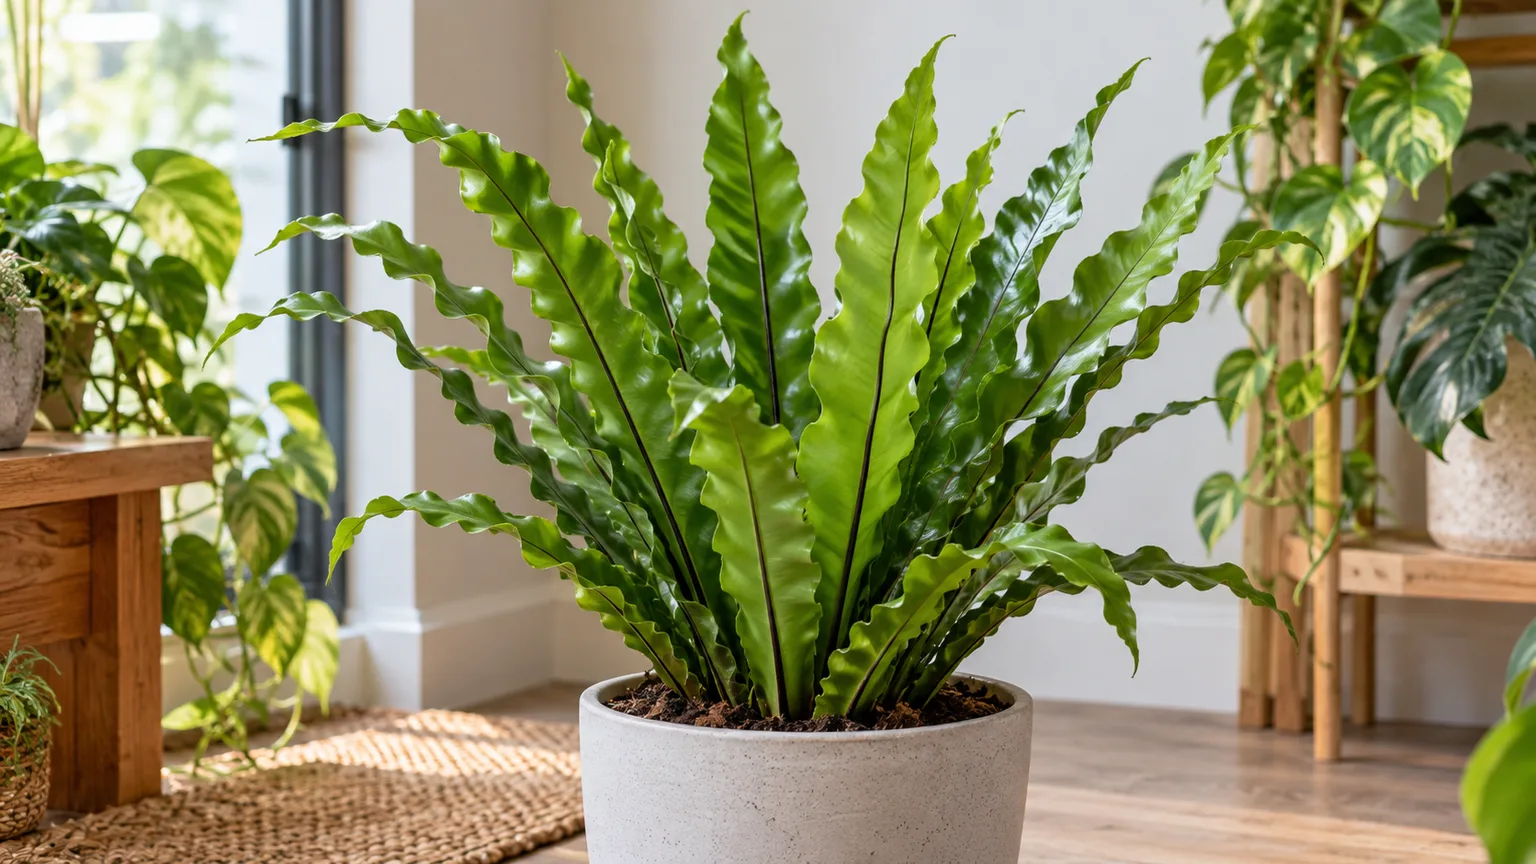
Japanese bird’s-nest fern, Asplenium antiquum, is grown for a tidy upright rosette of glossy, rippled fronds. It is an epiphytic fern native to parts of East Asia, so its roots need air and its foliage does best in a humid, sheltered setting; Kew’s Plants of the World Online accepts the name as a distinct species and records its range from southeastern China through temperate eastern Asia, including Japan, Korea, Taiwan, and the Nansei Islands (Kew Science). Indoors, you can meet those needs without turning the plant into a daily project if you choose the right spot and water by checking the pot rather than following a calendar.
The most important balance is a root ball that stays lightly and evenly moist while the crown stays open and relatively dry. Light, airflow, pot size, and humidity all influence how quickly the mix dries, so there is no reliable one-size watering interval. Learn the plant’s baseline first; then change one condition at a time if the fronds start to lose their color or texture.
Quick care: keep the crown dry and roots airy
| Need | Practical starting point | What to watch |
|---|---|---|
| Light | Bright, filtered or indirect light | Bleached patches or crisp edges suggest direct sun; very slow growth can mean the spot is too dim. |
| Water | Water when the upper layer begins to dry, then drain fully | Do not pour into the central rosette or leave the pot in standing water. |
| Mix | Loose, organic, moisture-retentive but fast draining | A mix that stays heavy and wet for days needs more air or a smaller pot. |
| Humidity | Stable, moderately humid air; increase it if new or edge growth crisps | A humidifier nearby is more dependable than occasional misting. |
| Temperature | Warm, steady indoor conditions away from vents and cold drafts | Protect the fern from sudden chills and temperature swings. |
These are starting conditions, not a promise that every plant will respond identically. A small nursery plant in a warm room may dry faster than a mature specimen in a cool, low-light bathroom, even if the pots look alike. Check the medium and the plant together instead of treating the table as a schedule.
Identify the plant before you buy
The accepted botanical name is Asplenium antiquum Makino, in the spleenwort family, Aspleniaceae. It is often sold as Japanese bird’s-nest fern, and the narrow upright habit with glossy, undivided fronds and wavy margins makes it distinctive. Kew separates the species taxonomically, but retail labels and common names can be less precise than botanical databases.
Look at several traits rather than treating one leaf as proof. Compared with many plants sold as A. nidus, A. antiquum is often described as more compact and upright, with narrower fronds and more noticeable rippling; a young plant, a cultivar, or a crowded display may blur those differences. A practical article about growing A. antiquum from Stay Green Garden also contrasts its upright form with the broader, arching look commonly associated with A. nidus (Stay Green Garden). Treat that as a visual tendency, not a laboratory identification key.
There is a reason to be cautious with the label. UF/IFAS notes that names applied to crested, ruffled, and dwarf bird’s-nest fern forms can be inconsistent in horticulture, especially among cultivars of A. nidus (UF/IFAS Gardening Solutions). Ask the seller for the species name and, if a specific cultivar matters to you, request a source that uses that cultivar name consistently. For everyday care, prioritize a healthy crown and undamaged fronds over a promise that the plant is a particular named selection.
Choose a place with filtered light
Set the fern where it receives bright ambient light without a hard beam of direct midday or afternoon sun. An east-facing window often works if the sun is gentle; a north-facing window may be bright enough in a bright room, while a south- or west-facing window usually needs distance, a sheer curtain, or another filter. These are orientation shortcuts, not rules: a shaded courtyard window can be dim, and a nearby building can change the light completely.
Watch the fronds at the plant’s actual position. Pale, dry patches on the side facing glass point toward too much direct light, while long periods without new growth may reflect weak light, cool temperatures, or seasonal slowing rather than a single failure. If you move the fern, shift it gradually over several days and keep it out of the path of hot window glass; sudden exposure can scorch foliage that had adapted to shade.
A bathroom can be convenient because it is often more humid, but humidity does not replace light. A windowless bathroom generally needs a grow light on a consistent timer if it is the permanent location; without enough light the pot dries slowly, growth stalls, and watering mistakes become easier. A bright room with a small humidifier nearby is usually more workable than a steamy but dark room.
Set humidity and temperature you can maintain
Humidity matters most when it is persistently low enough to dry the thin frond margins faster than the roots can replace water. A hygrometer helps you distinguish a genuinely dry room from a plant that is browning for another reason, but avoid chasing a single exact percentage as if it were a species-wide threshold. If the room is dry in winter, a small humidifier placed near the plant can raise local humidity more steadily than misting the leaves.
Grouping plants can modestly buffer dry air, and a correctly arranged humidity pebble tray may add a little moisture immediately around a pot. Neither method turns a dry room into a greenhouse: keep the pot base above the tray water, empty the tray if it becomes stagnant, and do not let a decorative cachepot trap runoff. Misting briefly wets the fronds but does not reliably maintain room humidity, and water left in the center can create an avoidable crown problem.
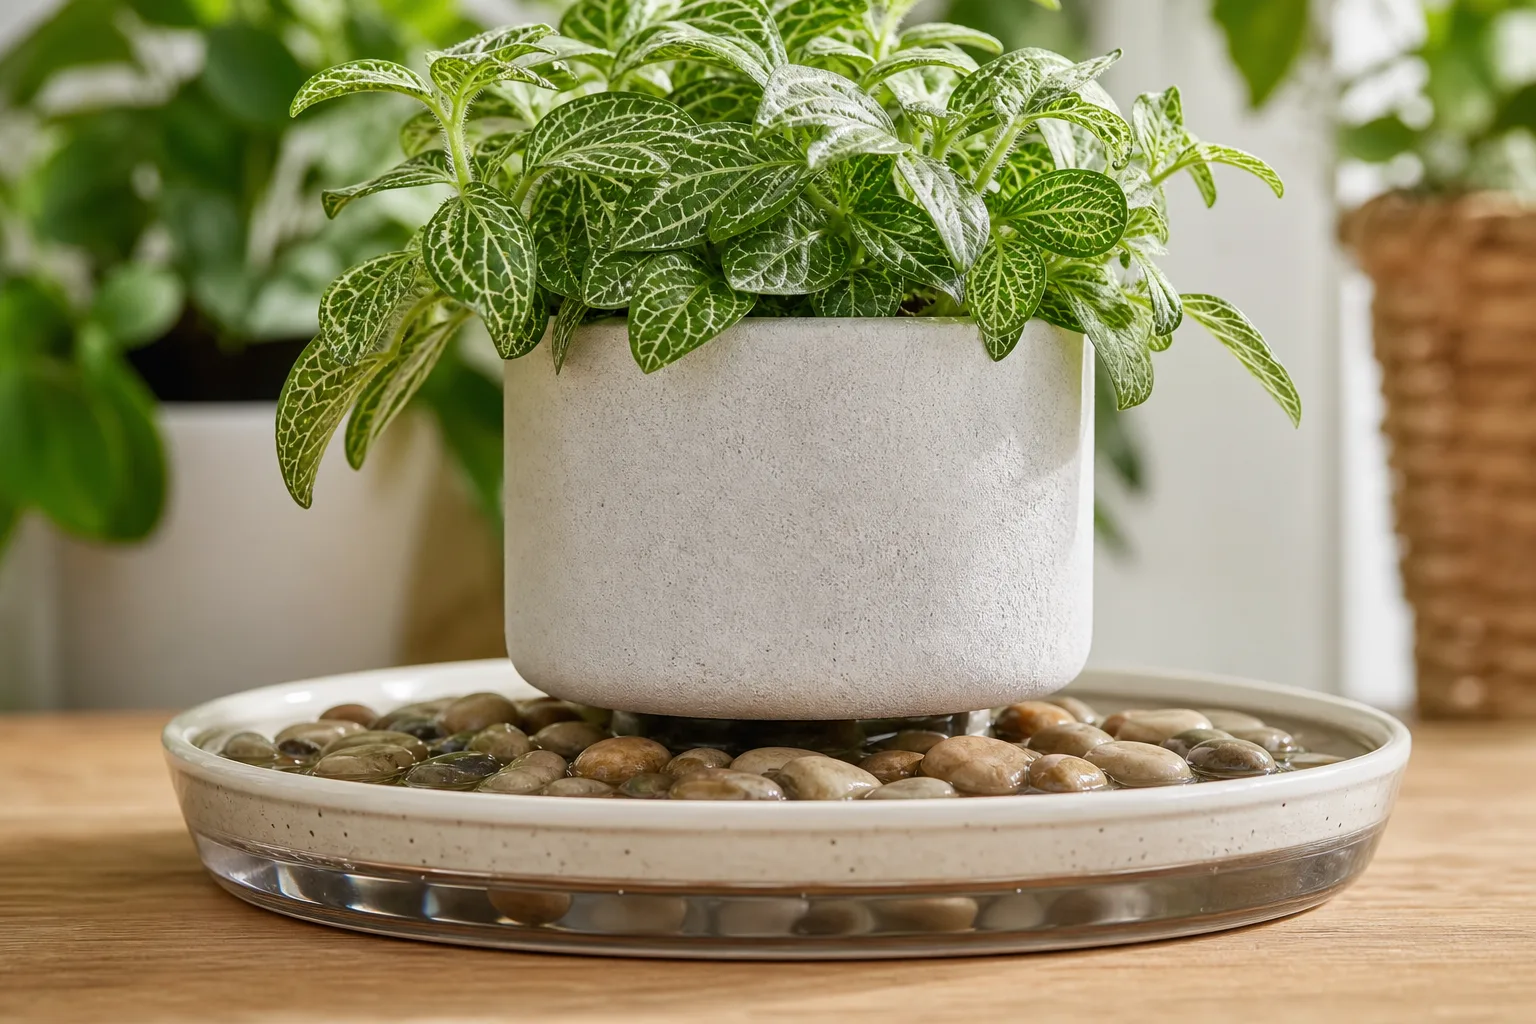
Keep the fern warm and away from heating vents, air conditioners, open exterior doors, and cold glass during winter. NC State Extension describes the related bird’s-nest fern A. nidus as frost-sensitive and suited to bright light or light shade and humid conditions (NC State Extension). That is helpful context for the genus, not a species-specific outdoor hardiness rating for A. antiquum; indoors, steady room temperatures are the safer default.
Water for even moisture without a wet crown
Water when the top layer of mix begins to dry, but before the entire root ball becomes dusty and dry. Put a finger into the medium near the rim or lift the pot to learn how its weight changes after a thorough watering; the weight check becomes especially useful once you have observed the plant through one or two cycles. The interval will shift with pot size, season, room heat, light, and the proportion of bark or other coarse material in the mix.
When it is time, take the pot to the sink or use a narrow-spout can and water the soil around the outer edge of the rosette. Apply enough to wet the root ball evenly, allow excess water to drain through the holes, and empty any saucer or cachepot afterward. The crown is the center from which new fronds emerge; water standing there dries slowly, while repeated saturation around the base can encourage rot. NC State and UF/IFAS describe bird’s-nest ferns as epiphytic and moisture-loving, but their specific care notes are for A. nidus, so use them as a close-relative guide and still adjust to your A. antiquum pot (NC State Extension, UF/IFAS).
Do not let “even moisture” turn into permanently wet soil. If the mix is still wet several days after watering, check drainage holes, pot size, room temperature, and whether the medium has compacted; adding more water because a leaf droops can worsen root stress. If the pot is light and the medium is dry below the surface, water thoroughly rather than offering a few tablespoons that wet only the top.
Use an airy, moisture-retentive mix
The useful texture is moist but open, not a dense, waterlogged plug and not coarse bark that dries before the roots can take up water. A commercial fern mix can work if it drains well; if it stays soggy in your home, blend in a modest amount of fine orchid bark or perlite. A practical starting blend is two parts quality fern or houseplant mix to one part fine bark and one part perlite, then adjust the next time you repot: use less coarse material in a hot, dry room and more if the pot remains saturated.
The goal is not a magic recipe or a specific pH number. It is a stable structure that holds some water between checks while letting oxygen reach roots after each watering. Avoid garden soil in a small indoor pot because it can compact, drain unpredictably, and bring in debris or pests; also avoid packing fresh mix tightly around the crown.
Choose a container with open drainage holes. A decorative outer pot is fine if you remove the nursery pot for watering or empty the outer pot immediately afterward. A self-watering pot can help an attentive grower maintain more even moisture, and one A. antiquum grower describes using a wick planter, but the reservoir method can keep a cool or low-light root ball too wet if the mix and wick are not calibrated (Stay Green Garden). Try it only if you can check the medium and reservoir instead of assuming the wick will regulate itself.
Repot only when the root ball needs it
This fern grows slowly enough that an annual repot is rarely a useful goal. Repot when roots crowd the drainage holes, the plant has become unstable in a pot that is too small, or the mix has broken down and stays wet long after watering. A pot that dries normally and supports the rosette is not “due” simply because the plant has been in it for a year.
Move up by one modest pot size, typically only a couple of centimeters wider, and keep the crown at the same height it had before. A pot that is much larger than the root ball holds extra wet mix the plant cannot use quickly. Refresh the medium around the roots gently, keep the central growing point exposed, water once to settle the mix, and give the plant a stable warm spot while it readjusts.
Spring or the start of active growth is a convenient time, but the plant’s condition matters more than the calendar. Avoid repotting a healthy fern immediately after bringing it home unless the nursery mix is failing or the roots are clearly in trouble; moving, repotting, and changing light all at once makes it hard to tell why the plant is stressed. If you must repot during a problem, preserve as much healthy root structure as possible and do not divide the crown.
Fertilize lightly while new fronds grow
Feed only when the fern is actively making new growth, usually in the brighter months of your indoor year. A balanced liquid houseplant fertilizer diluted below the label’s full strength is a cautious starting point; apply it to pre-moistened mix, not onto the fronds or into the crown. If growth is slow in winter, hold fertilizer rather than trying to force growth with a stronger dose.
More fertilizer is not a shortcut to larger fronds. Excess salts can damage roots and distort tender new growth, especially when a small pot dries unevenly or fertilizer accumulates in the mix. If you see crust at the surface or brown tips after repeated feeding, pause, flush the mix with plain water if drainage is good, and restart at a weaker dilution only after the plant resumes healthy growth. Related bird’s-nest fern guidance also emphasizes light feeding rather than frequent heavy doses (Plantvale).
Groom fronds and read the sori
This is a rosette plant, not a fern that needs shaping cuts. Remove a frond only when it is fully brown or badly damaged, cutting it close to the base with clean scissors without nicking neighboring new growth. A green frond still contributes energy even if its tip is unattractive, so trimming the brown tip into a sharp line rarely improves the plant and may create a more conspicuous edge.
Turn a mature frond over before assuming brown marks mean pests. Ferns reproduce with sori, clusters of spore-producing structures on the undersides; NC State’s bird’s-nest fern profile documents sori on mature fronds (NC State Extension). Rows of evenly spaced brown marks that stay attached to the leaf are different from loose insects, sticky residue, webbing, or scattered lesions. Do not scrub natural sori off the frond.
Dust can be rinsed away with a gentle stream of lukewarm water, but shield the crown and let the plant drain fully before returning it to its cachepot. Do not polish fronds with oil or household cleaning products; they can leave a film and make later diagnosis harder. The best grooming routine is usually a quick check of the center and the undersides, not repeated handling of delicate new fronds.
Propagate by spores only if you enjoy a slow project
A fern cannot be propagated from a leaf cutting the way a pothos can. The growing point sits in the central crown, and cutting it apart is risky; if your plant has no separate rooted offsets, division can destroy the only healthy rosette. For most home growers, buying another correctly labeled plant is the dependable choice.
Spores are possible, but the process is slow and uncertain. Mature fronds may carry rows of sori underneath; when the spore cases darken and begin releasing dust, collect a frond or hold paper beneath it, then sprinkle the fine spores over a clean, pre-moistened, low-nutrient sowing surface. Avoid burying them, because spores need contact with a surface and light to germinate; keep the container humid and bright but out of direct sun, and minimize contamination by using clean equipment.
The first growth is not a miniature fern but a small gametophyte stage that can look like a green film or tiny heart-shaped patch. Fernlets appear only after further development, and the schedule can stretch across many months; keep the surface humid without flooding it, and do not transplant anything until individual little fronds and roots are established. If that long cycle sounds like an experiment rather than a practical way to get another fern, skip it without guilt.
Grow outdoors only in a sheltered warm climate
In a warm, humid climate, a potted A. antiquum can spend time outdoors in deep or dappled shade, protected from strong wind and hard sun. Kew records its native range in subtropical and temperate East Asia and describes it as an epiphyte or perennial (Kew Science); that habitat context explains the preference for shelter and moisture but does not translate neatly into a universal U.S. hardiness zone for every cultivated plant.
Treat outdoor placement as a seasonal move, not an assumption that the fern is landscape-hardy. Acclimate it in a protected shaded location for several days, keep it out of afternoon sun and wind, and bring it back inside before cold nights or a sharp temperature drop. The related A. nidus is used outdoors in frost-free Florida landscapes, but that regional extension recommendation should not be stretched into a guarantee for A. antiquum in a colder garden (UF/IFAS Gardening Solutions).
If you live where winter freezes are normal, grow it in a container you can move. Outdoor rain can keep a pot wet for longer than expected, so lift the nursery container out of a decorative cachepot, confirm that water drains freely, and check the root ball before watering again. A few warm months under tree shade may be a useful summer break; an exposed bed is a gamble.
Diagnose browning, yellowing, and stalled fronds
Change care based on the pattern, not on one damaged leaf. A single old outer frond fading while the center continues to push healthy growth may be normal turnover; repeated damage on several fronds or failure of the growing point deserves investigation. Check the leaf surface, root-zone moisture, pot drainage, window exposure, and recent changes in that order.
Brown tips, pale patches, and yellow fronds
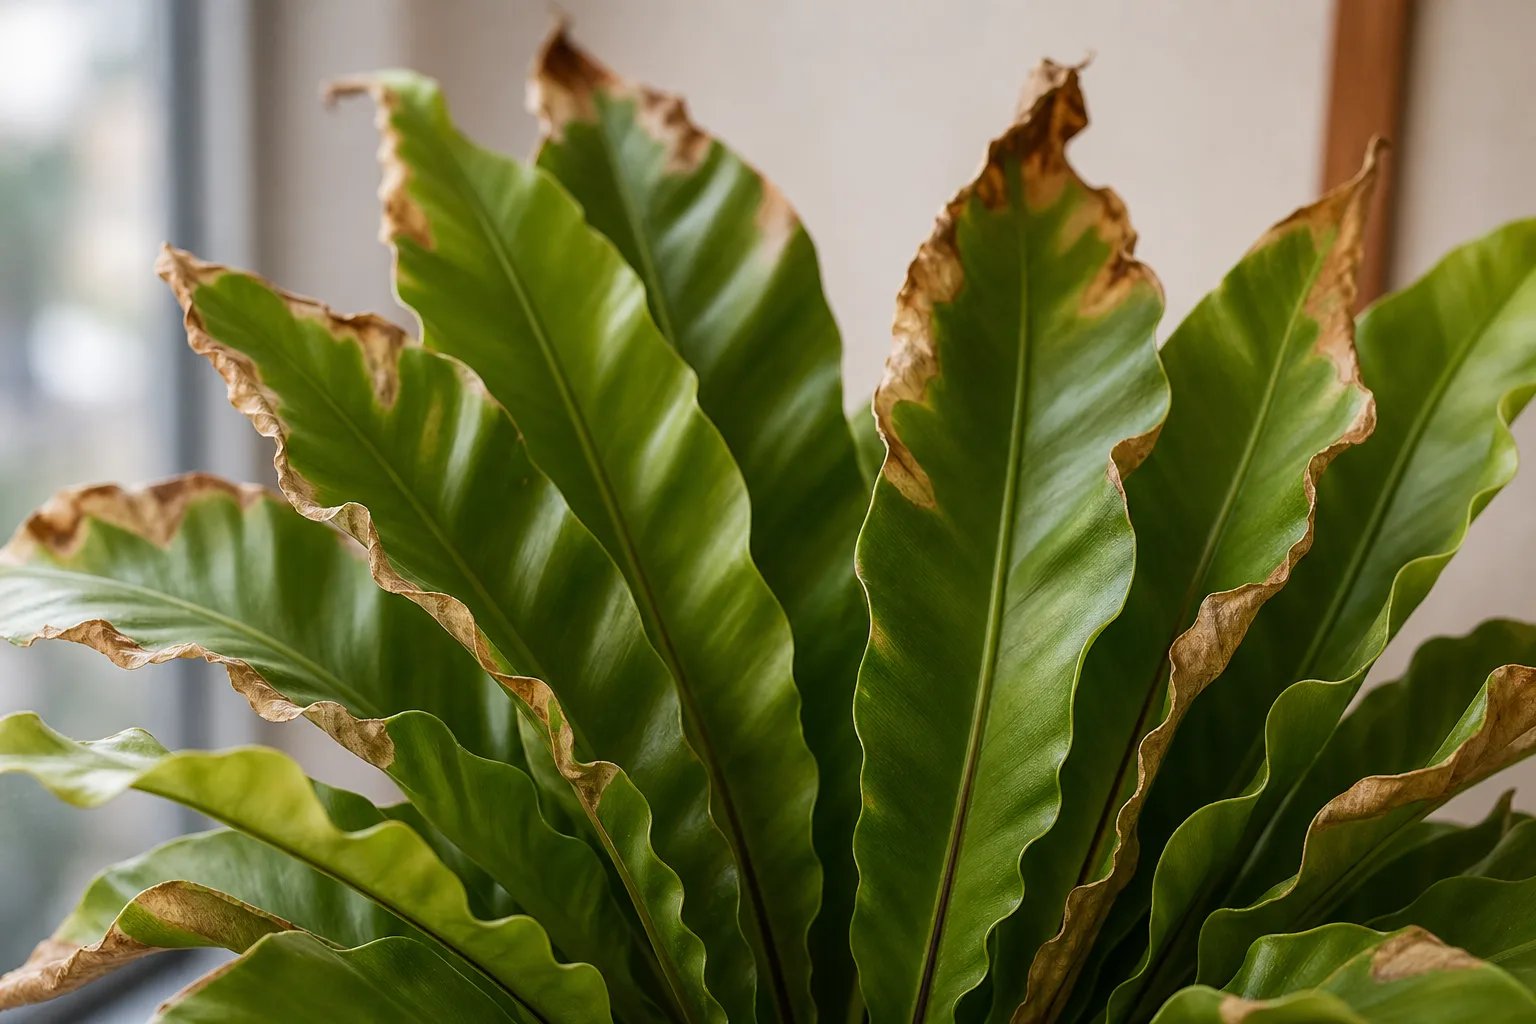
Crispy brown edges often follow dry air, a missed watering, or a root ball that repeatedly dries too far; direct sun and fertilizer salts can also brown tissue. First check whether the mix is dry at root depth, then look for a bright sun stripe or recent fertilizer buildup. If the room air is dry and watering has been consistent, move the humidifier closer or relocate the plant to a more humid bright room rather than increasing watering blindly.
Pale or bleached areas on the window-facing side point toward excessive direct light. Move the plant a little farther from the glass or add a sheer curtain, then wait for new growth to judge the adjustment; old sun-scorched tissue will not turn green again. If fronds are uniformly yellow and the mix stays wet, investigate drainage and roots before adding humidity or fertilizer.
Yellowing from the base can also reflect an old frond, while a soft dark crown, collapsing central growth, or a sour-smelling root ball raises concern about rot. Remove standing water and inspect the mix; if roots are brown and mushy, trim only clearly dead tissue with a clean tool and repot into fresh airy medium. Crown damage is serious because new fronds emerge from that center, and a plant with a rotted crown may not recover even after watering is corrected.
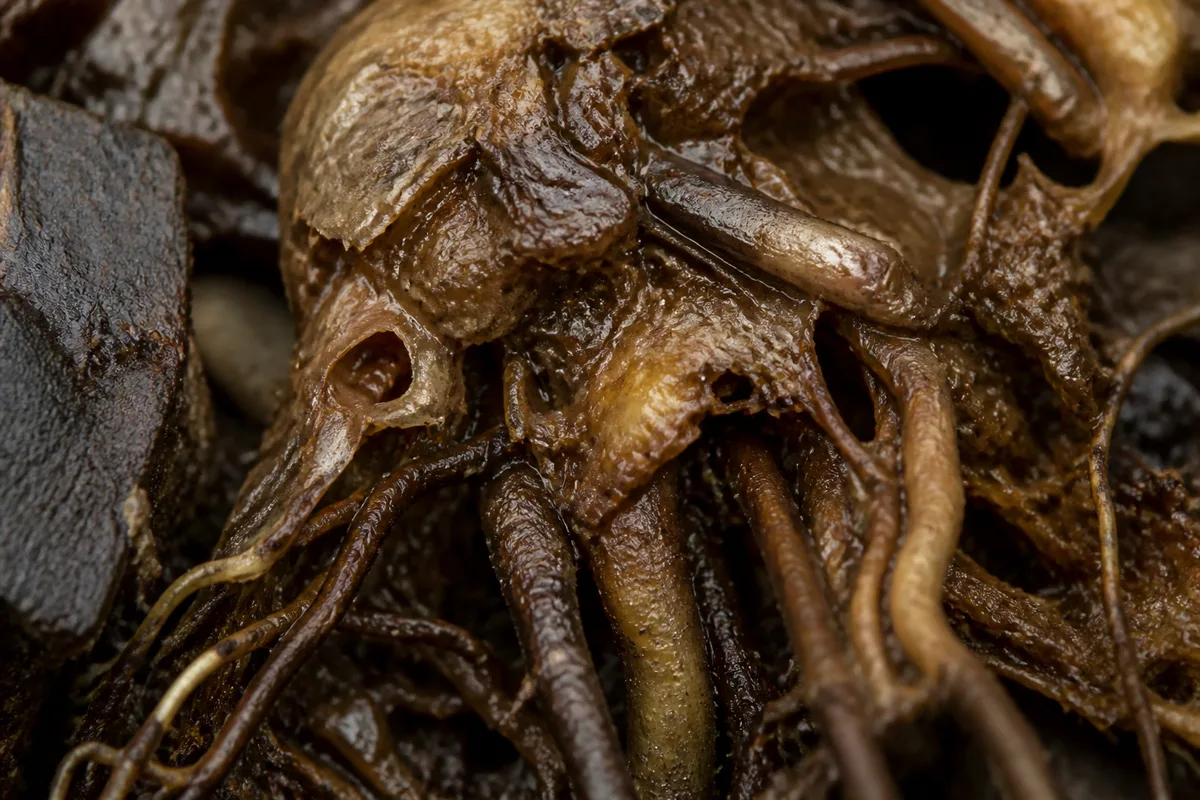
Small, distorted, or stalled new fronds can follow a damaged crown, low light, cold drafts, dry conditions, or excess fertilizer. Check the recent care history before taking drastic action, then stabilize light, temperature, and watering for several weeks. Ferns are slow, so judge recovery by the next emerging frond rather than expecting old damage to disappear.
Watch for scale and other pests
Inspect the frond undersides, midribs, and the center of the rosette when you bring a plant home and whenever its growth changes. Scale insects can resemble fixed brown or tan bumps, while mealybugs appear cottony; natural sori, by contrast, form orderly rows on the undersides of mature fronds. A hand lens and a damp cotton swab can help distinguish a pest from a normal spore pattern.
Isolate a plant with suspected pests so they do not spread to nearby houseplants. Remove a small number by hand or rinse carefully, keeping the crown from holding water, then monitor for new insects over the next few weeks. Fern foliage can be sensitive to sprays; UF/IFAS warns that insecticides may damage bird’s-nest ferns, so use any pesticide only if its label allows the plant and the pest, and test a small area before treating the whole plant (UF/IFAS Gardening Solutions).
Use a simple seasonal check-in
Rather than keep a rigid weekly routine, check the plant once a week and respond to what changed. In a bright, warm growing season, the pot may dry quickly and new fronds may emerge; in a cool winter room, slower growth means the same pot can remain wet longer. Adjust the watering interval, not the amount of care attention, and avoid feeding when growth has stopped.
When you first bring the fern home, leave it in a stable spot and observe how long the medium stays moist after watering. After a month, you will have a rough baseline for that plant, pot, and room; repeat the check after changing a window, repotting, turning on heat, or moving it outdoors. This simple record is more useful than a generic “once a week” instruction because the conditions that set the interval are visible and local.
If you need to troubleshoot, change one variable at a time and give new growth time to respond. Moving the fern out of direct sun while also changing the mix, pot, fertilizer, and humidity may eventually help, but it hides which factor mattered and can add transplant stress. Stable conditions make the next symptom easier to interpret.
Conclusion
Asplenium antiquum is manageable when you respect the two parts of its rosette: keep its roots evenly moist in an airy mix, and keep water from sitting in the crown. Bright filtered light, stable warmth, and enough ambient humidity support clean frond growth, while a modest pot and restrained feeding reduce the risks that often masquerade as “fern fussiness.”
Start by confirming the plant label, choosing a bright sheltered position, and learning how quickly its pot dries. Repot only when the root system or broken-down mix calls for it, treat the wavy fronds gently, and use the next new frond—not the old damaged one—as your measure of whether a change worked.