Why Is My Arborvitae Turning Brown? What to Check
Learn how to read arborvitae browning by timing and location, check pests and roots, and choose a safe first response before pruning or spraying.

A browning arborvitae can be showing normal color change, shedding older foliage, or responding to a problem in its roots, site, or branches. Instead of starting with a treatment, answer four questions: Which arborvitae do you have? When did the color change begin? Where is the brown tissue on the plant? What can you see or feel where the roots grow? Those observations help you choose whether to wait, adjust water, remove a visible pest, or ask for a diagnosis.
This order matters because an arborvitae can turn brown for opposite reasons. Dry soil may call for a slow soak, but saturated soil calls for less water and better drainage. Brown interior foliage can be part of normal shedding, while damage that advances through live branch tips needs investigation. Foliage color alone does not reveal which situation you have.
Start by identifying the cultivar and its normal color
“Arborvitae” usually refers to trees and shrubs in the genus Thuja, but color and growth habits vary by species and cultivar. Eastern arborvitae (Thuja occidentalis) and its cultivars are common hedge plants. Green Giant is a hybrid, and Penn State Extension notes that its foliage can fade toward bronze in winter; Emerald Green is selected for deeper winter color. That difference can change how concerning the same winter shade looks.
Find the nursery tag, invoice, landscape plan, or a label on a nearby plant. If you cannot identify the cultivar, photograph the entire tree and the flat sprays closely, then ask the nursery or a local extension office to help. A name such as “cedar” on a sign can refer to more than one kind of conifer, so confirm that the plant is actually a Thuja before following advice meant for a different species. (Penn State Extension)
Green Giant and Emerald Green can look different in winter
A bronzy cast across otherwise firm, evenly colored sprays may be normal for a cultivar that changes color in cold weather. That is different from brown, brittle tissue that dies back at the tips or from a patch that grows larger week by week. Compare the plant with photos from the previous winter, the cultivar description, or another specimen of the same variety on your property. A new cultivar’s normal seasonal color gives you a baseline; without one, “brown” is too broad a diagnosis.
Put the browning on a calendar
Write down when you first saw the change rather than relying on the moment you noticed it. Look at local weather over the preceding weeks and recall whether the tree was planted, pruned, watered, sprayed, or surrounded by construction. A short timeline can separate a gradual annual change from a sudden injury and help an extension diagnostician later.
Gradual inner browning in fall
If older foliage turns tan or brown inside the canopy while the outside remains green, the arborvitae may be shedding old foliage. Evergreen does not mean every scale-like leaf remains on the tree forever. Penn State Extension describes older foliage browning and falling in autumn, and horticulturist Melinda Myers explains that fall color change concentrated along the inner branches is often seasonal when the outer foliage is healthy. Recently transplanted trees or trees that endured a dry summer may show this process more conspicuously. (Penn State Extension; Melinda Myers)
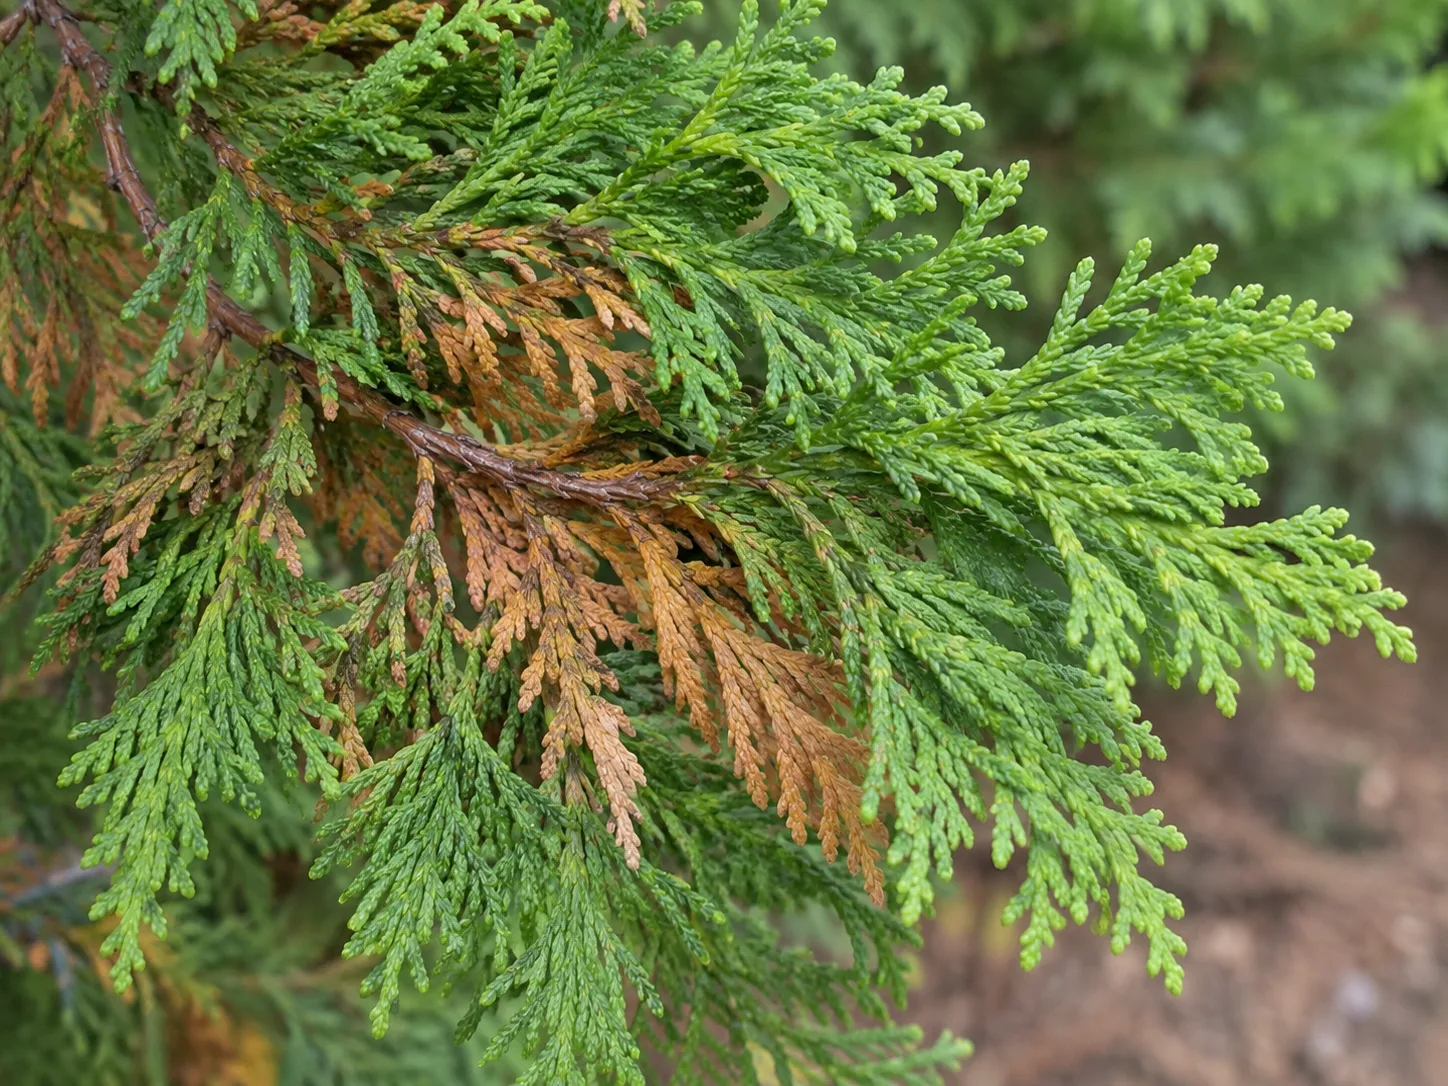
Part the branches gently and check the newest tips. If they are green and flexible and the brown material is mostly older growth close to the trunk, you generally do not need to spray or prune. Let loose foliage fall or remove it gently if it collects underneath. If new growth or entire branch tips are also browning, treat that as a separate clue and continue through the checks below.
Browning that appears after winter
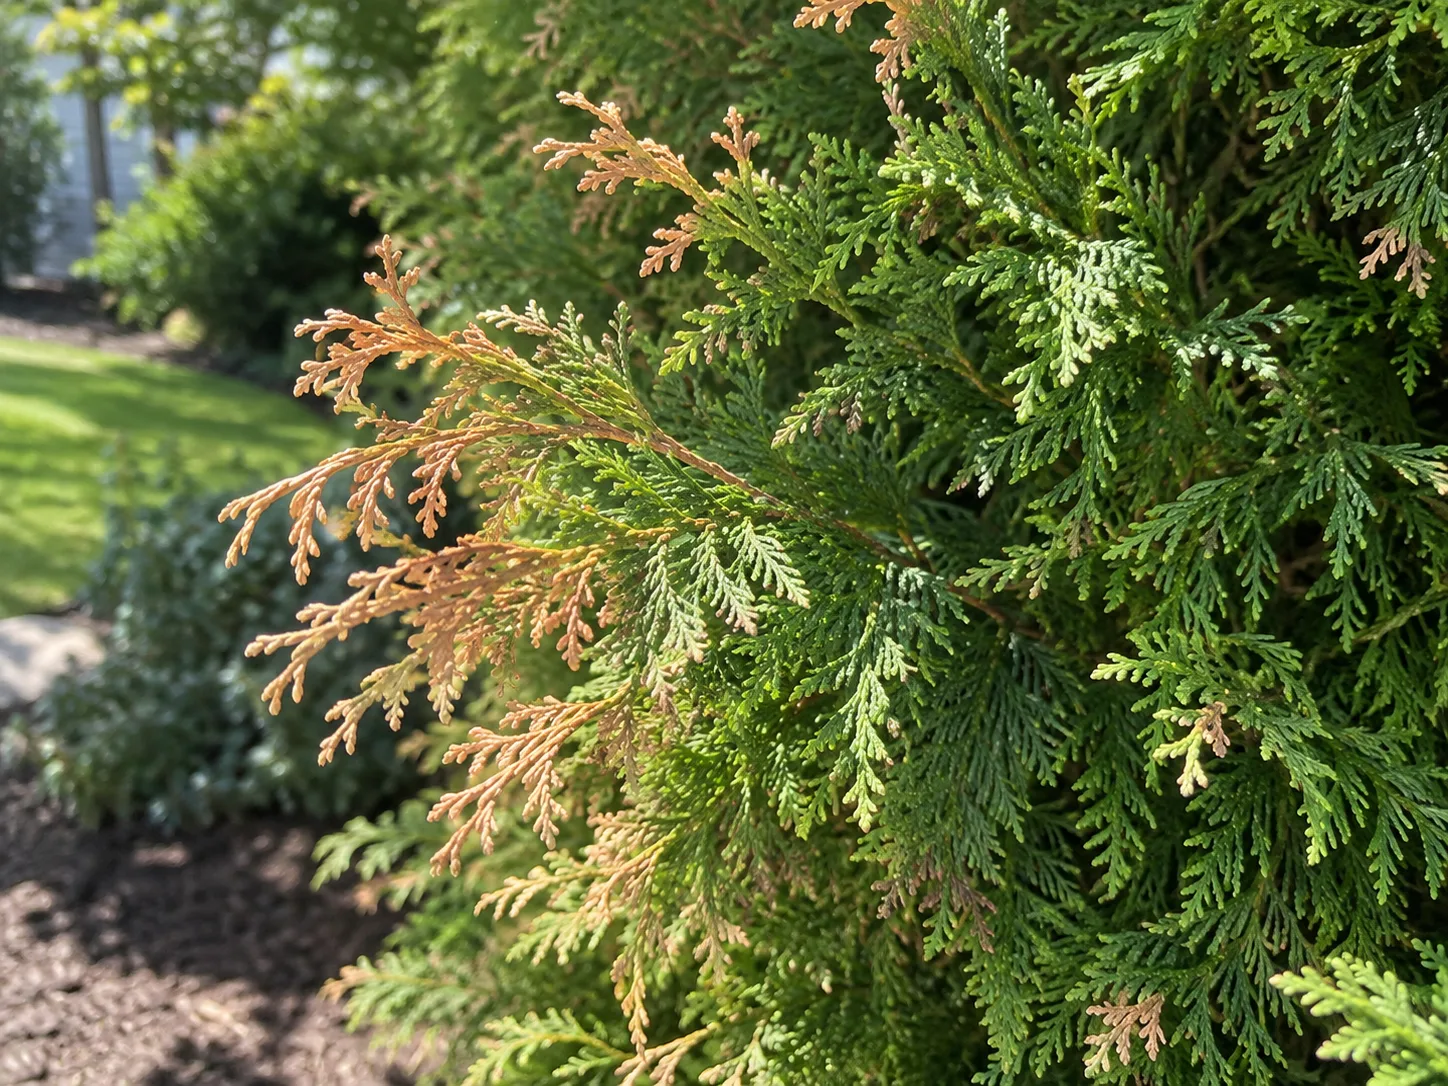
Damage first noticed in late winter or spring may reflect winter desiccation, sometimes called winter burn. Arborvitae foliage continues to lose moisture in cold weather while frozen ground limits root uptake. Wind, direct winter sun, and repeated freeze-thaw conditions can increase loss, often damaging the most exposed face or branch tips. Penn State Extension lists arborvitae among the evergreens at risk and explains that the pattern often follows sun and wind exposure. (Penn State Extension)
The calendar does not prove winter burn. Salt splash from a road or walkway can injure the same side, and a dry root zone before the soil froze can make exposure worse. Compare the damaged side with a sheltered side, note nearby pavement or plowed snow, and inspect the soil before deciding to irrigate. Wait for spring growth before pruning broadly; the tree’s new buds show which branches remain alive.
Browning during active growth
When fresh tips brown during spring or summer, or a patch keeps spreading as the plant grows, routine fall shedding is a weaker explanation. Look for a recent heat wave, irrigation failure, root disturbance, mower or construction injury, or visible feeding signs. New brown tips can also appear when a disease affects the branch tips, but fungal problems overlap visually with environmental stress and should not be named from color alone.
A change that starts soon after transplanting or a dry spell makes root moisture a high-priority check. A change after wet weather, an irrigation leak, or soil work raises a different question: are the roots getting oxygen? Record the sequence first, then inspect the tree and soil rather than treating whichever cause comes to mind.
Map the damage across one tree and the whole hedge
Look at the plant from all sides and compare it with the neighboring arborvitae. Browning confined to the interior, to the roadside face, to low reachable branches, or to a few separate branch tips gives different leads. If every tree in a row declines at once, shared conditions such as an irrigation line, salt exposure, compacted soil, or pesticide drift deserve attention. If one tree is affected while neighbors remain green, check for a blocked emitter, a damaged trunk, local root disturbance, or a pest on that individual.
Use this brief differential to pick the next inspection, not to name a diagnosis from one symptom:
| When and where the change appears | Inspect next | Do not assume |
|---|---|---|
| Older interior foliage in autumn; outer sprays remain green | Compare new tips with shaded, older growth | Every brown scale means disease |
| Exposed face after winter | Compare a sheltered side; note wind corridor and de-icer exposure | All winter bronzing is injury |
| Tips after hot or dry weather | Feel soil at the root ball and check each irrigation emitter | A wet lawn means roots are wet |
| Whole plants in a wet low spot or row | Look for standing water, buried root flare, and a shared runoff source | More water or fertilizer will help |
| Local patches with hanging cases, stippling, or dead tips | Inspect both sides of sprays and photograph visible evidence | Browning alone identifies a pest or fungus |
Follow a brown patch along the branch instead of inspecting only the canopy silhouette. Does the discoloration start at the tip and move inward, begin at the trunk and affect older sprays, or occur in small scattered spots? Is there a clean break, chewing, a hanging case, fine stippling, or dead tissue at a branch junction? The pattern narrows possible causes, but it does not identify a specific pathogen or insect without its distinguishing signs.
Inspect the foliage before naming a pest or disease
Use a hand lens if you have one, but do not scrape every spray or spray the hedge on suspicion. Check both sides of affected branches and part the canopy to see what is happening inside. Photograph a symptom beside healthy foliage for comparison. A clear picture of the suspect organism or feeding mark can be more diagnostic than a wide shot of a brown tree.
Cases, stippling, chewing, and browsed branches
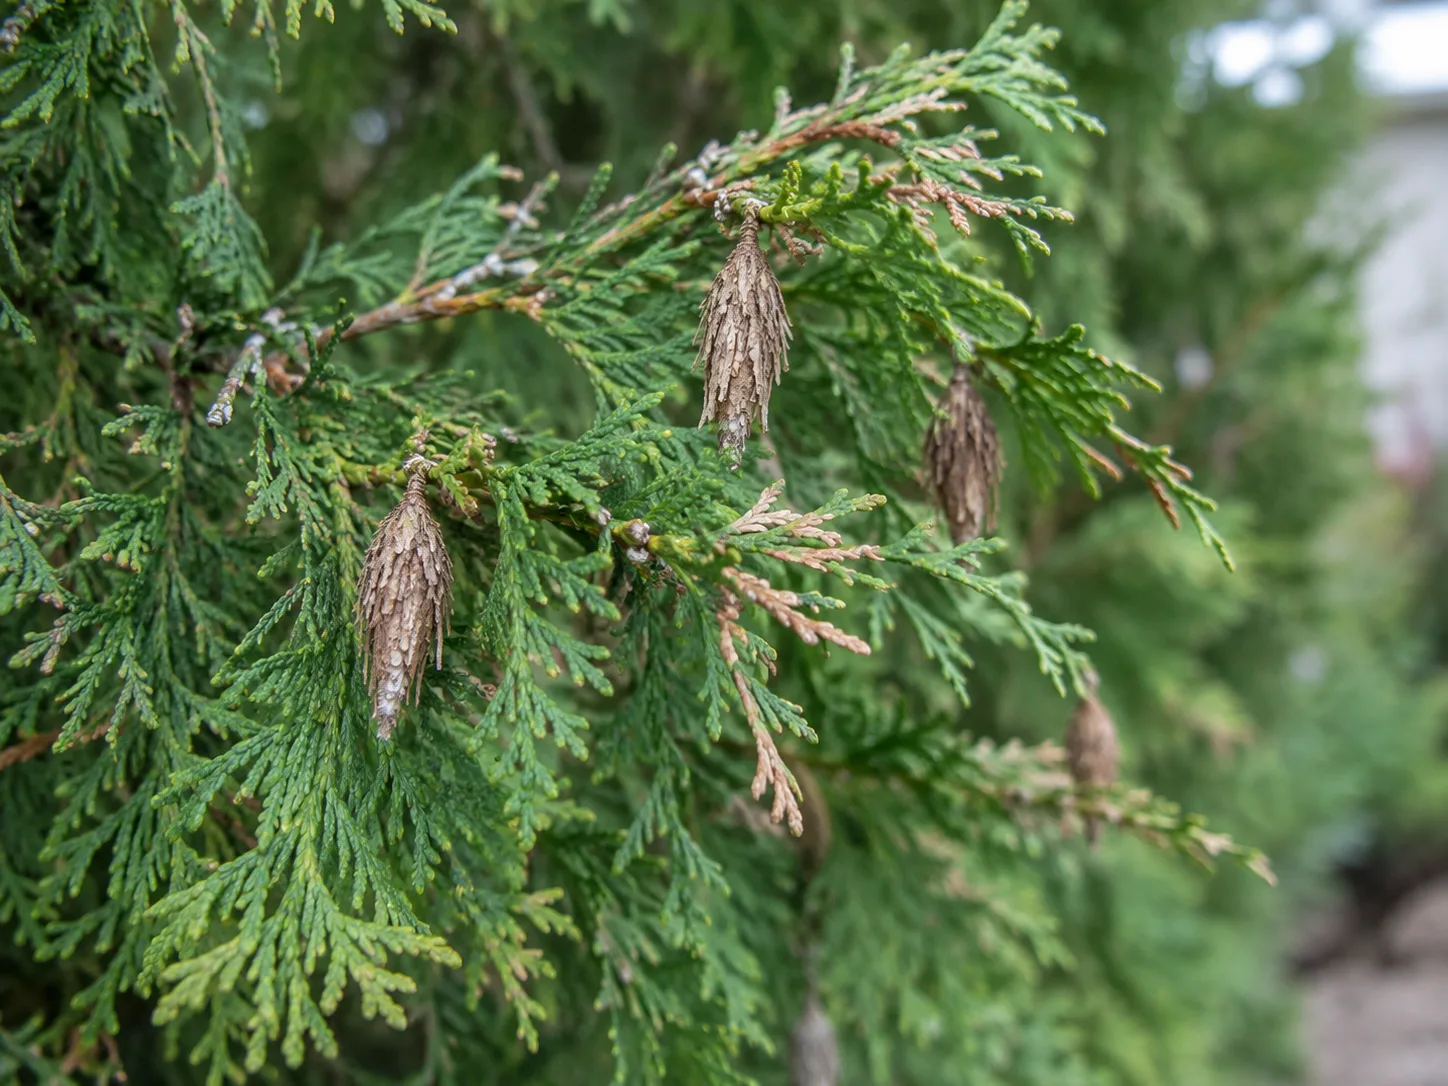
Bagworms create spindle-shaped, plant-covered cases that hang from branches and can look like small brown cones. Their feeding can remove foliage in local patches, unlike even aging of older interior sprays. Penn State Extension describes bagworms as a common arborvitae pest and also identifies leafminers, scale insects, mealybugs, and spider mites among pests that may visit these plants. A small reachable case can be removed and discarded; for an infested tall hedge, ask local extension staff about the pest’s life stage and regional treatment window before choosing a product. (Penn State Extension; NC State Extension)
Spider mites may leave fine pale speckles that blend into a dull bronze cast, especially in hot, dry weather. Tap a suspect branch over white paper and look for tiny moving specks, then verify with a hand lens or a local diagnostic service. Webbing may be visible in a heavy infestation, but a web or a bronze color on its own is not enough to identify mites. Deer browsing looks different: foliage is removed or ragged at reachable heights, often with broken or clipped branch ends. Do not apply a broad pesticide unless a pest has been identified and the product label covers the plant and problem.
Tip blight and below-ground root problems
Some arborvitae needle blights cause dry, brown branch tips and dieback at several points in the canopy. Purdue’s landscape diagnosticians report that this disease is less common than environmental stress and pest damage; they explain that fungi associated with tip blight can be weak pathogens that take advantage of trees already weakened by drought, transplant shock, freezing injury, or rough pruning. A few spots or a dead tip cannot confirm the fungus because identification may require laboratory examination. Purdue recommends addressing underlying stress and does not generally recommend fungicides for the stress-related problem it describes. (Purdue Landscape Report)
Root disease produces a less specific canopy signal: foliage can discolor broadly and decline while the cause remains hidden underground. Poorly drained soil and roots that become oxygen-deprived are important concerns, but a brown crown cannot tell you which pathogen is present. The Pacific Northwest Plant Disease Management Handbooks describe root-rot cases with discolored, decomposing roots and caution that positive identification matters before treatment. Avoid digging up major roots to investigate; ask a plant clinic or arborist to assess the tree and collect an appropriate sample if decline is progressing. (Pacific Northwest Plant Disease Management Handbooks)
Check moisture at the root ball and the root flare
Grass and surface mulch can look wet while the original root ball is dry, particularly during establishment. The reverse also happens: a lawn may drain at the surface while a low or compacted planting hole holds water around roots. Check at several points, including near the root ball and farther out under the canopy. Use a finger or narrow probe several inches down to feel whether soil is dry, moist, or saturated. A moisture meter can help you compare spots, but its reading is only a clue because soil type affects it.
Arborvitae prefer moist, well-drained soil and can struggle in drought; Purdue also notes that both overly dry and overly wet conditions commonly stress them. If the soil is dry at the root zone and drains freely, water slowly over the roots instead of briefly wetting the foliage. A soaker hose or drip line can help direct that water to the root zone; Glover Nursery’s arborvitae guide also recommends watering at the base and avoiding overhead irrigation, while its specific timing advice should be adjusted to the soil and weather in your yard. If the soil is soggy, pause irrigation and look for a leak, runoff, compaction, or a low spot. Do not add water merely because the leaves look dry: roots without enough oxygen can show drought-like foliage symptoms. (Penn State Extension; Purdue Landscape Report; Glover Nursery)
Check the base of the tree without excavating. The trunk should widen into the root flare near the soil surface; a mound of soil or mulch against the trunk may conceal that flare. Keep mulch a few inches back from the bark. If the soil remains wet, avoid adding a thick new mulch layer or digging trenches through established roots. Correct a simple irrigation problem, but leave major regrading and root excavation to an arborist.
Newly planted and established trees need different checks
For a newly planted arborvitae, test the root ball itself and the soil around it separately; they can dry at different rates. Check moisture more often during hot, windy conditions, but water according to what you find rather than using a universal interval. Make sure water reaches the root zone, and allow the site to drain between irrigation.
An established tree should not need to be watered on the same schedule as a new planting, but it can still suffer during extended drought or when roots have been cut, buried, compacted, or crowded. Think back to recent grading, trenching, parking, or construction. If stress appeared soon after such work, more frequent watering may not solve damaged roots or poor drainage.
Make a low-risk response plan for the next 48 hours
Use the first two days to collect clues and avoid making the problem larger. Take an overall photo and a close-up of a brown branch. Write down when the color began, the recent weather, whether the plant is new or established, and any change in watering or nearby work. Inspect the cultivar label and look for bagworm cases, browse marks, stippling, branch breakage, or signs that water pools after rain.
Then choose only a correction supported by what you found. If the soil is dry and drains, give it a slow soak and check again later. If the root zone is saturated, pause supplemental watering and trace the source of water. If you find a few reachable bagworm cases, remove them. If the browning is limited to old inner foliage in fall, leave healthy outer branches alone. If none of these clues stand out, monitor rather than combining water, fertilizer, pesticide, and pruning into one untestable experiment.
For a problem hedge, compare one affected tree with one green tree in the same row. Check whether they share irrigation, slope, sun, road exposure, and recent spray history. That small comparison can reveal a simple difference such as a blocked drip emitter or a salt-splashed end plant, while also giving a plant clinic better context if you need one.
Change one likely stress and measure the response
Once you have a plausible cause, correct it and keep a short record. Mark one affected branch with a loose tag, photograph the whole tree from the same place, and note whether the browning advances, stays put, or is joined by fresh growth. A tree does not recover by recoloring dead scales; improvement means that green tissue remains healthy and new tips develop during the normal growth flush.
If you changed irrigation, do not judge the result by the next day’s color. Monitor soil moisture and whether additional branches become affected. If you stopped watering because the site was saturated, watch how quickly it drains after the next rain. If an insect was removed, inspect for fresh feeding rather than expecting already-browned foliage to heal. When the condition worsens or new symptoms appear, update the diagnosis rather than repeating the same correction.
Avoid fertilizer as an all-purpose rescue. It will not repair severed roots, reverse winter burn, or kill pests, and unnecessary salts can increase root stress. A soil test or extension diagnosis can identify a nutrient issue; without one, focus on moisture, drainage, exposure, and visible evidence first.
Wait to prune until you can identify live growth
After winter or drought injury, it can be difficult to tell in early spring which brown sections are dead. Give buds and new growth time to reveal the living boundary, then remove only small branches that are clearly dead or broken. Wisconsin Horticulture notes that arborvitae have latent buds farther back along stems and can be pruned to a bud or side branch; that supports a selective cut rather than blindly shearing off every brown-looking spray. But an arborvitae may not fill a gap in old, bare wood, so avoid cuts that leave a large empty window. (Wisconsin Horticulture)
Use clean, sharp pruners for small branches and cut back to live foliage or a side branch. Do not remove a large share of healthy foliage to “balance” the tree, and do not climb or use a chainsaw without the proper training. For more on timing, see the guide to pruning evergreens in winter. If the tree is high, close to a building, or structurally split, call an arborist rather than trimming from a ladder.
When to send a sample or call an arborist
A plant diagnostic clinic is useful when fresh tips keep dying, several new patches appear, or you find spots or lesions but cannot identify a pest. Ask first how the clinic wants a sample collected. Send a section that includes both affected and healthy transition tissue, not a bag of fully dead foliage, and include your photos, cultivar if known, timeline, irrigation history, and any product applied nearby. For some diseases, looking at spores or tissue under magnification is necessary.
Call an arborist when a large or mature tree is declining, roots may have been damaged by construction, water remains trapped at the base, or whole branches are dying. A professional can assess canopy, trunk, root flare, and soil conditions together. Treat leaning, split, or hanging branches as a safety concern and keep people away while arranging an evaluation. If several arborvitae fail in sequence, do not assume they all need the same spray; the pattern may point to drainage or a spreading root issue.
Use a seasonal check to prevent the next round of browning
In fall, look inside the canopy and decide whether the older inner foliage is shedding while the outer growth remains healthy. Before the ground freezes, check moisture and water during an extended dry period if the site drains. Penn State Extension advises that winter burn risk depends on exposure and adequate soil moisture, while screens or wind protection can be useful for particularly exposed evergreens. Burlap should act as a loose windbreak rather than a tight wrap that traps moisture or rubs branches. (Penn State Extension)
In spring, wait for the new flush before cutting winter-damaged growth. In summer, check root-zone moisture after hot, dry, or windy spells and inspect for pests before damage spreads. Keep de-icing salt, herbicide drift, and equipment away from the hedge, and avoid covering the trunk flare with soil or mulch. A short seasonal photo record makes it easier to spot whether a familiar color shift is repeating or whether this year’s injury is new.
Conclusion
A brown arborvitae is easier to assess when you replace “What should I spray?” with a short sequence: identify the cultivar, date the change, map where it appears, inspect the foliage, and check moisture at the roots. That sequence separates normal inner shedding or a cultivar’s winter bronze from stress that is advancing through new tips or whole branches. None of those clues proves a diagnosis by itself, but together they guide a safer first response.
Correct only what the evidence supports, measure whether the damage stops spreading, and wait for live growth before pruning. If new sections keep declining, root-zone conditions are poor, or the tree is too large to inspect safely, involve a plant clinic or arborist. Brown foliage will stay brown; healthy roots and buds may still produce the next season’s green growth.