Landscaping: Design, Planting, and Care Guide
Start landscaping with a site audit, then build useful outdoor zones, choose climate-fit plants, manage water, and phase projects into a workable plan.
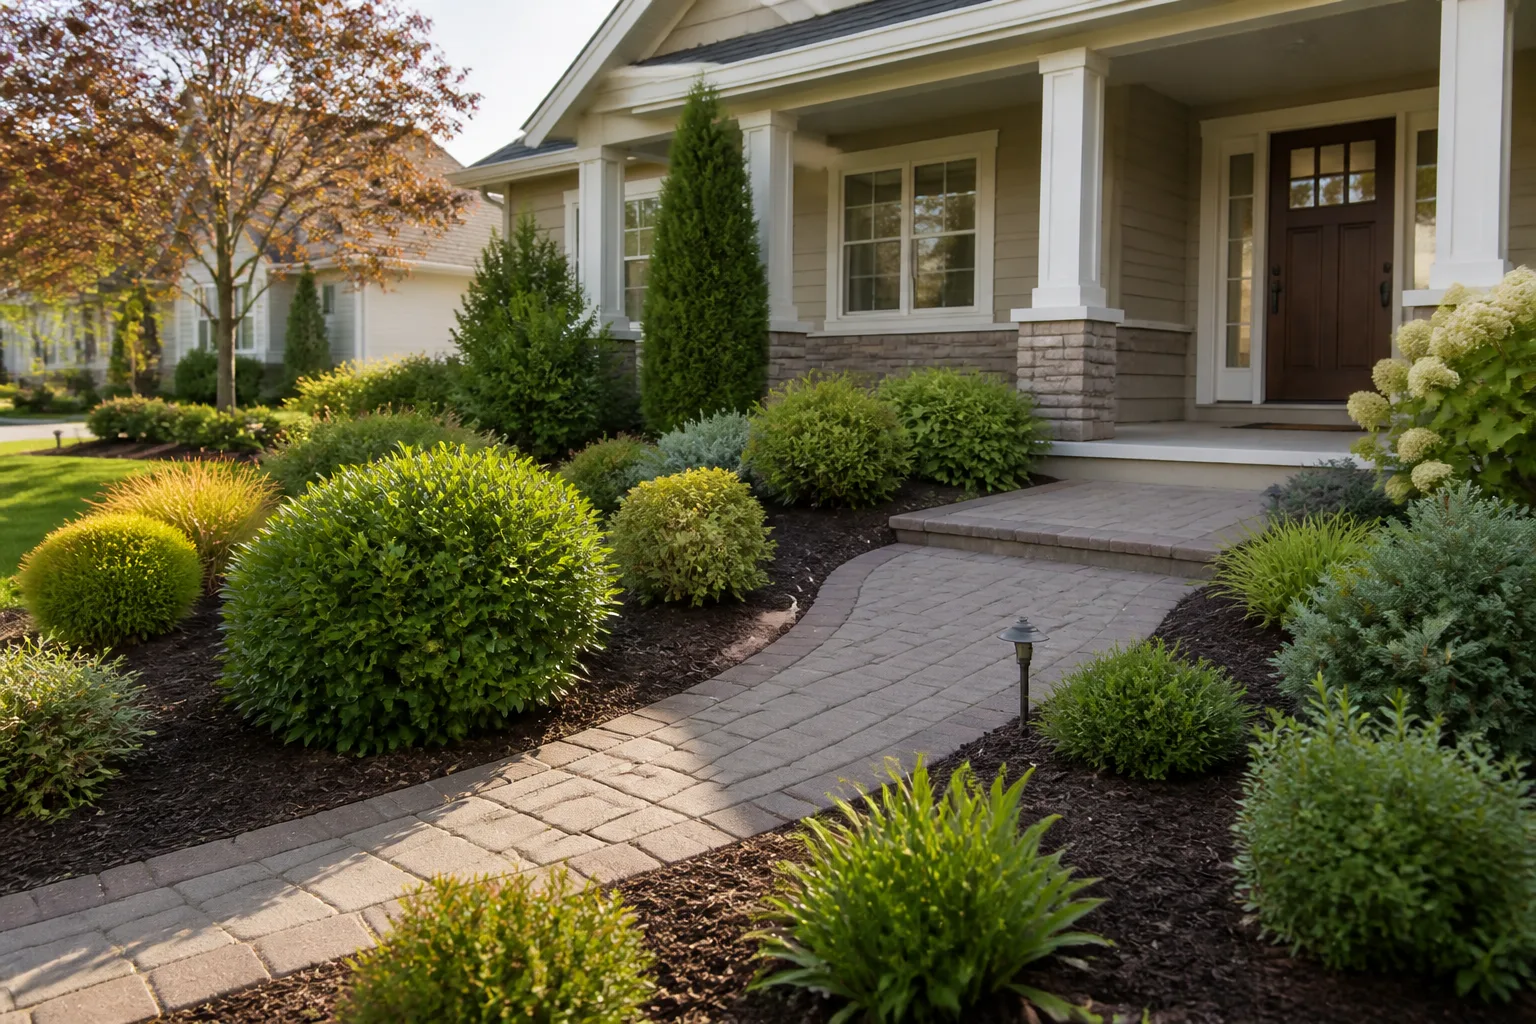
Good landscaping starts before the first plant goes into the ground. It begins by noticing what your yard already does—where people walk, where rain collects, which corners bake in afternoon sun, and which jobs you want the space to do—then shaping those facts into a plan you can afford to build and maintain.
That plan can be a small refresh around the front steps or a gradual backyard redesign. Either way, the reliable sequence is the same: understand the site, solve practical problems, set the layout, choose plants and materials for the conditions, then install in manageable stages.
Start with how you want to use the yard
Write down the activities you want the landscape to support before you decide on a style. A household that needs a clear path to the garage, a safe play patch, and a place to eat outside has different priorities from one that wants pollinator habitat, a kitchen garden, or a quiet seating corner. List the frequent uses first; occasional wishes can fit around them.
Then give each activity a location. Put dining near the kitchen if carrying food across the yard would make the patio inconvenient, and keep a play area visible from the rooms where adults spend time. A compost bin, hose storage, utility equipment, and trash containers also need practical access, even if planting will later soften their appearance.
Make a rough time-and-budget boundary. If you can spend one hour a week, a collection of clipped hedges, annual color, and a large lawn may become a chore; a few clear beds, regionally adapted plants, and a small usable lawn may suit better. Landscaping becomes easier to judge when you ask, “Will this feature still be useful after the novelty wears off?”
Read the site before choosing plants
Walk the property at different times of day and note how sunlight shifts across it. Mark hot afternoon areas, deep shade, wind corridors, roof overhangs, and places where reflected heat comes off pavement. Observe for several days if you can; a single quick look can miss seasonal shade from trees or a building.
Map the fixed features: house, drive, fences, mature trees, doors, windows, overhead wires, visible utility boxes, and water sources. Mark how people and pets already cross the yard. Homegrown National Park’s native landscape planning guide recommends sketching immovable features and growing conditions first, then adding bed shape and plant layers; that layered approach also works for a conventional yard plan.
Check soil and slope rather than assuming a bag of topsoil will fix everything. Note whether soil is sandy, compacted, or heavy clay, and consider a soil test through your local cooperative extension before using fertilizer or major amendments. Take photos of the same areas after rain and during dry weather. These reveal where runoff enters, where puddles linger, and where thirsty plants would need more irrigation than you want to provide.

Make a quick “site ledger” with three columns: condition, evidence, and response. For example: “afternoon sun; pavement stays hot until evening; choose heat-tolerant plants or add shade.” This converts vague impressions into decisions and helps prevent the familiar mistake of buying a beautiful plant before finding out that the spot is too wet, too dry, too exposed, or too small.
Plan water flow before adding beds or paving
Water problems should be handled before surface styling. Watch a hard rain from a safe place and trace where water comes off the roof, crosses the lawn, slows down, and exits the property. A low patch may be a useful place for moisture-tolerant planting, but standing water next to a foundation, erosion at a slope, or repeated flooding needs diagnosis rather than concealment with mulch or decorative stone.
The right response depends on the cause. Compacted soil, a blocked downspout, a leaking irrigation line, a grading problem, and runoff from a neighboring property require different fixes. Start with simple actions—clear gutters, extend a downspout only where local rules allow, repair an irrigation leak, or reduce unnecessary impervious cover—but do not dig a drain or reshape a slope until you know where the water can legally and safely go.
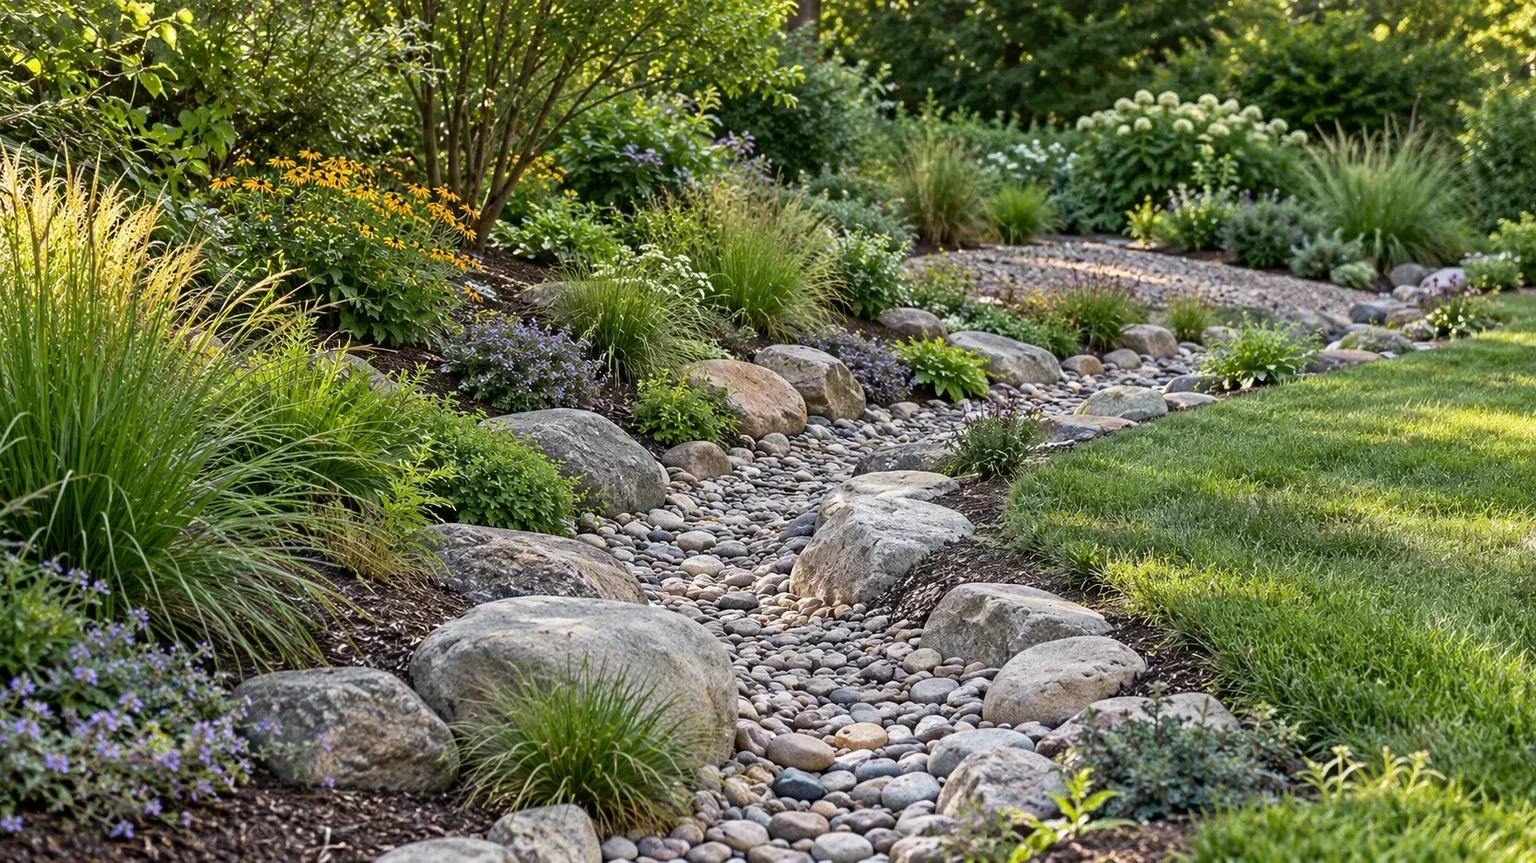
Keep water away from the building and avoid sending it onto a neighbor’s lot or into a public walkway. Rain gardens, swales, dry creek beds, permeable paving, and planted slopes can be useful design features, but their placement and capacity depend on soil, rainfall, utilities, and local standards. If water is entering a basement, undermining a structure, or moving across a property boundary, ask a qualified drainage or landscape professional to assess it.
Divide the landscape into useful zones
Treat the yard as connected outdoor rooms rather than one undifferentiated patch. A simple property might have an arrival zone near the front door, a service strip for bins and utilities, a sunny garden bed, and a back patio connected to a modest lawn. Use a path, change in surface, low border, or shift in planting to signal where one use ends and another begins.
Scale each zone to the activity. A seating area needs enough room for chairs to slide back and for people to pass; a narrow ornamental bed should not pinch the route to a gate. Keep maintenance access in the drawing too: leave space to reach a faucet, clean a drain, open a utility cover, mow an edge, and prune a shrub without standing in another bed.
Small yards often feel larger when there is a clear route and one main focal view instead of many competing objects. A diagonal path can lengthen a short space, while a bench, specimen tree, or attractive gate draws attention to the far end. Do not use every trick at once: a quiet palette and a few distinct zones usually read more spaciously than lots of tiny beds and ornaments.
Sketch a simple plan you can build in phases
Measure the house and yard, then sketch them on graph paper or a printed aerial image. Use a consistent scale, even if it is simple—one square might equal a few feet—so a patio or mature shrub does not accidentally consume twice the space you have. Add doors and windows, existing trees, property edges, water flow, utilities, and the routes people use every day.
Draw a second version for proposed changes. First place permanent or expensive elements: paths, patios, fences, retaining structures, large trees, and irrigation lines. Next mark beds and lawn areas. Finally, sketch plant groupings by mature width rather than the size of a nursery pot. The University of Florida IFAS guide to low-care, low-cost landscapes emphasizes planning, matching plants to local conditions, grouping plants with similar water needs, and using hardscape for lasting structure.
Before committing, test bed edges directly on the ground with a garden hose or rope. Walk the curves from the house and street, check whether a wheelbarrow can pass, and look from inside rooms where you will see the landscape most. A drawing is a proposal; the marked outline catches awkward turns and overly narrow beds while changes are still cheap.
Choose a design language that suits the house
A landscape does not need a strict named style, but a few consistent choices make it feel intentional. Repeat one or two paving materials, keep bed shapes related, and use a limited palette of plant forms or colors. University of Florida IFAS explains how plant aesthetic characteristics—including shape, scale, texture, and color—affect a planting; these are practical tools for coordinating a landscape rather than rules that require a formal design degree.
For a relaxed, informal yard, use gently curving beds, repeated drifts of compatible plants, and paths that invite a slower walk. A more formal garden may use straight lines, balanced entry plantings, clipped shapes, and repeated spacing. Country Living’s overview of English garden design illustrates how a path, layered planting, and vertical features can create a welcoming, lived-in character; borrow an element that suits your property instead of trying to reproduce a whole style.
Let the architecture inform the choices without matching every line literally. A simple modern house may benefit from restrained bed geometry and strong foliage contrast, while a cottage-style home can carry looser planting. The key is repetition: reuse a material or plant in several places so the yard feels related, and reserve contrast for a few focal points so it does not become visual noise.
Give paths, edges, and focal points a job
A path should connect destinations and be comfortable to walk on in the weather you have. Choose a stable surface for a frequently used route, and consider stepping stones or gravel for lighter traffic if they remain safe and level. Curves work when they help reveal a destination or route around an obstacle; decorative curves that lead nowhere tend to create mowing and edging work without improving circulation.
Edges do more than make a bed look neat. They separate lawn from mulch, keep gravel from migrating, and clarify where to mow. A clean spade edge is inexpensive but needs periodic recutting; metal, stone, or brick edging costs more and can last longer if installed correctly. Avoid raised edges that trap water against a house or create a trip hazard on a commonly used route.
Pick one or two focal points where the eye should land: a tree, a specimen shrub, a gate, a sculpture, or a small seating area. A focal point needs breathing room and a view line; placing one behind a tangle of plants defeats its purpose. Country Living’s garden design examples highlight paths and vertical structures as ways to add depth, but the path or trellis should still solve a real access or screening need.
Layer plants for structure through the seasons
A layered planting has different heights and roles. Trees or tall shrubs create the upper framework, medium shrubs and perennials fill the middle, and grasses or groundcovers cover the lower layer. The arrangement can be formal or loose; what matters is that plants have room at mature size and the bed still has a recognizable shape after flowers fade.
Use evergreen structure selectively, then add seasonal interest with foliage, flowers, seed heads, bark, and fall color. A garden built only around bloom can look empty for much of the year, while a foliage-forward design holds together between flowering periods. The IFAS plant aesthetics publication explains that form, scale, texture, and color all affect how plants work together; repeating leaf shapes or colors is an easy way to establish rhythm.
Think about the view from several positions. In a foundation bed, keep taller plants away from windows and do not let mature branches cover vents or block maintenance access. At the back of a border, height can frame a fence; beside a path, low plants protect sightlines and avoid brushing passersby. The “right” plant is not simply the prettiest—it is the one that fits its role, its conditions, and the space it will occupy later.

Choose plants by conditions and mature size
Start with your region and site, then narrow the choices by exposure, soil moisture, and available space. Plant labels and extension databases can tell you mature height, spread, hardiness, and preferred growing conditions; use those details before buying. A shrub that is described as compact may still be too large for a narrow foundation bed, and “drought tolerant” usually means after establishment, not immediately after planting.
Group plants with similar water and light needs. Put thirsty plants where irrigation is convenient and keep dry-site species out of a frequently watered lawn edge. The University of Florida IFAS low-care landscape guidance recommends repeating a small number of plants and grouping by water requirements, which makes both design and maintenance simpler. That source is written for Florida, so use its planning logic rather than treating its regional plant list as universal.
Use repetition to make beds look cohesive, but do not plant a single species everywhere. A mixed palette with overlapping bloom times and different forms can be more resilient when weather, pests, or disease affect one plant. Check for invasive status and local restrictions before adding fast-spreading shrubs, vines, or groundcovers, especially near natural areas and waterways.
Use native plants thoughtfully
Native plants can be valuable choices when they are native to your local region and fit the site. Many support local insects and wildlife, and a plant adapted to local conditions may need less supplemental water once established. Those are potential benefits, not a guarantee that every native plant is effortless: a wetland species can struggle in a dry foundation bed, and young plantings still need establishment care.
Homegrown National Park’s native landscape guide suggests mapping fixed features and site conditions before placing trees, shrubs, herbaceous plants, and ground-layer plants. It also recommends choosing a limited palette and grouping plants with similar light, water, and soil needs. This sequence helps a native bed read as designed instead of looking like a random collection of whatever was available at the nursery.
Use local extension services, native plant societies, or regional botanical gardens to identify plants suited to your ecoregion. Locality matters: “native to North America” is not a precise enough filter for a small garden, because a species adapted to another rainfall pattern or growing season may struggle in your yard. If ecological value is a priority, preserve some seasonal seed heads and leaf litter where appropriate, while keeping paths, drains, and building edges clear.
Make planting beds easier to maintain
Fewer, well-chosen plants often create a calmer bed than a long list of one-off purchases. Repeat a handful of reliable species in groups, leave access for weeding and pruning, and size the bed so you can reach its center without stepping on soil. Mulch can suppress weeds and buffer soil moisture, but it does not replace appropriate plant spacing or correct a persistently wet site.
Plan for mature spread instead of planting too close to create an instant full look. Plants that crowd into one another may need frequent pruning, compete for light, and become harder to inspect. On the other hand, a bed planted too sparsely can leave open soil that is vulnerable to weeds; fill the space deliberately with compatible groundcover or mulch while slower shrubs establish.
Keep difficult transitions simple: a narrow grass ribbon along a fence, a tiny bed between driveway and house, or a steep bank can demand far more trimming than it appears to. Expand a bed into a shape that a mower can follow, use groundcover only where it can be contained, and avoid thorny plants beside a tight walkway. The Florida IFAS low-care guide suggests fitting plant size and natural form to the space so you do not have to constantly trim a plant to make it behave.
Choose hardscape materials for use and runoff
Hardscape includes paths, patios, steps, walls, and other built surfaces; softscape refers to living plants and planted areas. Hardscape can make a yard more usable and provide year-round structure, but every paved area changes how rain moves. A useful patio is worth the footprint; an oversized decorative surface may create more runoff and heat than the space needs.
Select materials for their job, climate, and maintenance. Smooth pavers may be easier to sweep but can become slippery in shade; gravel is permeable and relatively flexible but can migrate onto lawns; timber feels warm but may need upkeep; stone can last for decades but costs more to move and install. Consider edge containment, accessibility, snow removal, drainage, and how the material will meet doors and existing paths.
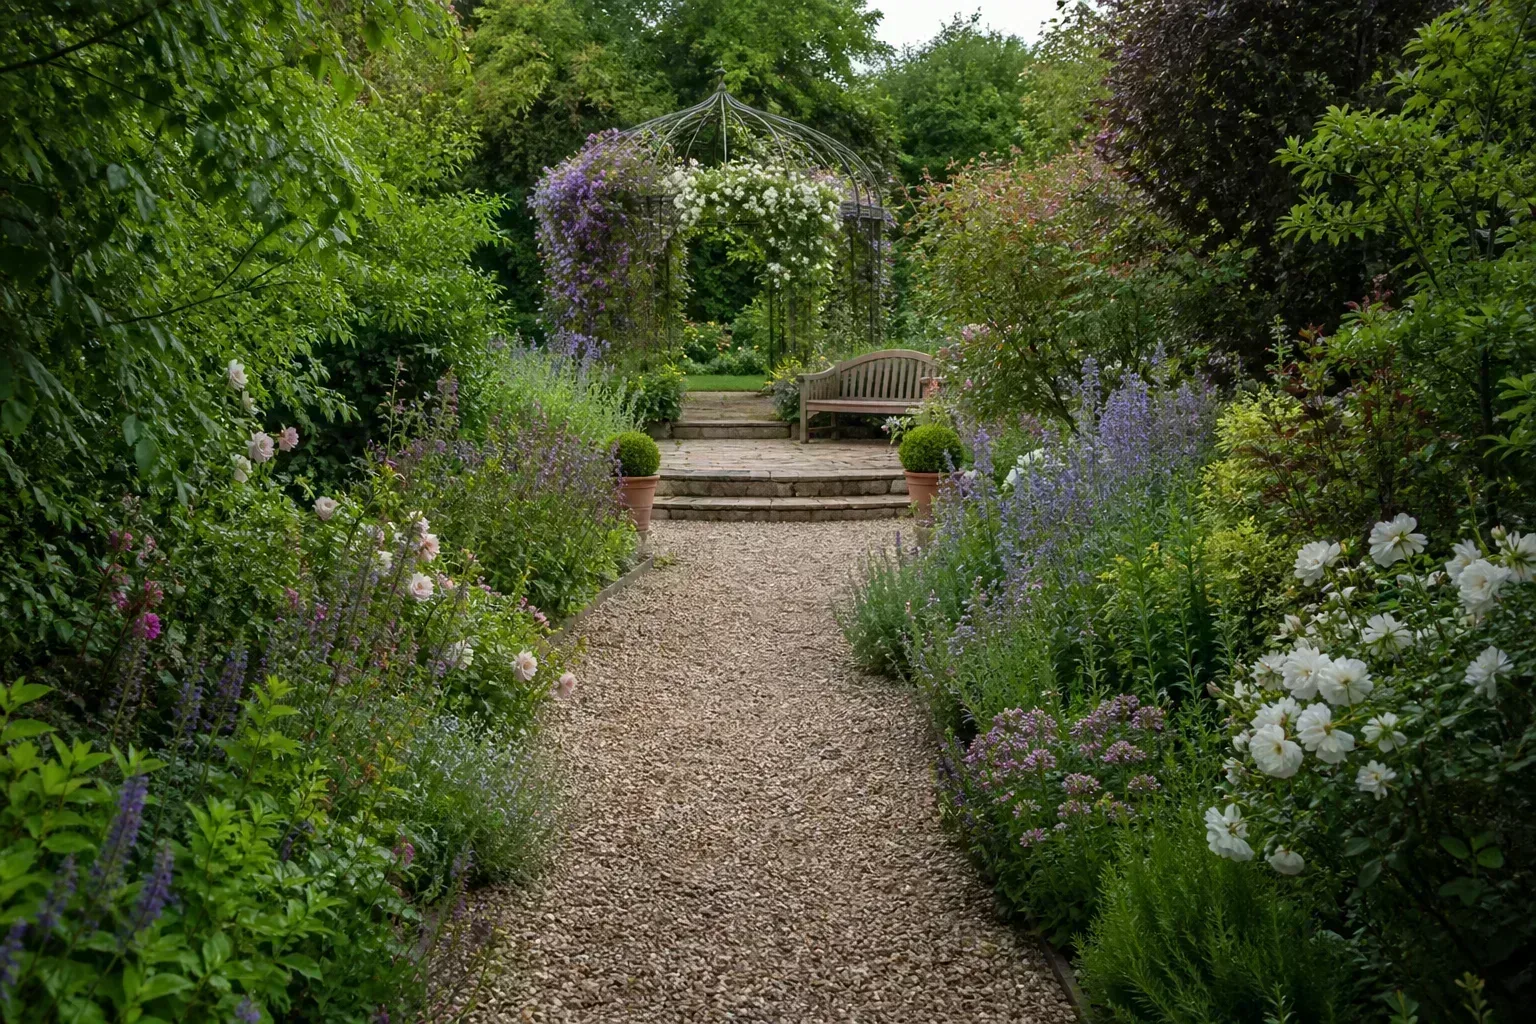
Where it suits the project and local conditions, use a permeable path or jointed paving to leave some rainfall able to soak into the ground. Do not assume a “permeable” product solves drainage by itself: the base, underlying soil, slope, and water volume matter. The Florida IFAS guide recommends hardscape and garden structures as lasting organizing elements; the best surface is the one that supports movement while still handling water responsibly.
Add privacy without creating a new problem
Privacy can come from a fence, a layered planting, a trellis, or a change in how the patio is oriented. Start by identifying the exact view you want to screen and whether it is an eye-level sightline, an upper-story window, or headlight glare. A narrow vertical screen may solve one view while preserving light and air elsewhere; a solid barrier across the whole boundary can make the yard feel smaller and darker.
Before planting a privacy hedge, check mature height and width, local fence rules, overhead wires, underground utilities, and distance from neighboring structures. Fast-growing trees seem like a quick fix but can outgrow the space, shade a garden, or require repeated pruning. A mix of shrubs and a modest trellis can fill a view gradually while giving you more control than a single row of oversized trees.

A living screen needs care while it fills in, so set expectations. If you need immediate privacy, a fence or outdoor screen may be the functional layer, with plants added for softness and seasonal interest. Keep the access gates, window views, and neighbor-facing side in mind; privacy should not block the hose, hide a drainage problem, or make routine pruning impossible.
Make the landscape lower-maintenance over time
Low-maintenance landscaping is about reducing recurring work, not eliminating it. Choose plants that fit the place, repeat them, keep bed edges mowable, and avoid features that need constant grooming or frequent refilling. A naturalistic bed can be less work than a formal lawn if the plants are suited to the region and the planting is dense enough to cover soil without becoming crowded.
Reduce lawn where it is hard to mow or does not serve a purpose, but keep turf where children, pets, or household members actually use it. Convert one awkward strip at a time so you can learn how the new bed handles weeds and irrigation. If containers are part of the design, place them near a water source; pots dry faster than in-ground beds and are not a low-care choice when they require daily summer watering.
Build a maintenance budget into the plan. Decide who will mow, edge, prune, clear leaves, and water new plantings, then choose features accordingly. The most sustainable design is one you can care for consistently, whether that means a simple DIY yard, a shared household schedule, or hiring a gardener for seasonal work.
Install the project in a sensible order
A practical installation order prevents finished work from being damaged by later construction. First confirm property constraints and underground utilities; in the United States, contact 811 before digging. Then handle necessary grading, drainage, and buried irrigation or lighting, followed by paths, patios, and fences. Build access for machinery before narrow beds or delicate plants go in.
Next define bed edges and prepare the soil only as needed. A soil test can prevent unnecessary fertilizer or amendments; do not routinely enrich every bed, because some plants perform better in leaner soil. Install trees and shrubs first so you can place smaller plants around their mature structure, then add perennials, grasses, groundcovers, and mulch.
Water new plants thoroughly and follow the nursery or extension guidance for establishment care. Keep a simple record of planting date, variety, and watering notes; it helps identify whether a plant failed from the site, installation, or ongoing care. If the budget is tight, complete one visible, functional zone at a time rather than buying materials for the whole property and leaving half-finished beds exposed.
Keep the yard healthy with seasonal checks
In spring, inspect winter damage, clear leaves from drains, refresh bed edges, and prune only plants that benefit from that timing. Check irrigation before hot weather, and repair leaks rather than increasing run time to compensate. If you are planting new trees or shrubs, verify the recommended planting window for your climate and avoid working wet soil that compacts easily.
During summer, watch new plantings for wilting and water deeply when the root zone is dry, subject to local restrictions and the plant’s needs. Check whether sprinklers are watering pavement or the house, and adjust the system by zone instead of giving every bed the same schedule. Remove invasive weeds before they set seed, but do not confuse every native seedling with a weed; identify unknown volunteers before pulling them.
In fall and winter, note where leaves pile up, where icy paths become slick, and whether runoff appears during snowmelt. Protect vulnerable container plants according to your zone, keep snow storage away from salt-sensitive plantings, and use the quieter season to update the plan. Seasonal maintenance should respond to what the yard actually showed you, not a generic calendar that ignores local weather.
Know when a landscape professional is worth hiring
Many tasks—measuring, sketching, planting small beds, mulching, and setting simple paths—are reasonable DIY work when you have the time and tools. Professional help becomes valuable when several systems meet: major grading, retaining walls, complex drainage, large trees near buildings, outdoor lighting, irrigation, steep slopes, or a complete redesign with a tight budget. One consultation can help prioritize what must happen first and prevent expensive rework.
Ask a prospective landscape designer or contractor how they handle runoff, mature plant sizes, access, maintenance, and local permits. Request a written scope that states what is included, what is excluded, materials, site preparation, irrigation responsibilities, and who handles utility marking. Compare proposals by scope and durability rather than only the final price; one quote may omit grading or plant establishment that another includes.
Hire a licensed specialist where required for electrical work, structural walls, or regulated drainage. Do not ask a planting contractor to guarantee that a symptom will disappear if the underlying water movement has not been diagnosed. A good professional should be willing to explain tradeoffs and phase options, not pressure you into a design that exceeds your use, budget, or maintenance capacity.
Conclusion
A successful landscape is a working outdoor space shaped around the site you have. Start with how you use the yard, map sun and water, draw paths and activity zones, and choose plants and materials that fit local conditions. Those steps make the design more attractive because it functions well, and more durable because it is not fighting the property.
You do not need to remodel every corner at once. Make one clear improvement—repair a drainage issue, connect the patio to a path, simplify an overgrown bed, or add a well-placed shade tree—then observe how the yard responds. The next decision will be easier, and the finished landscape will feel like it belongs to your home and the people who use it.