How to Grow Jerusalem Artichokes Without the Takeover
Learn when and how to plant Jerusalem artichokes, contain their spread, manage tall stalks, harvest after frost, and store sunchokes for easy winter digging.
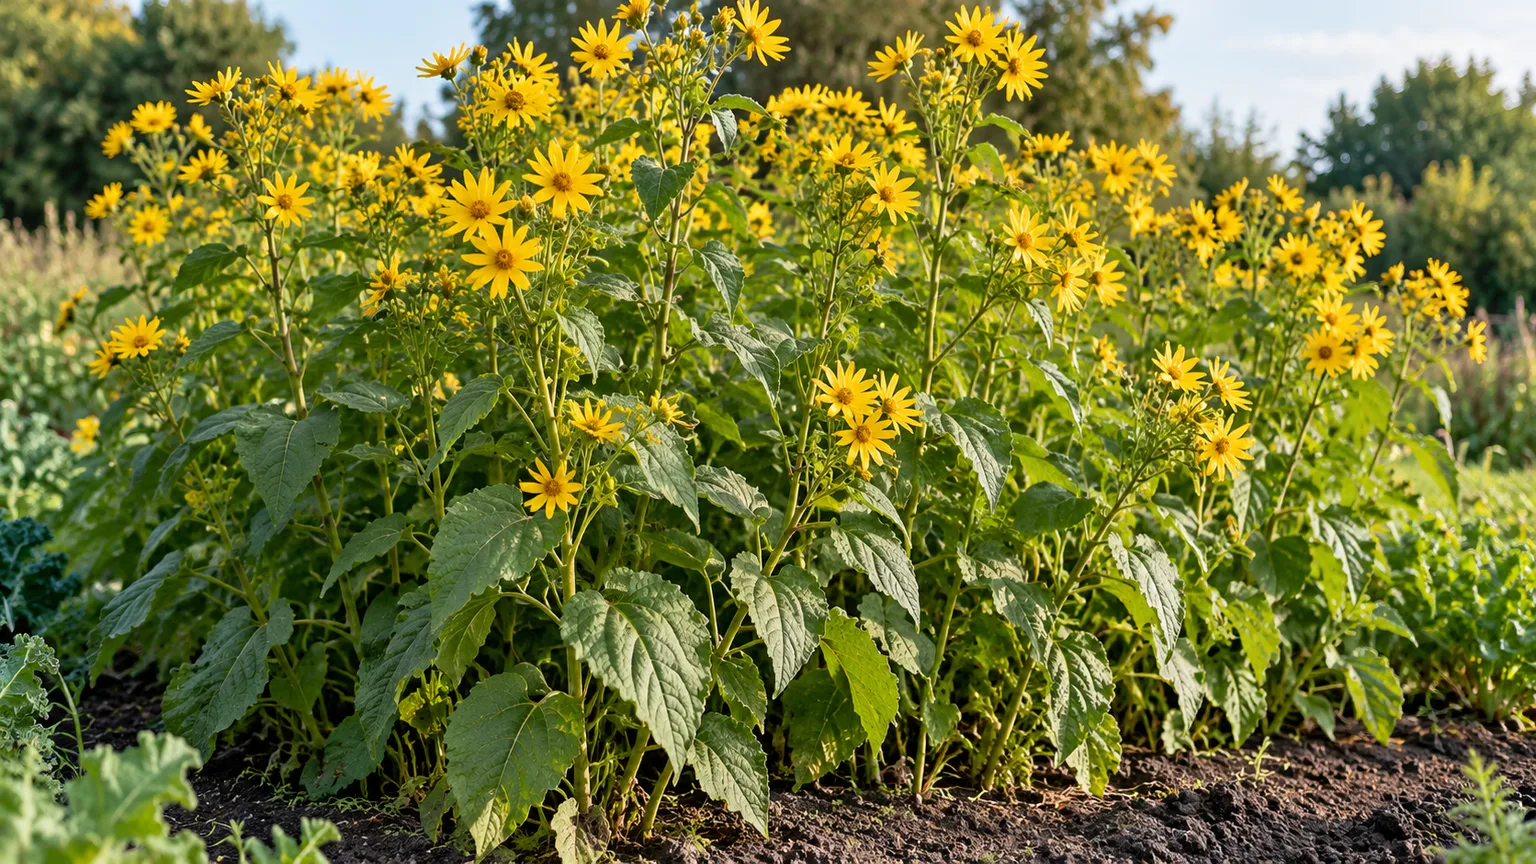
Jerusalem artichokes are a low-fuss perennial crop with one important catch: the tubers you miss can become next year’s plants. Choose the site before you plant, give each tuber room to grow, and decide whether you want a permanent patch or a crop you can empty from a container at harvest.
The plant is grown for its knobby underground tubers, but it also sends up sunflower-like stems that can reach 6 to 10 feet. That combination makes sunchokes useful as an edible screen and a risky neighbor for small beds. A contained site, steady moisture while the crop is establishing, and a harvest plan will do more for a dependable crop than a complicated feeding schedule.
What Jerusalem artichokes are—and what they are not
Jerusalem artichoke, sunchoke, sunroot, and earth apple are common names for Helianthus tuberosus, a perennial sunflower in the Asteraceae family. The edible part is the underground tuber, not a flower bud; the plant is unrelated to the globe artichoke. The name can mislead new growers, but its growth habit is closer to a tall sunflower that produces a cluster of small tubers.
A healthy planting may send up a thick stand of coarse green stems and yellow flower heads late in the season. Depending on climate and variety, some plants flower late or barely bloom before the tops begin to die back. Flowering is attractive to pollinators, but it is not a reliable signal of whether tubers are forming; tuber growth happens below ground throughout the season. NC State Extension describes the plant as a tall, bushy root vegetable and notes that leftover tuber pieces can resprout, so this is best treated as a perennial bed with an intentional boundary (NC State Extension Plant Toolbox).
Decide whether a permanent sunchoke bed fits your garden
Think about your end-of-season routine before picking a planting location. If you want to harvest a few tubers at a time for fall and winter meals, an isolated bed where the soil stays workable is convenient. If you want to remove the crop completely each year, or you garden in a small mixed bed, a large container may be easier to control.
Sunchokes are not suited to a planting that you intend to clear by pulling the stems or tilling once. Tubers can remain below the visible crown, and small pieces left in the soil can resprout. A small starter planting is often enough; there is no need to plant a full row until you know how much room the patch takes and how your household uses the harvest.
| Growing option | Best fit | Main trade-off |
|---|---|---|
| Dedicated bed at the edge of the garden | A perennial crop, winter digging, or a tall seasonal screen | Missed tubers may return in spring and need follow-up |
| Large container with drainage | A small garden or a planting you want to empty at harvest | The pot dries faster, and the crop needs more frequent watering |
| Uncontained mixed vegetable bed | Only where volunteer plants would be welcome | Tall stems can shade crops and tubers can spread beyond the row |
UGA Extension notes that containers can make harvesting easier because the grower can empty the whole container, though the growing mix dries faster than garden soil. For a raised bed, planter, or pot, use a container large and sturdy enough for a tall plant, with drainage holes; do not use a small decorative pot and expect it to stay evenly moist.
Containment is the first decision
If you plant in open ground, reserve a dedicated patch or put the row along a boundary where volunteer stems will not surprise you. Keep it away from paths, lawn edges, and places where digging is difficult. A shallow garden edging does not make the crop self-contained: a tuber can escape beyond the intended row, and a fragment left after harvest may start a new shoot.
A container gives you a clearer limit, but it must have a way for excess water to escape. Choose one you can reach from all sides or empty at the end of the season. A sealed pot that holds rainwater is more likely to rot tubers than control them. UGA Extension recommends containers as one way to make the vigorous plant easier to manage and harvest (UGA Extension’s growing guide).
If you want the patch to return, leave a few sound tubers in the bed and mark the edge so you can identify volunteer shoots next spring. If you want to end it, dig the bed thoroughly, sift around the original planting area, and revisit it during the next growing season to remove new shoots while they are small. The plant is persistent rather than magically unstoppable; repeated removal of foliage and tubers is more reliable than one shallow pass with a hoe.
Choose a site that supports tubers and fits the plant’s height
Give the plants full sun if you can. They tolerate some partial shade, but less light can mean weaker stems and a smaller harvest. Place them where a 6- to 10-foot stand will not block light from shorter vegetables. A row along the north edge of a northern-hemisphere garden can work as a seasonal screen while reducing shade over the rest of the bed; in the southern hemisphere, use the south edge for the same reason.
Leave enough room to walk around the planting and work a digging fork into the soil at harvest. Planting sunchokes behind a permanent fence, under a tree, or directly beside crops that need full sun can turn the fall harvest into a frustrating job. If strong winds are common, choose a sheltered edge or plan to stake the stems before they lean.
Sun, soil, drainage, and pH
Loose soil is a practical advantage. Sunchokes can grow in heavier ground, but tubers are easier to lift and clean when soil is friable. Avoid a low spot that stays waterlogged after rain: poor drainage can encourage rot and makes the harvest harder. Work in a modest amount of finished compost if the soil is compacted or low in organic matter, but do not turn the bed into a high-nitrogen mound that produces a mass of tops at the expense of useful tubers.
Published pH recommendations vary. NC State Extension describes the plant as happiest in slightly alkaline soil, while GrowVeg gives a lower pH target for very acidic soil. That range is a reason to test before adding lime, not a reason to guess. If your soil is already near neutral and drains well, start with that; address a confirmed extreme acidity according to a local soil-test recommendation rather than chasing a precise number for one crop (GrowVeg’s Jerusalem artichoke guide).
When to plant sunchoke tubers
Spring is the simplest default in climates with freezing winters. Plant once the soil is workable and no longer waterlogged, while leaving enough of the growing season for the plants to build tubers before fall. In mild-winter regions, a fall planting can establish roots before spring growth, but avoid planting into soil that is already frozen or likely to stay saturated.
Use firm tubers that have not shriveled. A small grocery-store or farmers-market sunchoke can be a starter if it is a true Helianthus tuberosus tuber with visible buds, though a named variety gives you more information about its size and growth habit. Choose a variety for your growing conditions: gardeners who want a tidier harvest can look for compact cultivars with tubers clustered close to the stem, such as Dwarf Sunray; smooth-skinned types such as Fuseau can be easier to clean. Variety names do not guarantee a particular yield in every garden, so use the supplier’s local maturity notes when available (Garden Betty’s sunchoke guide).
How to plant Jerusalem artichokes step by step
Plant whole tubers or cut a large tuber into sections, making sure every section has at least two healthy eyes or buds. Small fragments with no visible buds are poor insurance, and cut pieces can dry before they get established. If a tuber has started to sprout, keep the shoot intact and orient it upward when you can.
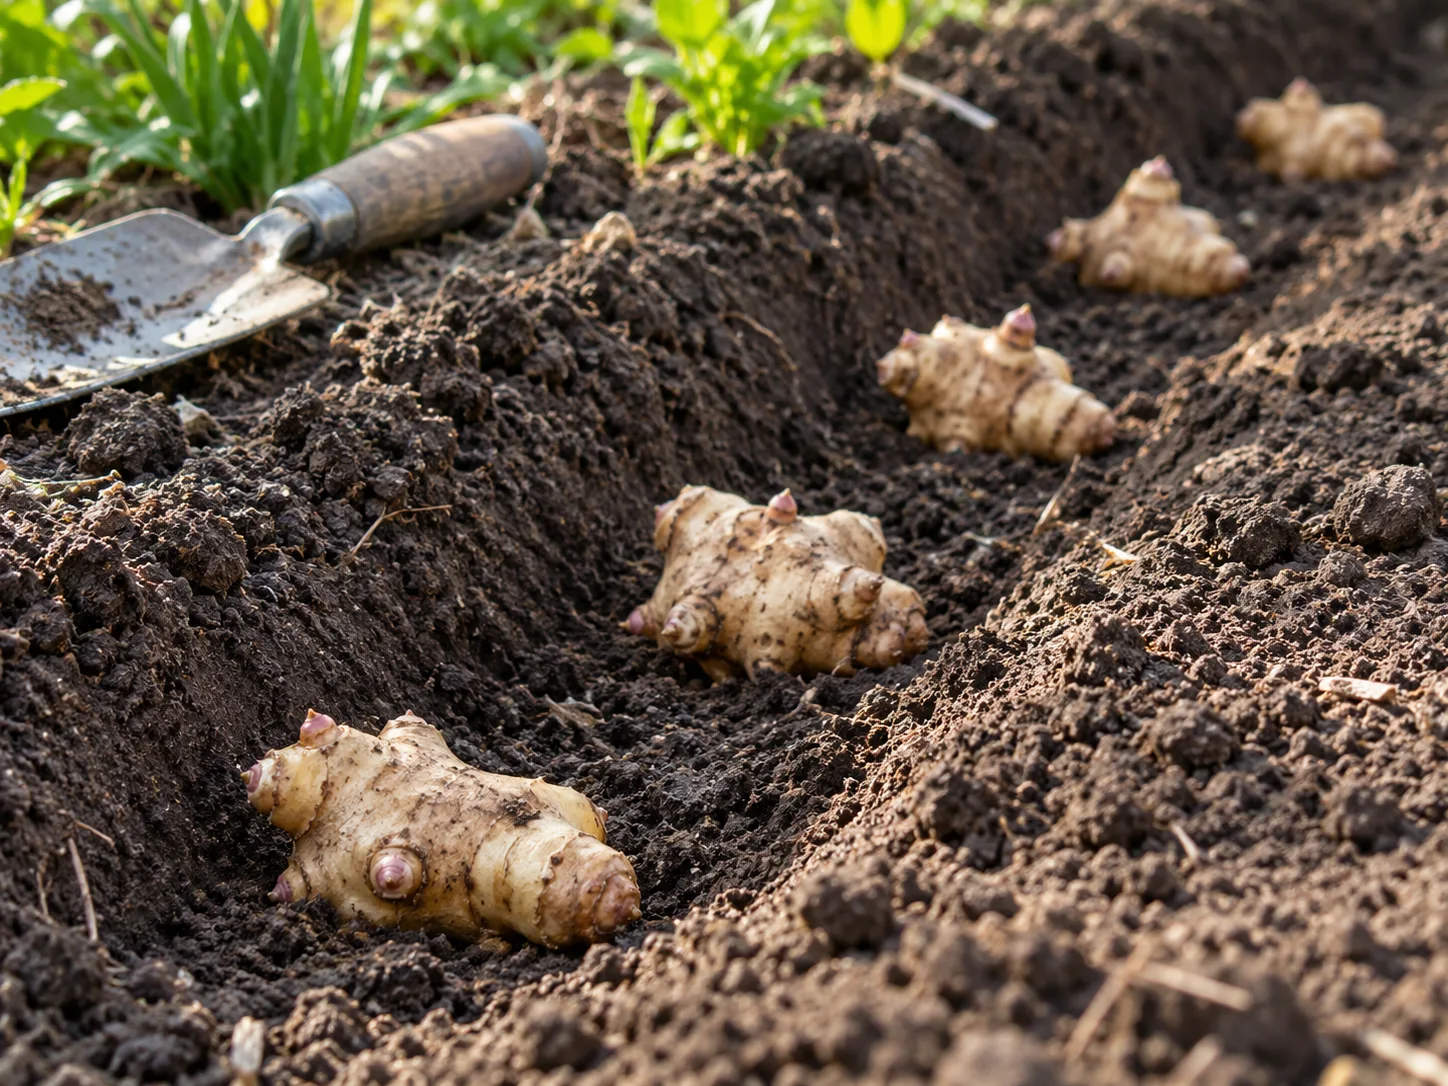
Use this sequence for a first planting:
- Remove perennial weeds and loosen the planting area so roots and tubers will not be trapped in a hard layer.
- Set tubers about 3 to 4 inches deep in ordinary garden soil, with buds facing upward if they are visible.
- Space plants 18 to 24 inches apart so each clump has room and you can dig beside it later. Leave roughly 3 feet between rows if you are planting more than one.
- Backfill with soil and water the row thoroughly.
- Add a light mulch after shoots emerge or once the soil is moist; keep the mulch away from stems if the bed tends to stay wet.
Garden sources differ on planting depth: some recommend about 2 to 3 inches, while others recommend 4 to 6 inches. A middle depth of 3 to 4 inches is a useful starting point in ordinary, well-drained soil; plant a little shallower in heavy or wet soil and deeper in loose, dry soil. UGA Extension gives the shallower end of that range, while several practical guides use 4 to 6 inches, so adjust for your soil rather than treating a single depth as universal.
Water after planting and keep the soil modestly moist while shoots establish. Mark the row and record where you planted it. The stems may take a while to appear in cool soil, and marking the location prevents accidental digging or replanting before the tubers sprout.
Care for sunchokes through the growing season
Once established, the crop needs little routine attention beyond early weeding, water during dry spells, and a check on stem stability. Remove competing weeds while the plants are short; after the canopy closes, frequent digging and hoeing risk damaging shallow tubers. Mulch conserves moisture and makes it easier to distinguish the intended row from new volunteer plants.
Do not assume that a vigorous canopy means a large tuber harvest. Sun, drainage, consistent moisture, space, and time all matter. If the tops grow well but tubers stay small, review the growing conditions first instead of adding fertilizer by guesswork.
Water for establishment and tuber fill
Keep the bed evenly moist after planting until shoots are established. Later, water deeply when the root zone has dried during an extended dry spell, especially while the plants are growing rapidly and setting tubers. The aim is consistent moisture, not soggy soil; a site that stays wet after rain needs drainage improvement or relocation before planting.
Sunchokes can survive dry periods, but drought is not a yield strategy. A peer-reviewed study of sunchokes under controlled conditions found that drought reduced plant performance and tuber production; it supports avoiding prolonged dryness but does not define a one-size-fits-all weekly watering schedule for home gardens (Nacoon and colleagues’ sunchoke study). In practice, check soil rather than the calendar: water when the top few inches have dried, then let extra water drain away.
Container plants need closer checks because their root zones dry faster than an in-ground bed. During warm or windy weather, feel the growing mix every day or two. If water runs straight through a dry container without wetting the center, apply it slowly in two passes; do not leave the pot sitting in a saucer of water.
Feed lightly, based on soil
Jerusalem artichokes do not need a fixed feeding schedule. If the soil is fertile, a modest layer of compost before planting may be enough for the season. Where a soil test identifies a nutrient shortage, correct that specific issue; avoid routinely applying a high-nitrogen fertilizer that encourages excessive leafy growth.
If the patch produces tall stems but small tubers, first check whether it is too shaded, crowded, dry, waterlogged, or planted late. Adding fertilizer without identifying the cause can make the canopy even larger without solving a poor tuber set. Keep notes on the bed’s drainage, planting date, and harvest size so the next season’s adjustment is based on what actually happened.
Manage tall stalks without sacrificing the crop
Sunchokes can reach shoulder height and much taller, so plant them where a late-season screen or windbreak is useful. Their stems can lean or lodge in exposed locations, particularly after heavy rain. Set stakes or a simple support along the row while plants are still manageable; tying a whole row loosely is usually easier than trying to straighten fallen stems in autumn.
You do not have to remove flowers to get tubers. Flowers may be useful to pollinators, and some plants flower late or not at all without that meaning the crop has failed. If stems are shading neighbors or are at risk of falling, cut back only enough to solve that practical problem. A midsummer cut to a uniform height can reduce flowers and change the plant’s shape; it is not a guaranteed yield boost. This is a trade-off between plant height, flowering, and space, not a mandatory care step.
After the tops die back, cut the dry stems down to a manageable height before digging. Leave a short marker at the row edge if you will harvest later, but remove dead stalks that interfere with winter access. In a permanent bed, keep the planting boundary visible through the dormant season so stray shoots are easy to spot next spring.
When and how to harvest Jerusalem artichokes
Sunchokes are ready when the plants have finished their main growth and the tops begin to yellow and die back in autumn. Harvest dates vary with climate, planting date, and variety, so do not rely only on a number of days from planting. A light frost may sweeten the flavor, but you do not have to wait for a frost to find edible tubers.
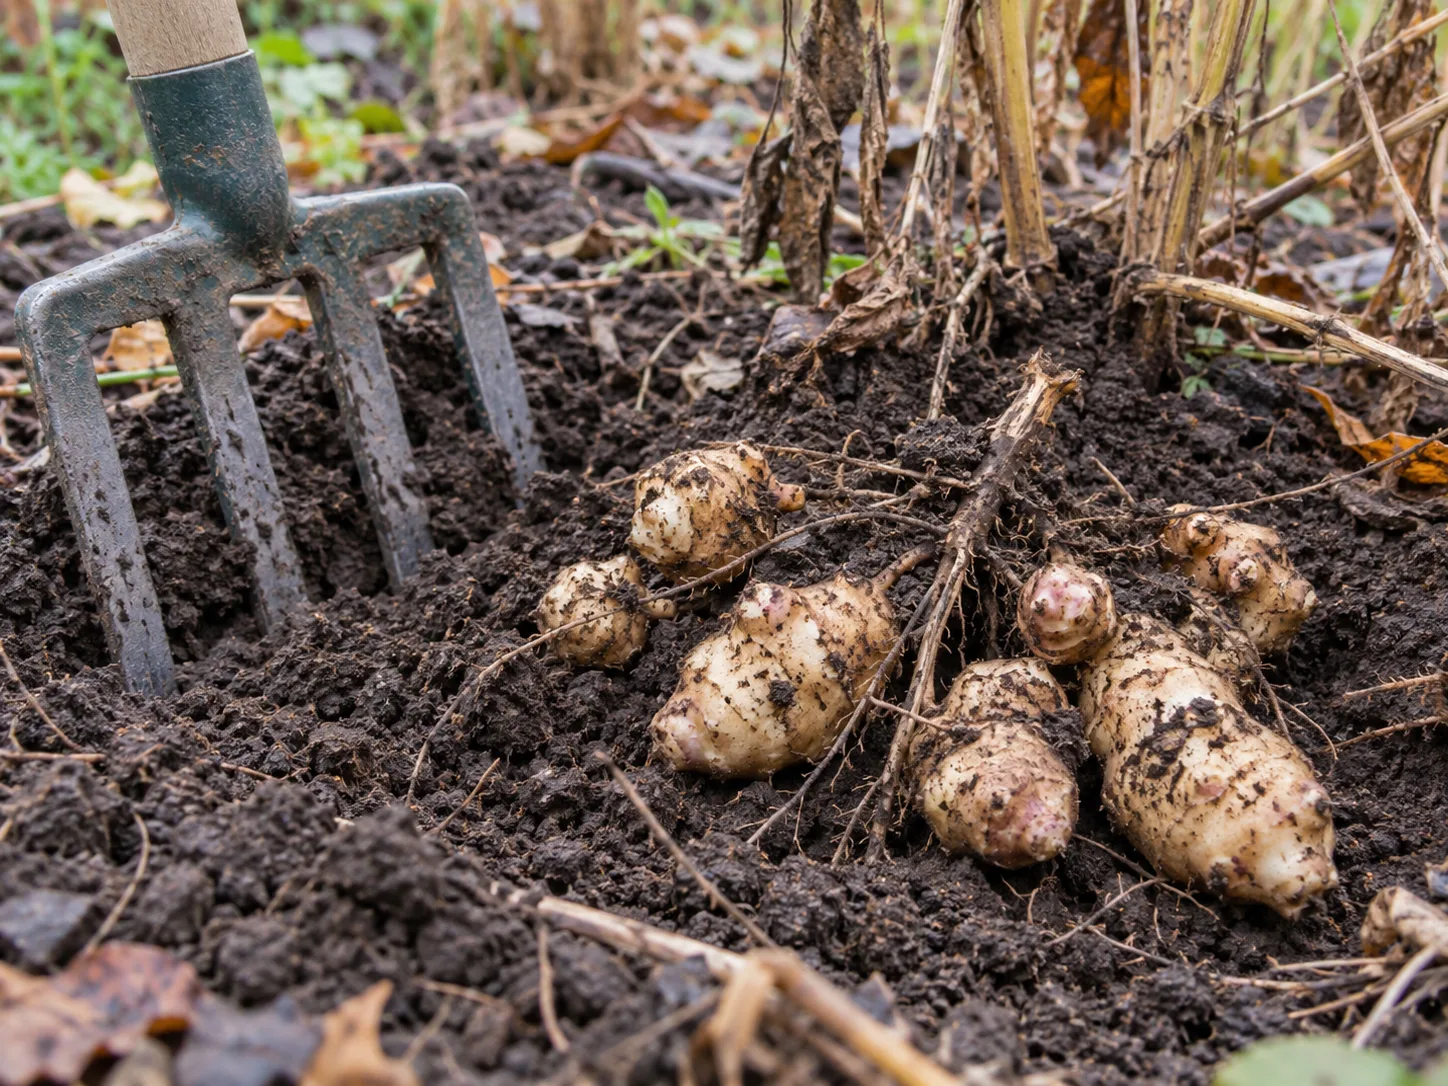
Use plant condition and ground temperature, not a fixed date
In a region with mild winters, you may be able to dig after the stems die back and leave the remaining tubers in the soil for later. In colder climates, harvest before the ground becomes too hard to work, or mulch the bed to make a later harvest possible. If you want to test readiness, loosen soil around one plant and inspect a few tubers rather than digging the entire bed at once.
The tubers remain viable underground after the tops die. That makes in-ground storage practical where soil stays workable and drainage is good, but less useful where soil freezes solid, stays waterlogged, or is invaded by rodents. If your ground freezes early, harvest what you can before that point and store the rest in a cool, humid place.
Dig gently and decide what should regrow
The tubers break or bruise more easily than their large tops suggest. Start digging outside the stem cluster instead of stabbing beside the base. A fork can loosen the soil and lift the clump with less cutting than a spade; work around the plant, then sift the loosened soil for tubers that have separated from the main cluster.
Use this harvest routine:
- Cut back the dead stems so you can see the planting area.
- Insert a digging fork well outside the crown and lever the soil upward; do not force the tines through the center of the clump.
- Lift tubers by hand as the loosened soil falls away, then check the surrounding soil for detached pieces.
- Set aside only firm, healthy tubers for eating or replanting.
- If you want the bed to return, leave a few sound tubers at the intended center of the patch. If you want to remove the crop, search carefully for strays and check again for shoots next spring.
Do not discard a tuber into an adjacent bed or compost pile if you want to limit spread; it may remain capable of sprouting. The harvested patch is also a good time to decide whether the crop has earned its space. If you enjoyed the harvest but found the bed hard to control, move the next planting to a container or a more isolated edge rather than expanding the original row.
Store sunchokes without letting them shrivel
The easiest storage is often the ground itself. Leave unharvested tubers in a well-drained bed and dig them as you need them, provided the soil stays workable and the patch is meant to return. A thick layer of loose mulch can protect the row from hard freezing and make late digging easier, but do not mulch so heavily over waterlogged soil that the bed stays cold and saturated.
Once dug, sunchokes lose moisture faster than potatoes. Brush off loose soil, leave the skins unwashed until use, and refrigerate the tubers in a bag that limits drying while allowing some air exchange. They are best used within a few weeks; inspect stored tubers and discard any that become soft, slimy, or moldy. Both Growing in the Garden and Garden Betty recommend short-term refrigeration and keeping tubers in the ground when winter soil remains workable. A cool, humid cellar or damp packing medium can extend storage, but the ground is usually more forgiving if you are able to leave them there.
For next year’s crop, store only what you cannot replant promptly. Keep planting tubers cool and slightly moist, not wet or sealed in an airtight container. Sort out shriveled, cut, or rotting pieces so the best buds are reserved for the new row.
Troubleshoot weak crops and unwanted returns
Small tubers usually point to a growing condition that limited their development. Start with the easiest checks: did the row receive several hours of direct sun, was the soil moist during prolonged dry weather, did water drain after rain, and were plants spaced far enough apart to leave room for tubers? Heavy soil may still grow the plant, but loose soil makes both tuber growth and harvest easier. If the top growth is dense and tall while the harvest is undersized, avoid responding with more nitrogen until you have checked light, moisture, crowding, and the planting date.
If stems fall over, consider wind exposure, saturated soil, and whether the plants were planted too close to a path or neighboring crop. Stake the row early in the next season or relocate it to a sheltered boundary. Cutting stems back is an option when height becomes a problem, but it changes flowering and should be used as a space-management measure rather than a routine yield promise.
If volunteer shoots appear outside the row, remove the shoots and dig out the tuber that produced them. Repeat checks through the growing season: a single missed tuber can keep the patch alive, and a shallow pass over the bed is unlikely to find every piece. If you are trying to eliminate an established planting, expect to monitor the area for more than one season.
Most small home plantings are not plagued by serious insect damage, but look for slug feeding or fungal leaf spots if foliage is damaged. A more serious warning is sudden wilting while the soil is moist, especially with white cottony growth around stem bases or dark, hard bodies on plant tissue or soil. USDA Agricultural Research Service identifies those signs with white mold caused by Sclerotinia sclerotiorum and notes that the disease can be difficult to manage once established. If white mold is confirmed, ARS recommends a rotation of at least three years into a grass-family crop such as corn, alongside canopy reduction, weed control, and removal of volunteer sunchokes. Ask a local extension office for diagnosis and a rotation plan rather than treating unexplained wilt with more water or fertilizer (USDA ARS, “White mold of Jerusalem artichoke”).
Conclusion
Jerusalem artichokes are easy to grow when you give them a suitable place, but the planting decision lasts beyond the first harvest. Set a small number of sound tubers in a sunny, well-drained, contained bed or a large container; keep the soil moist during establishment and dry spells; and support tall stems if wind or shade becomes a problem.
Wait for the tops to die back before digging, then loosen the soil widely enough to find the tubers without cutting through them. Leave only the tubers you want to regrow, and monitor the bed for volunteers. That simple cycle turns sunchokes from an unplanned perennial into a useful crop you can harvest through fall and winter.