How to Grow Ginger From Store-Bought Root
Learn how to grow ginger from store-bought root: choose viable rhizomes, sprout them indoors, plant them correctly, and harvest baby or mature ginger.
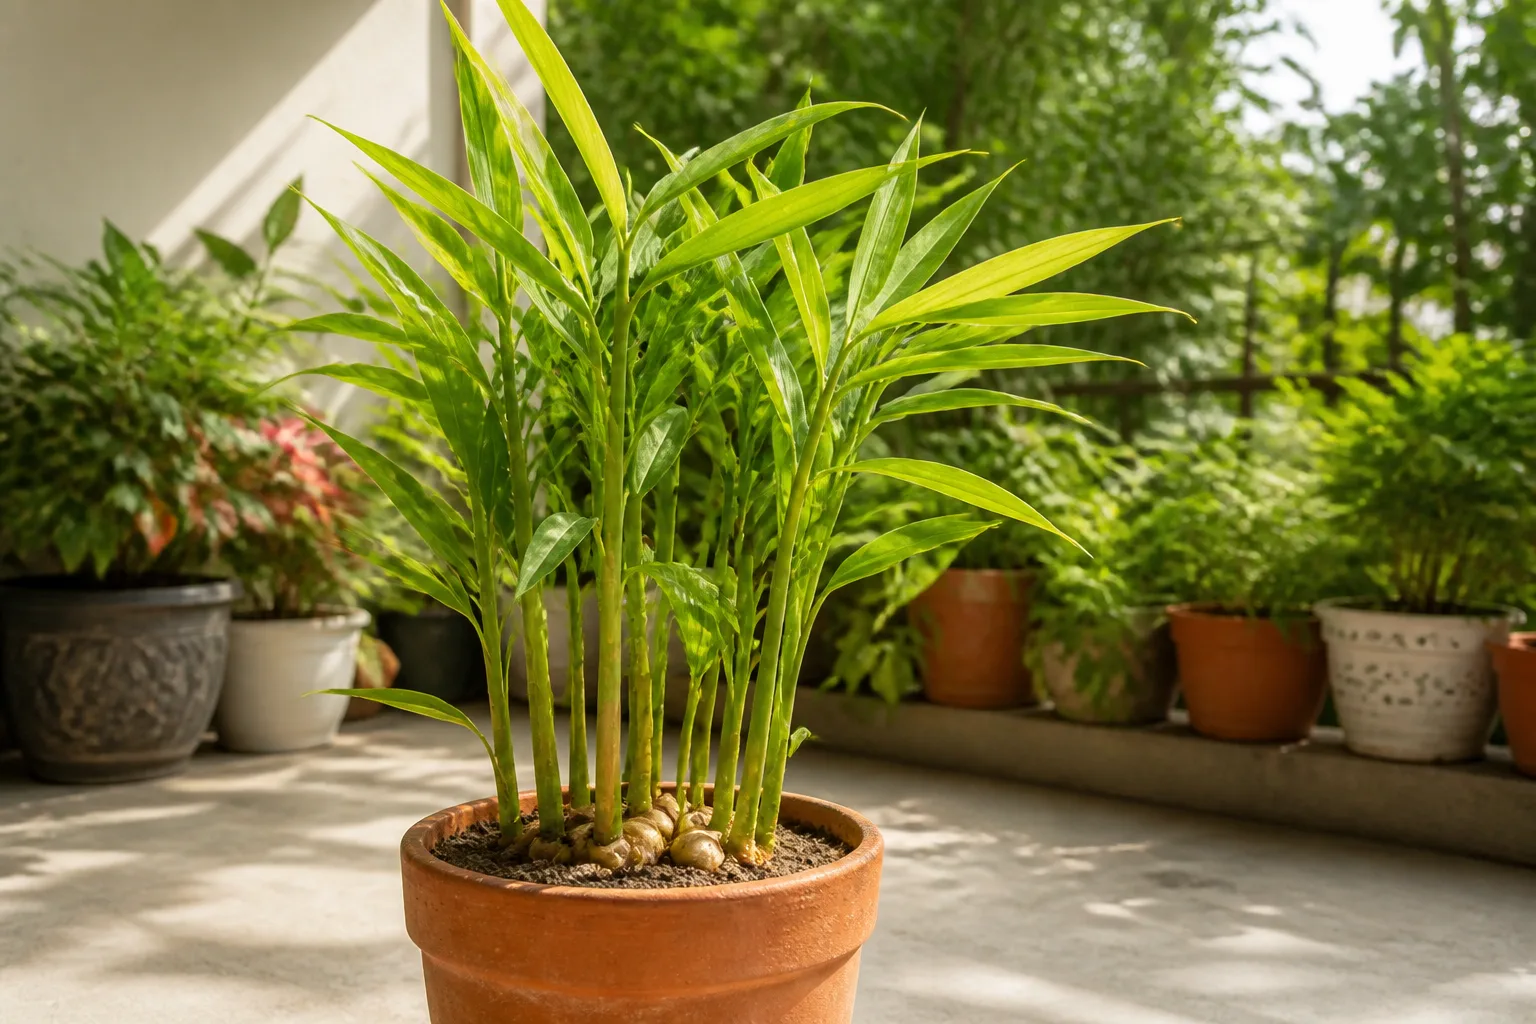
Yes, a piece of fresh grocery-store ginger can grow into a leafy plant—and eventually make new ginger underground. The catch is that the piece must still be biologically ready to sprout, and it needs tropical warmth for much longer than most kitchen-counter experiments suggest.
The most reliable plan is simple: buy a firm rhizome with swollen buds, start it in warm soil, keep the medium lightly moist rather than wet, and use a wide container if your growing season is short. Treat the first attempt as a viability test, not a guaranteed crop; a treated, old, or damaged piece may never wake up even when you follow every step correctly.
Can You Grow Ginger From Store-Bought Root?
You can grow culinary ginger (Zingiber officinale) from a store-bought rhizome if it is fresh enough to produce shoots. What you buy as ginger “root” is actually an underground stem, and each raised bump or eye is a node that can develop into a new shoot. Extension guidance from Texas A&M AgriLife Extension and University of Wisconsin–Madison Extension both describe the edible rhizome as the part used for propagation.
Grocery-store ginger is a gamble because the supply chain is designed to keep it dormant and attractive until you cook it. Some conventional pieces may be treated or irradiated for storage, while other pieces simply have been held too long and lost the energy or moisture needed to sprout. An organic label, a farmers-market purchase, or a piece that is already swelling at the eyes improves your odds, but none of those is a promise of success.
A ginger rhizome is a thickened underground stem, not a true root. That distinction tells you how to plant it: the eyes are the important parts, they should face upward, and a section can make several shoots if it carries multiple healthy buds.
The rhizome also stores the energy for its first growth. Until roots and leaves form, the planted piece is living off those reserves. That is why a plump section usually outperforms a thin, leathery scrap, and why keeping the medium warm and airy matters more than adding fertilizer during the sprouting stage.
Choose Grocery-Store Ginger That Has a Chance
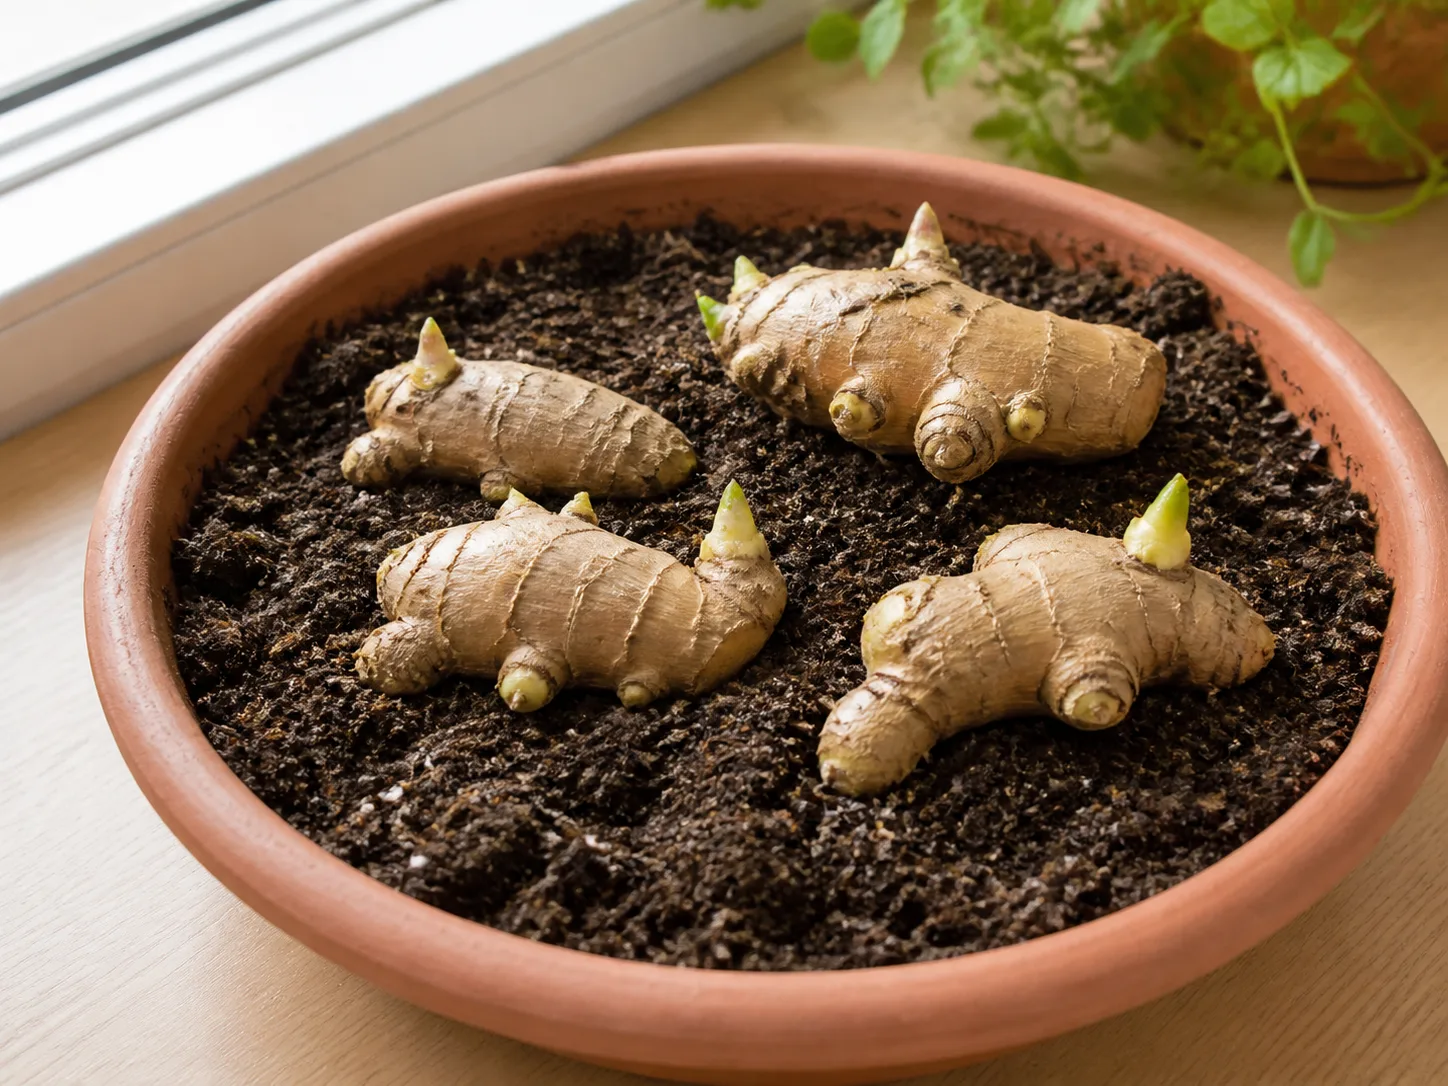
At the market, select several pieces rather than betting your whole experiment on one knob. Look for ginger that is firm, heavy for its size, and cream to golden brown with smooth, intact skin. The best candidates have several raised eyes; eyes that are swollen, pale green, or already showing a short shoot are especially promising.
Pass over pieces that are shriveled, hollow-feeling, bruised, leaking, moldy, or soft at the joints. A small dry patch can be trimmed away only if the surrounding tissue is completely firm, but do not plant a piece with soft rot and hope the soil will fix it. Rot spreads easily through a warm, wet pot.
Check the label, but judge the piece
Organic ginger is often a sensible first choice because grocery ginger may have been treated to delay sprouting. Epic Gardening’s review of store-bought rhizomes also makes the useful distinction between convenient grocery stock and seed-grade ginger: nursery or seed-company rhizomes are selected for vigor and are more dependable, while organic grocery ginger is the lower-cost experiment.
Do not assume that soaking removes every possible treatment. A brief rinse or overnight soak in room-temperature water can rehydrate a slightly dry piece, but it cannot turn old or chemically suppressed ginger into guaranteed planting stock. The practical test is what happens next: a firm rhizome with viable eyes should stay firm and eventually swell or sprout in warm conditions.
Cut large ginger into 2- to 3-inch sections, aiming for at least two eyes on each section. If you want a backup, keep one piece whole and start two or three sections in separate pots or a single wide tray. More starting pieces give you information about viability without requiring much extra space.
Decide Between a Pot and the Garden
Choose the growing site by counting warm months, not by choosing the prettiest spot. Ginger is tropical, grows slowly at first, and needs roughly four months for baby ginger or eight to ten months for larger mature rhizomes. Virginia Cooperative Extension notes that ginger is grown as an annual in short-season areas, while warmer climates can maintain it as a perennial or overwinter it in a container.
A pot or grow bag is the safer choice when nights cool early, your soil is heavy, or you want to extend the season. A container lets you start indoors, move the plant outside after frost, and bring it back in before cold weather. In a warm, frost-free climate with loose soil, a garden bed can support a larger clump, but you still need protection from intense afternoon sun and standing water.
Sprout Ginger Indoors
Start six to eight weeks before your local last frost if you plan to move the plant outdoors. Put the rhizome in a warm place around 70–80°F (21–27°C); a warming mat can help, but it is not essential if the room stays warm. Mother Earth Living reports a three- to six-week pre-sprouting window in a shallow, lightly moist mix, while Virginia Tech’s extension guidance warns that ginger can take 50 days or more to show growth.
During this stage, warmth is the main trigger. Keep the mix lightly moist, never muddy, and do not fertilize. The rhizome may spend weeks making roots before you see a green point, so an undisturbed, warm pot is often more successful than repeated digging to check for progress.
Cut and Callus the Rhizome
Use a clean, sharp knife to divide the rhizome. Leave at least two eyes on each piece, and make the cuts between buds rather than through the most promising eye. Set the sections in a warm, dry place out of direct sun for two or three days, until the cut faces feel dry and sealed.
This callus is a small but useful barrier against excess moisture entering the cut surface. University of Wisconsin–Madison Extension and Virginia Cooperative Extension both recommend allowing divided pieces to heal before planting. Do not leave them for weeks until they become leathery; the goal is a dry skin over the wound, not dehydration.
If the piece is already sprouting, you can plant it whole or divide it carefully around the active buds. Handle the short shoots gently. They are easily snapped, and a damaged shoot can slow the plant even when the rhizome remains viable.
Pick a Sprouting Method
Soil sprouting is the best default. Fill a small pot or shallow tray with fresh seed-starting mix or a loose, well-drained potting mix. Set the ginger horizontally with the eyes facing upward, cover it with about an inch or two of mix, and water just enough to settle the medium. The pot must have drainage holes.
Use a paper-towel test only when you want to check viability before committing the piece to soil. Wrap the ginger in a damp—not dripping—paper towel, place it in a loosely closed bag, and keep it warm and dark. Check every few days for swelling, roots, or mold. Move it into soil as soon as a bud and a few roots are visible; leaving it in a wet bag for too long encourages rot and creates a more difficult transition into potting mix.
The soil method takes longer to inspect but produces roots in the medium where they will keep growing. In either method, a firm piece that has not sprouted after six to eight warm weeks is a candidate for replacement, especially if another section from the same purchase is also inactive.
Plant the Sprouted Rhizome
Pot up when the shoots are green and the rhizome has begun rooting, rather than waiting for a tall, fragile stem. Choose loose, loamy, organic-matter-rich soil that drains quickly after watering but does not turn dusty immediately. The RHS profile for common ginger calls for rich, well-drained, moisture-retentive soil in filtered light and high humidity.
Plant the rhizome horizontally, with the buds pointing upward. Cover it enough to keep it from drying, but do not bury a new shoot under a deep layer of wet soil. If the rhizome begins to press upward as it expands, add soil or compost gradually rather than forcing it deeper.
Container Planting
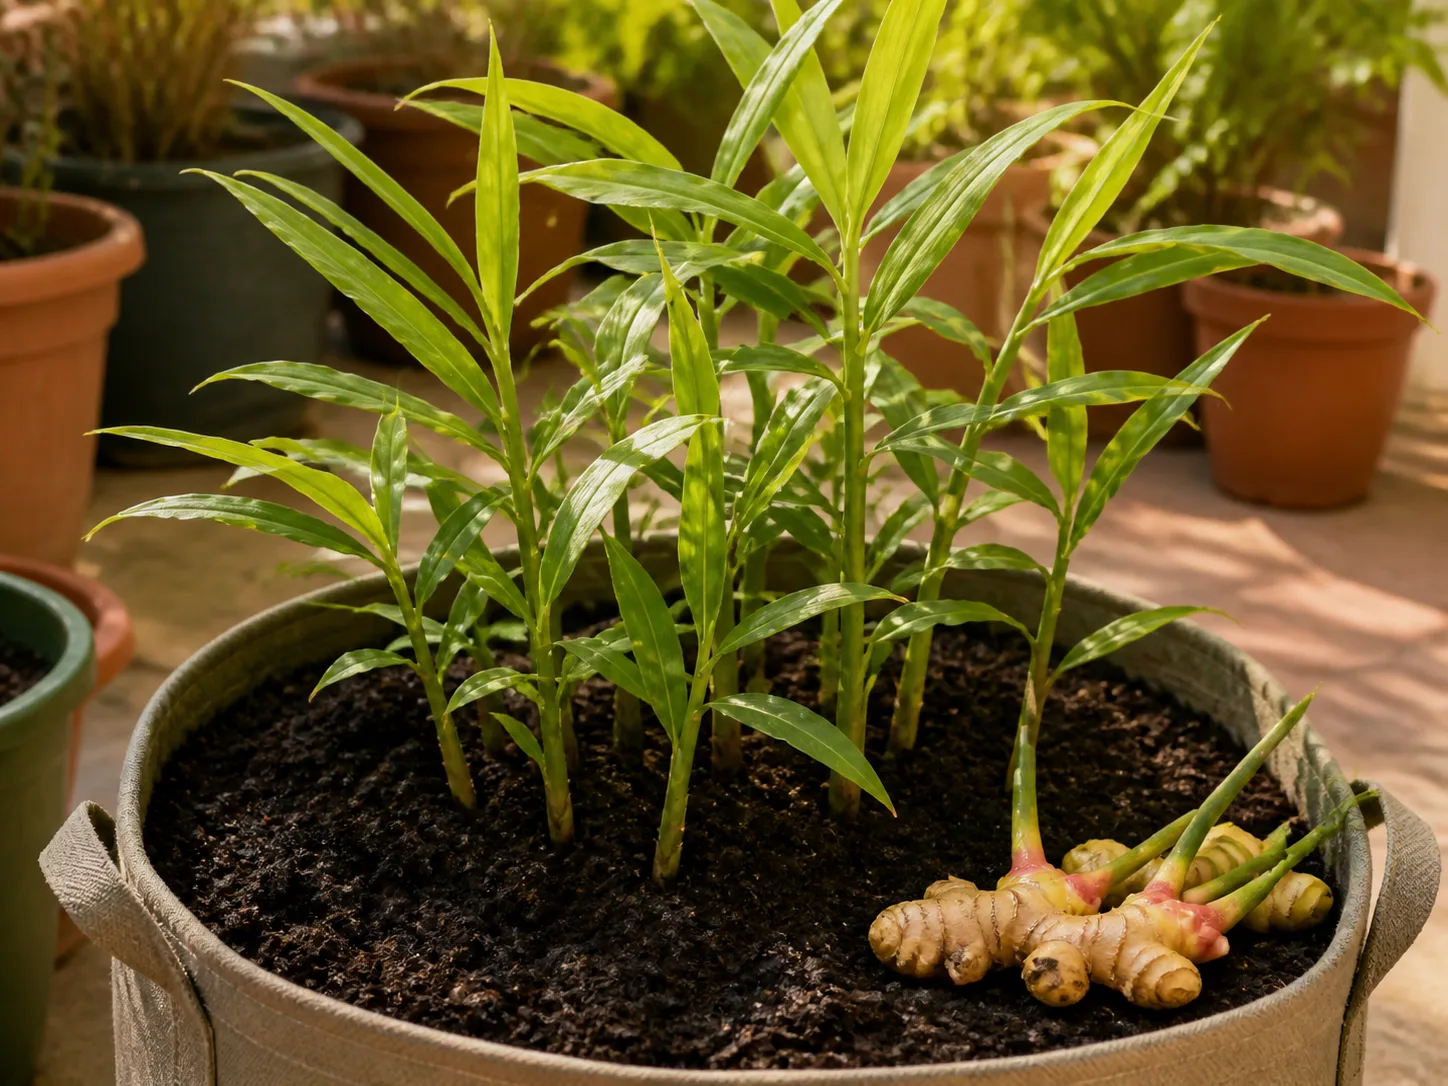
Use a container at least 12 inches deep and wide, with several drainage holes. Width matters because ginger rhizomes spread sideways; a tall, narrow pot can hold a lot of wet soil without giving the plant the horizontal room it needs. For a larger harvest, a five-gallon grow bag or wide square planter is more useful than a small decorative pot.
Set one section in the center or space several sections about 6–8 inches apart. Cover the rhizome with roughly 1–2 inches of mix at first, then add a little more as the shoots lengthen and new rhizomes begin to develop near the surface. Water thoroughly once, allow the excess to drain, and then wait until the upper layer begins to dry before watering again.
Keep the pot in bright, filtered light while the plant adjusts. If you started it in a small sprouting container, harden it off before moving it into direct outdoor conditions: give it several days in bright shade, then increase morning light gradually. This is especially important after a warm indoor start.
Garden Planting
Plant outdoors only after frost has passed and the soil is warm. A practical target is soil above 55°F (13°C) and nighttime temperatures staying above about 55°F, with protection available if an unexpected cold snap arrives. In a garden bed, set pieces 6–8 inches apart and about 2–4 inches deep, adjusting depth for the size of the piece and the soil’s ability to drain.
Choose a sheltered bed with rich, loose soil and two to five hours of direct sun or bright partial shade. Texas A&M AgriLife Extension recommends a warm site protected from strong winds, and its guidance gives the same partial-sun range that works well in hot climates. Avoid a low spot where rain sits around the rhizomes; warm, wet soil without oxygen is the fastest route to rot.
Care That Builds Healthy Rhizomes
Ginger makes leafy stems first and stores more energy underground later. Your job is to keep the plant steadily growing without creating the two conditions it dislikes most: cold roots and stagnant, saturated soil. Once the plant is established, inspect the soil and the leaf tips together instead of watering by calendar.
Light and Warmth
Ginger tolerates shade, but it still needs enough light to make leaves and replenish the rhizome. Give it bright filtered light indoors or partial sun outdoors. Morning sun is usually gentler than late-afternoon exposure; intense direct sun can brown the narrow leaf tips, especially when the pot dries quickly.
Keep the plant warm and away from cold drafts. Move containers indoors before nighttime temperatures approach 50°F (10°C), the threshold at which many extension sources warn of damage or death. A warm room with a grow light can keep the foliage going, but a low-light room may preserve the plant without producing a large harvest.
Water and Drainage
Keep the mix evenly moist while leaves are actively growing, but let excess water drain freely. Press a finger into the top inch or two of soil: if it feels wet and cool several days after watering, improve drainage or wait; if it is dry below the surface and the leaves are losing firmness, water thoroughly and empty the saucer.
Do not solve dry air by leaving the pot in standing water. Humidity around the leaves can help, but the rhizome needs oxygen around its roots. University of Wisconsin–Madison Extension specifically cautions against soggy media and notes that dormant, leafless container plants should not be watered until new shoots return.
As the season cools and the foliage begins to slow or yellow naturally, reduce watering without letting the rhizome become bone-dry. The plant is shifting toward rhizome development and dormancy; constant heavy watering at that point adds rot risk without extending the growing season.
Feeding, Mulch, and Hilling
Start with compost-rich soil, then use a balanced fertilizer according to its label during active growth. Monthly feeding is a reasonable container routine when the potting mix is not already heavily amended. In a rainy climate or a small pot, nutrients can wash out more quickly, so use the plant’s growth and a soil test—not a darker green color alone—to decide whether it needs more.
Outdoor ginger benefits from a light mulch layer that moderates soil temperature, slows evaporation, and reduces weed competition. Keep mulch a little away from the stems, and never use a thick wet layer against the rhizome crown.
Watch the soil surface as the rhizomes expand. They can grow upward and become exposed, so add about an inch of soil or compost when you see them. Virginia Tech describes mounding one to three times during the season when rhizomes reach the surface; the goal is to cover developing rhizomes while keeping the growing medium loose, not to bury the leaves.
The Ginger Growing Timeline
Use the following checkpoints instead of expecting a dramatic daily change:
- Selection and preparation: Choose firm, budded ginger, divide it if needed, and allow cut surfaces to callus for two or three days.
- Pre-sprouting: In warm, lightly moist mix, expect roughly three to six weeks; some pieces can take 50 days or more. No green shoot after six to eight warm weeks is a reason to test another piece.
- Early leaf growth: Once shoots appear, move the plant into bright filtered light and a wider container. The first leaves may be narrow and slow; do not compensate with constant watering.
- Outdoor growth: After frost risk passes and nights stay warm, harden off the plant and move it outside. Expect leafy growth through summer, especially in a wide pot or grow bag.
- Harvest window: Baby ginger can be usable at about four months, depending on warmth and growth. Mature ginger generally needs eight to ten months and a long, warm season.
The timeline changes with the starting piece, temperature, light, and whether you want tender baby ginger or a larger, more pungent mature rhizome. University of Maryland Extension has also had success starting ginger indoors early and growing it in large containers through a short Mid-Atlantic season—an approach that works because it adds warm weeks before and after outdoor weather.
Harvest Baby or Mature Ginger
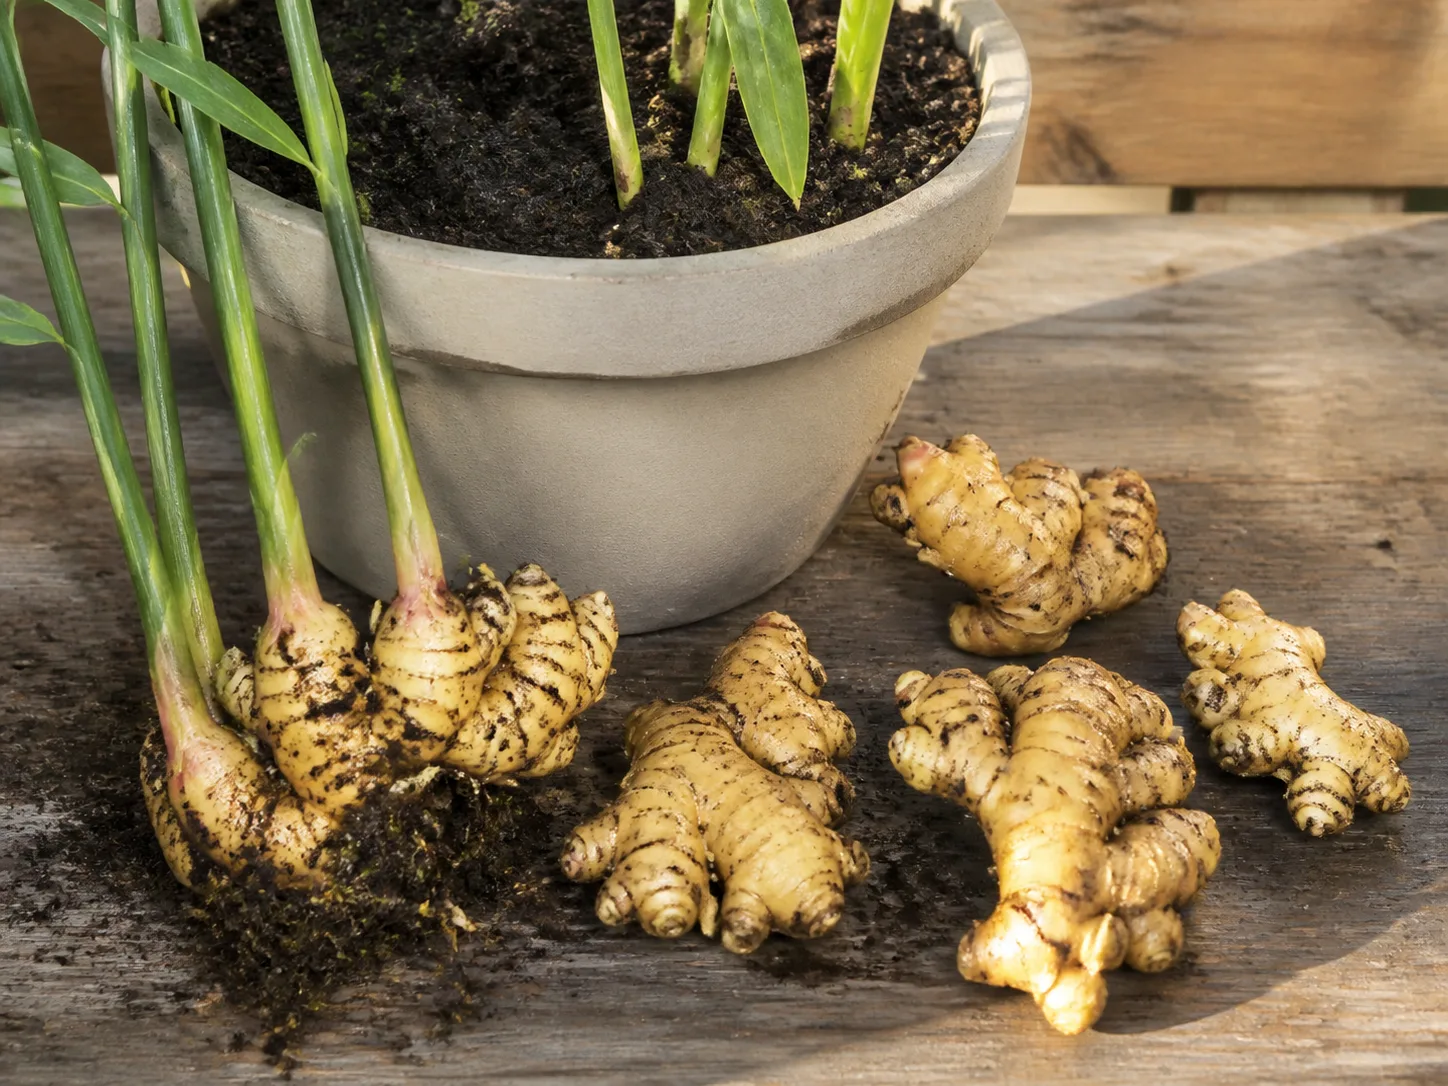
Harvest baby ginger when you want thin-skinned, juicy rhizomes with a milder flavor. It may be ready around four months, but the calendar is only a guide; the plant should have had sustained warm growth, and the rhizomes should feel plump rather than like the original piece. Baby ginger bruises easily and usually does not need peeling.
For mature ginger, wait until the foliage begins to yellow and die back after a long growing season, then harvest before frost or a hard cold spell. Mature rhizomes have a thicker skin, stronger flavor, and more fibrous texture. Virginia Cooperative Extension and University of Wisconsin–Madison Extension both describe eight to ten months as the useful mature-harvest range when the plant can stay warm long enough.
Ginger is shallow, so use your fingers or a garden fork well away from the stems to loosen the soil. In a container, tipping out the root ball is often easier than stabbing around the edges. Brush or rinse away soil gently, cut off the stems, and separate the new “hands.” Keep firm, healthy pieces for cooking or replanting; discard any section that is slimy, foul-smelling, or visibly rotten.
You can also take a small harvest from the outside edge of a container while leaving the center undisturbed. This selective approach is useful when you want fresh baby ginger but also want the plant to continue growing. Do not pull at a single knob until the whole clump shifts; that can tear young rhizomes and roots that are still feeding the plant.
Overwinter and Replant
In a frost-free climate, ginger can remain in the ground and return as a perennial. Elsewhere, bring container-grown plants inside before nights drop near 50°F, or dig the rhizomes before frost. A pot is the simplest overwintering plan because you can stop exposing the living rhizome to repeated cold nights and keep the growing medium around it.
As the plant enters dormancy, the stems may yellow and disappear. Reduce watering sharply, and never keep a leafless pot constantly wet. Keep it warm and protected; when new shoots appear in spring, resume watering gradually and return to brighter light.
If you dig rhizomes for storage, let them cure in a cool, dark, dry place for one to two weeks so cuts and small abrasions can seal. Store replanting pieces in a paper bag in a cool, relatively dry location rather than the refrigerator. Virginia Tech and University of Wisconsin–Madison Extension both describe storing healthy rhizomes outside the refrigerator and restarting them when warmth returns.
Choose the firmest, best-budded pieces for next year’s planting stock. The original grocery rhizome may be shriveled or spent after supporting the first plant, but the new outer hands can become stronger planting material if they are healthy and free of rot.
Troubleshoot Slow Sprouting, Rot, and Weak Growth
Nothing happens after several weeks: Check temperature first. Ginger can sit still in cool soil, and a treated or old grocery piece may never sprout. If the rhizome is still firm, give it more time in the 70–80°F range; if it is soft, moldy, or inactive after six to eight warm weeks, start another section or buy seed-grade stock.
The rhizome turns soft or smells sour: This is usually rot caused by wet mix, poor drainage, a damaged cut, or a sealed humid setup. Remove it immediately, discard the rotten portion, and do not return the firm remainder to the same saturated soil unless you can cut back to completely healthy tissue and let the new cut callus. Clean the container and use fresh, airy mix.
Leaves brown at the tips: Check whether the plant is in harsh afternoon sun, drying too rapidly, or sitting near a hot window. Move it to filtered light, water thoroughly when the mix needs it, and improve humidity around the plant without leaving the pot in water. Brown tips are a clue about the environment, not proof that the rhizome is dead.
Leaves yellow while the soil stays wet: Stop adding water and inspect the drainage holes. Yellowing can accompany low nutrition, but a constantly wet root zone is the higher-priority problem because ginger roots need air. Once the mix drains and the plant resumes active growth, use a balanced fertilizer only if the container mix or a soil test indicates it needs feeding.
The plant dies back in autumn: Seasonal dieback can be normal after the growing season, especially when nights cool and day length shortens. Check the rhizome before throwing it away: firm, fragrant tissue can be dormant and worth overwintering, while slimy or foul-smelling tissue should be discarded.
Conclusion
Growing ginger from a grocery-store rhizome is a worthwhile experiment when you start with the right piece and give it time. Choose firm ginger with several eyes, callus any cuts, sprout it warm in lightly moist soil, and use a wide container if your climate cannot provide eight to ten warm months.
The biggest wins come from restraint: do not bury the buds too deeply, do not keep the mix soggy, do not move a warm indoor plant straight into harsh sun, and do not mistake slow sprouting for immediate failure. Harvest baby ginger earlier or let a protected plant mature, then save a few healthy outer rhizomes so next year’s crop begins with better planting stock.