How to Grow Mexican Hat Flower: Sun, Soil and Seed
Grow Mexican hat flower in sun and well-drained soil. Learn when to sow, handle seed, water young plants, and control self-seeding without losing blooms.
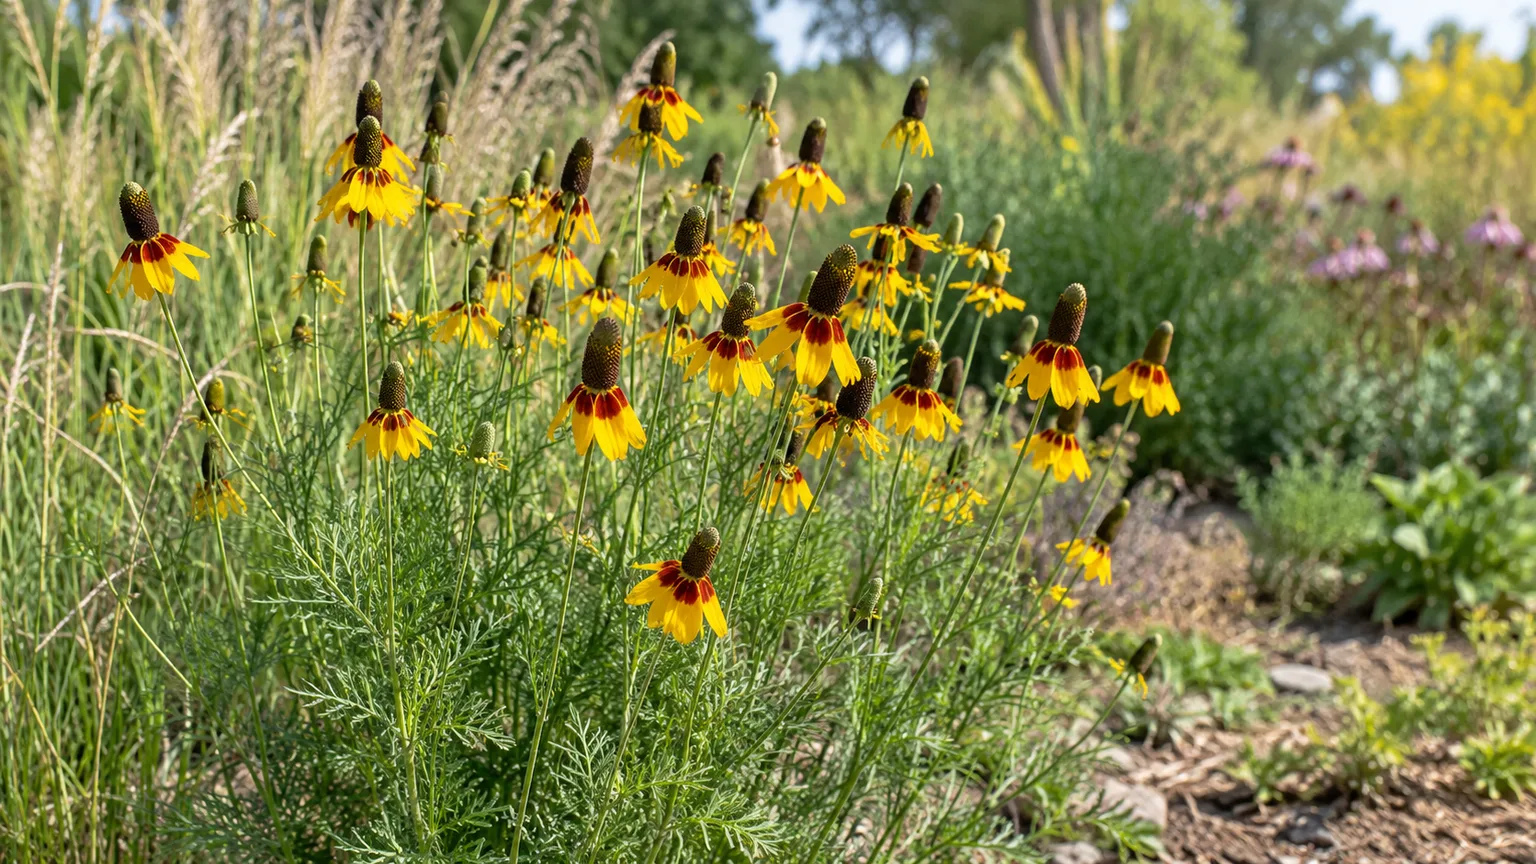
A sunny, open patch of ground is usually the hardest thing to find for Ratibida columnifera. Give this prairie perennial light, drainage, and room to reseed, and it can supply weeks of distinctive flowers with little feeding or irrigation once established. The main ways gardeners lose it are more ordinary: burying its small seed too deeply, letting weeds overtake seedlings, or planting it in a wet, shaded bed that suits a different plant.
Mexican Hat Flower at a Glance
| Growing factor | What to provide |
|---|---|
| Botanical name | Ratibida columnifera |
| Common names | Prairie coneflower, upright or long-headed coneflower, Mexican hat |
| Life cycle | Herbaceous perennial; can be short-lived but often reseeds |
| Light | Full sun is best; partial shade is tolerated with fewer or weaker flowers |
| Mature size | Commonly about 1 to 3 feet tall; height varies by source, seed strain, and site |
| Soil | Well-drained soil; adapts to lean ground but struggles in heavy, persistently wet clay |
| Water | Even moisture during germination and establishment; occasional deep watering in prolonged drought afterward |
| Flowers | Summer into early fall in many climates; timing varies with sowing date and weather |
| Best uses | Sunny borders, dry gardens, prairie-style plantings, pollinator beds, and cut flowers |
These are field-grown expectations, not guarantees. Ratibida columnifera may behave as a long-lived perennial in one garden and a short-lived one in another; leaving some mature seedheads in place lets a planting renew itself. It is more accurate to plan for a perennial that can reseed than to expect every original crown to persist indefinitely.
North Carolina State Extension describes the species as a rhizomatous herbaceous perennial native to central parts of the United States, growing in prairies, fields, and dry open woods. The plant reaches about 3 feet in favorable conditions, tolerates drought and poor soil, and attracts bees and butterflies (NC State Extension Plant Toolbox).
Hardiness labels are not identical across references: the NC State plant profile lists USDA zones 4a through 9b, while West Coast Seeds describes the species as hardy to zone 3. Treat those numbers as a broad starting point, not a guarantee for an exposed pot or a wet winter; local climate, drainage, and the seed source’s regional adaptation all affect survival.
Identify the Plant and Choose a Name
The recognizable feature is a tall, narrow central cone surrounded by a small ring of drooping ray florets. Rays may be yellow, rusty red, or yellow with reddish bases; the leaves are finely divided, which gives a mature clump a lighter texture than broad-leaved border perennials. The central column is a cluster of many small disk florets, not one solid cone.
Prairie coneflower, upright prairie coneflower, and long-headed coneflower are useful common names when you want to identify the species without relying on “Mexican hat.” That common name remains widely used, but it can carry a stereotyped image of Mexican clothing; gardeners may prefer the descriptive prairie names in plant labels and conversations. A common name is not a botanical identification, so check the Latin name on a seed packet if you need this particular species.
Do not confuse Ratibida columnifera with Ratibida pinnata, often called gray-headed or yellow coneflower. The two are related prairie plants, but the latter has a different flower shape and can grow larger. “Mexican hat plant” can also refer to certain succulents, so Ratibida columnifera is the label that settles the question.
Choose a Sunny Site with Fast Drainage
The plant fits best where the ground dries between rains and nearby vegetation will not shade it out. Place it in a meadow edge, south-facing slope, open border, or other area that receives several hours of direct light instead of a sheltered pocket that stays damp. Before you sow, look at the site after a hard rain: standing water or a soggy surface the next day is a warning sign.
Sun, wind, and growing room
Aim for six or more hours of direct sun a day. NC State lists full sun as the preferred exposure and notes that the plant tolerates partial shade; in practice, a little late-day shade is less concerning than planting beneath a dense canopy where the clump becomes lanky and flowering drops. If your only site is shaded for much of the day, choose a woodland-tolerant native rather than trying to compensate with fertilizer.
Allow roughly 12 to 24 inches between plants, adjusting for the look you want and the mature size of the seed strain. Use the closer end for a fuller drift where plants can still get airflow; space farther apart if surrounding perennials will fill in or if the seed source describes taller plants. The NC State profile lists a mature height of up to 3 feet, while seed growers may report taller plants, so avoid placing it directly in front of low edging or blocking a path.
Wind is not automatically a problem in the open habitat this species suits, but tall stems can lean when they grow in shade, rich soil, or a highly exposed bed. Choose a spot with support from neighboring grasses if gusts are frequent, or use a discreet ring before stems begin to flop. Moving a crowded or shaded plant is often a better long-term fix than tying every stem upright.
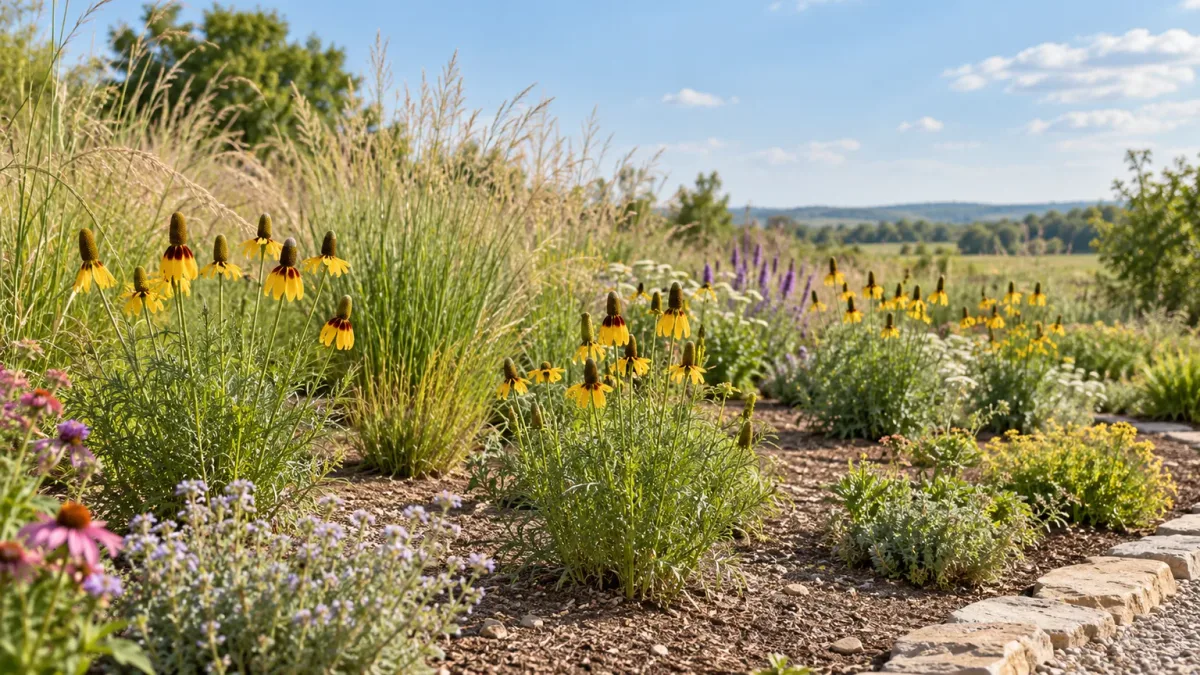
Give prairie coneflower open light and visible space between clumps so air can move through the planting.
Soil and drainage
Use soil that drains freely, from sandy to loamy ground. The species is adaptable and does not need a rich, carefully amended bed, but NC State notes that it is intolerant of heavy clay. If your soil holds water, plant on a raised mound or in a raised bed rather than digging a small amended pocket that can collect water like a basin.
Avoid adding large amounts of compost, manure, or moisture-retaining amendments just to make the soil look darker. A thin amount of finished compost can help a severely depleted bed, but a naturally lean site is not a defect for this plant. If a soil test shows an unusual pH or a nutrient problem, correct that measured issue; do not add lime or fertilizer simply because a seed supplier used the phrase “prairie plant.”
Plant Nursery-Grown Prairie Coneflower
Nursery plugs or small potted plants are the quickest way to get a defined clump and skip uncertain germination. Set them outside after the last hard frost in spring, or plant in early fall while the soil is still warm enough for roots to establish before freezing. In hot climates, avoid transplanting into peak heat unless you can provide close follow-up watering.
Water the pot before planting, loosen only roots that are circling tightly, and set the root ball level with the surrounding soil. Backfill without burying the crown, firm the soil gently, and soak the planting area once to settle air pockets. If you are planting more than one, arrange the pots on the ground first so you can see the spacing and avoid an accidental straight row.
Keep newly planted starts evenly moist through the first few weeks, then lengthen the time between waterings as new growth appears. A transplant may bloom the same year if it is large and planted early, but do not count on that: energy spent growing roots is useful establishment, not a failed plant. Remove aggressive weeds while the clump is small because they can shade it before the perennial has room to compete.
Grow Prairie Coneflower from Seed
Seed is the simplest way to establish a broad patch, but this is not a seed you bury and forget. It is small, may germinate over a spread-out window, and needs dependable surface moisture until seedlings can root. A clear, weed-free seedbed and careful watering matter more than buying a large packet.
Check your packet for the seller’s treatment instructions because recommendations differ. West Coast Seeds’ Ratibida growing guide recommends barely covering seeds and gives a germination window of 7 to 42 days; it also describes a short refrigerated treatment for indoor sowing. Chiltern Seeds’ species guidance instead describes autumn-to-spring sowing in a cold frame, where winter cold occurs naturally. These are not contradictory guarantees: seed source, treatment, temperature, and moisture all affect germination.
Direct sow outdoors
Sow directly in fall where winters provide a natural cold period and the soil will not remain waterlogged, or in spring once the bed is workable and the seed packet recommends it. West Coast Seeds lists May to June for direct sowing in its growing region, but that calendar should not be transplanted to every latitude; use your local frost pattern and the supplier’s directions. Spring sowing is easier to monitor, while autumn sowing lets winter weather provide a natural seasonal cycle.
Prepare the bed by clearing existing vegetation, especially perennial weeds, and raking the surface to a fine texture. Mix a small pinch of seed with dry sand if you are broadcasting it, which makes sparse, even distribution easier to see. Press seed into the soil or cover it only very lightly—around 2 millimeters at most—then water with a fine spray so the seed stays near the surface rather than washing into a furrow.
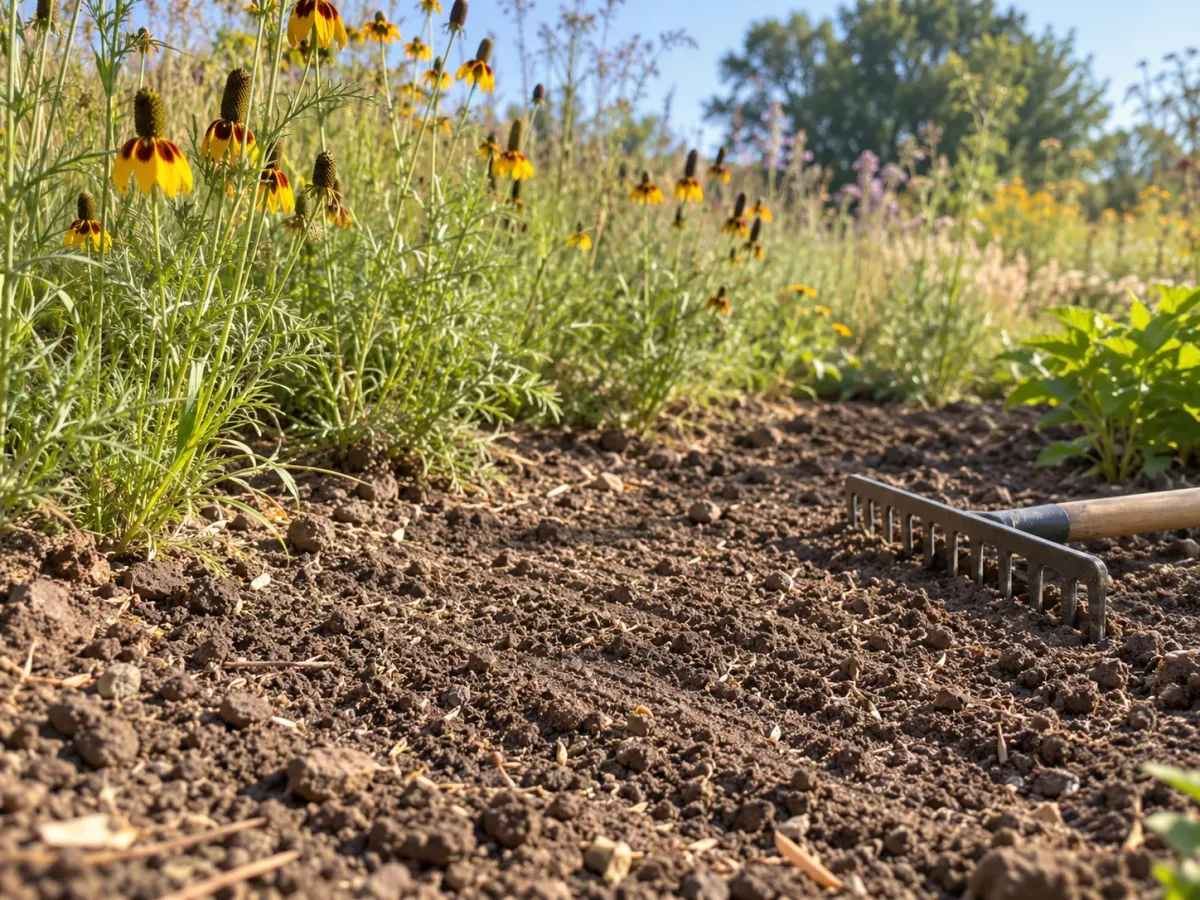
Rake a firm, fine surface and sow shallowly; a strong hose stream can displace tiny seed before it germinates.
Keep the top layer consistently damp, not flooded, until seedlings are visible and rooted. If the surface dries to a crust, very small seedlings may fail even though deeper soil is moist; use a gentle watering wand or a temporary light shade cloth during a hot, drying spell. Label the patch and learn the seedling’s appearance before weeding, because it is easy to pull out the plants you are waiting for.
Thin or transplant seedlings once you can handle them without disturbing their neighbors, leaving the spacing that suits your design. Young plants may invest the first season in roots and foliage, especially after a late sowing, so focus on establishment rather than a fixed first-year bloom promise. Expect flowering to become more dependable as plants mature and the patch fills in.
Start seed under cover
Indoor sowing is useful when you want a controlled start or need to protect seed from erosion and competition. Use small cells or pots with drainage and a fine seed-starting mix, sow shallowly, and keep the medium evenly moist rather than saturated. West Coast Seeds suggests chilling planted, covered pots in a refrigerator for a week before warm germination; because suppliers differ, follow the treatment supplied with your seed rather than assuming every lot needs the same cold period.
After any recommended cold treatment, move pots to a bright place with gentle warmth and wait patiently. A 7- to 42-day germination span is possible according to the West Coast Seeds guide, so a pot that has not sprouted in a few days is not necessarily a loss. If nothing appears after the supplier’s expected window, check whether the seed was buried too deeply, dried out, or kept in standing water before repeating the sowing.
Pot up only when seedlings have enough leaves and roots to hold their plug together. Harden them off gradually outdoors over about a week, then plant after frost risk has passed; set the plug at its previous depth and water it in. Avoid teasing apart a tangled tray of tiny seedlings if you can sow into individual cells instead, because less root disturbance means less transplant shock.
Water for Establishment, Then Reduce Irrigation
The watering plan changes as the root system develops. During germination, keep the seed zone damp; after planting plugs, water deeply enough to wet the root ball and nearby soil. Once plants are established, use rainfall as the baseline and irrigate only during extended dry weather or when the foliage shows sustained stress.
When you do water, soak the soil at the base rather than repeatedly wetting the leaves with a light daily spray. A deep watering encourages roots to explore the surrounding soil, while constant surface moisture can favor foliar disease and keep a poorly drained site wet. Water in the morning if overhead irrigation is unavoidable so foliage has time to dry.
Do not confuse temporary midday droop in extreme heat with a need for daily irrigation. Check the soil a few inches below the surface first; if it is still moist, wait and inspect again later. If the soil is dry and the plant remains limp into the evening, water slowly and reassess the drainage before increasing frequency.
Skip Routine Fertilizer
A routine fertilizer schedule is unnecessary for an established prairie coneflower in ordinary garden soil. NC State Extension describes the species as tolerant of poor soil, and too much nitrogen can push soft, leafy growth that leans and competes with neighboring plants. Feeding more is not a reliable way to produce more flowers.
If a soil test or clear signs of nutrient deficiency indicate a genuine problem, use the test results to choose a modest correction. Do not apply a high-nitrogen lawn product near the bed or pile fresh manure around the crown. In a new planting, remove weeds and correct poor drainage before reaching for fertilizer; those two issues are more likely to limit establishment.
Keep Flowers Coming and Choose What to Do with Seedheads
Flowering typically arrives in summer, with the exact start and finish shifting by climate, seed sowing date, and rainfall. The narrow dark central cone and drooping rays make the heads useful as a visual accent among softer grasses and rounder flowers. NC State lists the plant as a good cut flower and a pollinator-garden choice, which makes it practical as well as unusual.
Cut stems when a good portion of the disk florets have opened and the head still holds its shape. Use clean shears and take the stem above a set of leaves or a branching point to keep the plant tidy. A vase harvest also removes some developing seed, so it naturally reduces the number of seedlings that can appear in that part of the bed.
Deadhead selectively or save seed
Deadhead spent heads through the season if you want a tidier border, fewer seedlings, and a longer-looking display. Snip just above a healthy leaf or side bud rather than shearing the whole plant; scattered cuts preserve the branching structure and leave some flowers for pollinators. A plant that continues to make new buds may keep flowering, but deadheading cannot overcome deep shade, drought stress, or an unsuitable wet site.
If you want the planting to naturalize, leave a portion of heads to mature and disperse. For deliberate seed saving, wait until cones are dry and brown, clip them on a dry day, and finish drying them in a paper bag indoors; label the seed with the plant and collection date. The amount of reseeding is hard to predict, so save only a few heads the first year and see where volunteers appear before leaving more.
Propagate by Division When a Clump Needs It
Seed is usually the easiest propagation route, especially when you want to establish a patch. Division makes sense when an older clump has become crowded, you want to move part of it, or you need a duplicate plant without waiting for seedlings. NC State includes both seed and division as propagation methods for the species.
Divide in early spring as new growth begins, while the soil is workable and the plant is not carrying flower stems. Water the clump the day before, lift as much of the root mass as practical, and separate a section with healthy roots and several growing points. Replant divisions promptly at the original depth, space them like nursery plants, and water them through establishment.
Do not divide simply because the plant has reached a certain age. If the clump is flowering well and has not crowded its neighbors, leaving it alone avoids unnecessary root stress. A thin center or decline may reflect wet soil, shade, or competition rather than a need to split the plant.
Grow Mexican Hat Flower in a Container
A container works if it is deep and wide enough for a plant that may reach a few feet tall and if the pot drains freely. Choose a stable pot with several drainage holes and a free-draining outdoor mix; avoid a water reservoir or a decorative cachepot that holds runoff against the roots. One plant in a roomy pot is easier to keep balanced than a crowded mix of thirsty annuals.
Set the container in full sun, then check its moisture more often than you would in a garden bed. Pots heat and dry faster, so water when the upper layer is dry and the root zone is beginning to dry—not on a fixed daily schedule. Empty any saucer after watering, and move the pot only if extreme heat or strong wind creates a problem.
The trade-off is that container plants need more frequent attention and may be less reliable through winter than plants in the ground, especially in exposed pots. Use a locally hardy seed source, keep the drainage holes open, and protect the pot from repeated winter saturation. If you want a low-care prairie effect, a sunny in-ground planting is usually the easier option.
Design Around Its Height and Natural Reseeding
Plant prairie coneflower in a small group or loose drift rather than spacing identical specimens like formal edging. Repeating the same yellow and rust-colored heads through a bed gives the eye a clear pattern, while fine-textured grasses preserve airflow and make the narrow cones stand out. Pair it with regionally appropriate native plants that share its preference for sun and well-drained ground instead of combining it with species that need constant moisture.
Put the clumps toward the middle of a border if the plants in your seed lot are tall, and reserve the front edge for lower plants that will not be shaded. Along a path, leave room for stems to branch and lean a little without blocking the route. The plant also suits dry slopes and meadow edges where a loose, changing outline is more welcome than a rigidly symmetrical bed.
Self-seeding is a feature when you want a naturalized patch and a maintenance issue when you want fixed spacing. Decide which job matters before the seedheads mature: leave a few marked heads for renewal, deadhead most heads for control, or remove the plants that appear outside the intended area while they are small. The species is not listed by NC State as a serious landscape pest, but a prolific seedling habit can still crowd delicate neighbors in a small bed.
Troubleshoot Poor Growth and Flowering
Few or no seedlings: first check seed depth and surface moisture. If seed was buried under a thick layer of soil, crusted over, washed to one edge, or left to dry during germination, prepare a fresh patch and sow shallowly; wait through the seed source’s full stated germination window before deciding the batch failed. Weed seedlings carefully, because young prairie coneflower can look like other small broadleaf plants.
Tall stems with few flowers or flopping: inspect the light and soil before adding support. Shade, rich soil, excess fertilizer, crowding, or strong wind can all encourage stems to lean; move the plant into a sunnier site, stop feeding, reduce competition, and use a discreet ring only while the plant establishes. If the bed stays wet, improve the site rather than staking a plant that is struggling at the roots.
Mushy stems or decline after rain: check whether water drains away from the crown. Persistent wet soil can lead to root and crown problems even though the species tolerates occasional moisture; reduce irrigation, clear mulch away from the base, and replant on higher ground if the location remains saturated. Fungicide is not a substitute for correcting drainage.
Chewed or spotted leaves: inspect before treating. Minor feeding damage rarely justifies a pesticide on a healthy perennial, and spraying flowers can affect visiting insects. Remove a few badly damaged leaves, improve airflow if the patch is crowded, and ask a local extension service to identify a spreading disease or severe pest problem before choosing a treatment.
Follow a Simple Seasonal Care Plan
- Late fall: sow outdoors where the soil drains through winter and natural cold exposure matches your seed source; otherwise store seed according to the packet. Mark sowing areas so you do not disturb them during winter cleanup.
- Spring: plant new starts, thin seedlings, divide only crowded clumps, and remove last year’s stems before new growth makes the crown hard to see. Water transplants while roots spread.
- Summer: watch young plants during dry spells, cut a few stems for arrangements, and deadhead selectively if limiting seed matters more than naturalizing. Do not feed established plants by habit.
- Fall: leave some seedheads if you want volunteers or winter structure, or clip them before they release seed. Note where seedlings appear next spring so you can keep or remove them while they are small.
This sequence is more useful than pruning on a fixed date because frost, rainfall, and bloom timing vary across the plant’s broad range. In wet-winter climates, favor spring planting and good drainage; in regions with dependable cold winters, fall sowing may be an easy way to let nature handle the seasonal treatment. The Yavapai County Native and Naturalized Plants profile is one example of a regional extension reference; check a local extension service for conditions in your own area.
Conclusion
Grow prairie coneflower in an open, sunny spot that drains well, and choose a seed or nursery-planting method that fits your climate and the directions for your seed lot. Keep the seed shallow and evenly moist until it germinates, water transplants as they establish, then reduce irrigation and skip routine fertilizer. Finally, choose whether you want a tidy display or a naturalizing patch: deadhead most flowers for control, or leave a few seedheads to renew the planting.