How to Root-Prune a Root-Bound Plant Safely
Learn when root pruning is safer than potting up, how much to remove, where to cut, and how to return a healthy root-bound plant to the same pot.
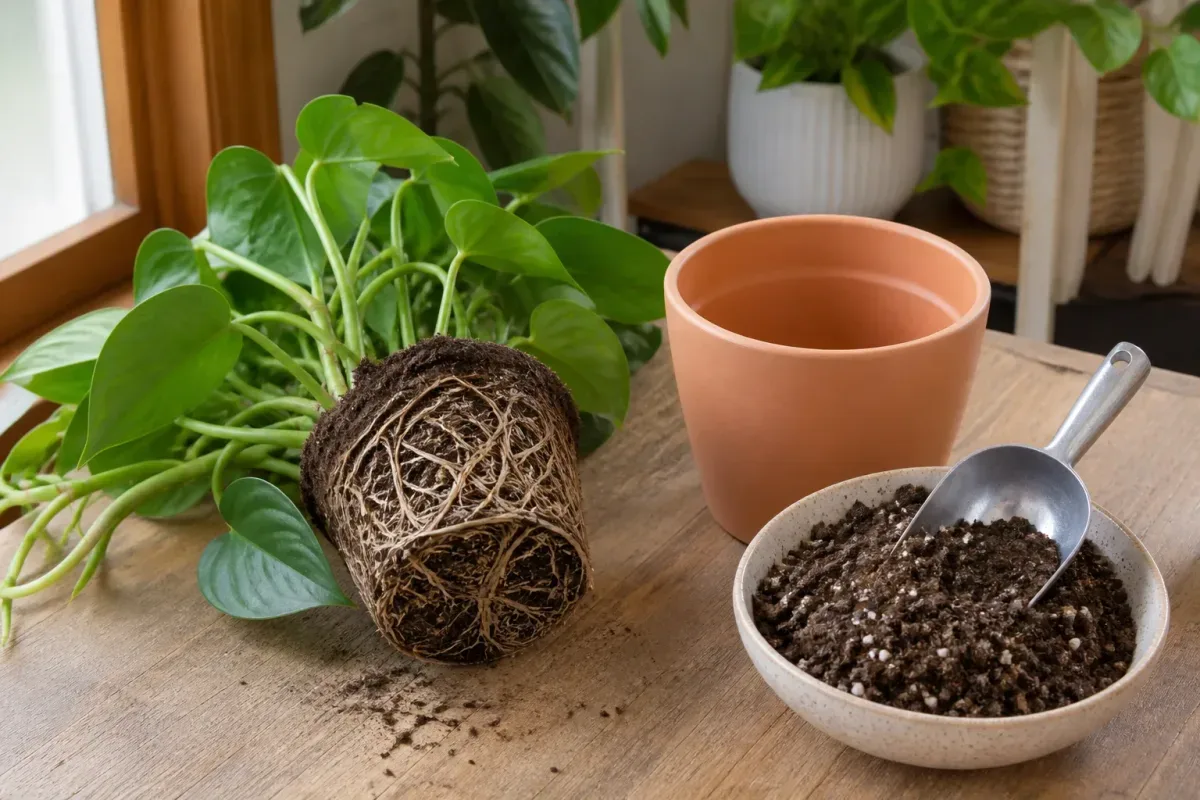
Root pruning is a way to refresh a container plant without moving it into a larger pot. You remove a limited amount of crowded outer roots, replace depleted mix, and return the plant to its original container. The goal is to interrupt tight circling and make room for fresh medium—not to strip the root system bare or force every species into the same routine.
Start with a healthy plant that needs to stay at its current size. If it is declining from dry conditions, pests, or a recent move, stabilize it first. If the roots are rotten, the pot lacks drainage, or a thick woody root would need to be removed, treat that as a different problem. The full diagnosis and pot-up decision are covered in our root-bound houseplant guide; this article focuses on the cut itself and the return to the same pot.
Decide whether root pruning suits this plant
Root pruning makes sense when the plant is reasonably healthy, the rootball is crowded, and you have a practical reason to keep the same pot. Common reasons include a heavy or decorative container that cannot be upsized, a plant whose mature size is already right for the space, or a container-grown specimen maintained at a set scale. It can also make sense when the roots have displaced most of the mix and the plant dries unusually fast, provided the plant is otherwise stable.
The Royal Horticultural Society (RHS) describes root pruning as one way to keep plants in the same-sized container, while noting that the plant still needs to make new growth to remain healthy. This is maintenance, not a cure for every stressed plant. If your goal is simply to help a young plant grow larger, moving it into a modestly wider pot is generally the less disruptive route.
Choose between a root prune, a larger pot, and a mix refresh
| Situation | Better next step | Why |
|---|---|---|
| The rootball is only lightly crowded and the plant grows well | Refresh loose mix or leave it alone | Cutting healthy roots would add stress without solving a clear problem |
| The plant is vigorous, tightly rooted, and should stay the same size | Conservative same-pot root prune | A limited trim can make room for fresh medium while preserving the container |
| The plant needs more space to keep growing | Move up one modest pot size | The roots receive new territory without losing a large portion of their existing system |
| The rootball is rotten, the plant is wilted in wet mix, or roots smell foul | Treat root rot and drainage first | Diseased roots and saturated medium call for sanitation and a suitable fresh mix |
Root-bound clues by themselves do not prove that a plant is ready for a root haircut. Penn State Extension’s houseplant repotting guide recommends checking the rootball: dense circling roots and little visible potting mix, especially in its lower portion, are stronger evidence than a single root at a drain hole. For a short diagnostic checklist and pre-planting treatment, see how to tell whether a plant is root-bound.
Choose a low-stress time to work
For routine maintenance, work as the plant begins active growth, often in spring for indoor plants in temperate homes. Longer days and renewed growth give the plant an opportunity to replace fine roots. The RHS identifies spring, as growth starts, as a general time for repotting and root pruning; Penn State Extension likewise recommends spring for houseplants. In a warm climate or with a plant that grows year-round indoors, the useful signal is active, healthy growth rather than the month on the calendar.
Avoid elective root pruning during a heat wave, a cold or low-light slowdown, flowering or fruiting that you want to preserve, or immediately after a move or major canopy trim. If a plant has root rot, waiting for spring can allow decay to continue; remove the diseased tissue and correct the wet conditions promptly instead. That is a rescue operation, not the maintenance procedure below.
Gather tools and prepare fresh potting mix
Set up on a washable surface or tarp before you unpot the plant. Have the existing pot, a small amount of fresh mix suited to the species, a sharp knife or clean pruning shears, a blunt stick or hand cultivator, gloves if the plant has irritating sap or spines, and a watering can ready. A blade should slice cleanly; crushing or tearing a root takes more tissue than a precise cut.
Clean soil from the blade and disinfect it before the job, especially if you handled a diseased plant or will work on several plants. Use a clean container with open drainage holes, and do not block those holes with a solid layer of stones. Penn State Extension explains that container mix should be moist enough to absorb water evenly before repotting, so lightly pre-moisten the fresh medium; it should feel damp and crumbly, not sodden. Keep the plant-specific mix: an orchid, cactus, or acid-loving plant should not be shifted into generic houseplant soil just because the pot is being refreshed.
Remove the rootball without pulling the stems
If the mix is bone dry and shrinking from the pot wall, a small watering several hours beforehand can help it hold together; do not soak a plant whose mix is already wet. Place one hand over the soil surface, with the stems between your fingers, then tilt the container and support the rootball as it slides out. Press flexible pot walls or tap the rim to release the sides. Never yank the plant by its trunk or stems.
For a tapered pot, first work a blunt knife carefully around the inside edge. If the rootball remains stuck, stop and work the pot rather than tugging the plant. A cheap plastic nursery pot can sometimes be squeezed or cut away; a valuable ceramic pot may be safer to sacrifice than the stem or root crown. The RHS also recommends easing out a congested rootball sideways and notes that a very tight rootball may need a careful cut along its outer edge to free it.
Once free, set the plant on its side and keep the rootball shaded while you inspect it. Do not leave exposed roots in direct sun, wind, or a hot car; small feeder roots dry quickly. If the plant is too large to handle securely, ask another person to support the canopy or choose a professional rather than risk snapping the stem.
Inspect the roots before making a cut
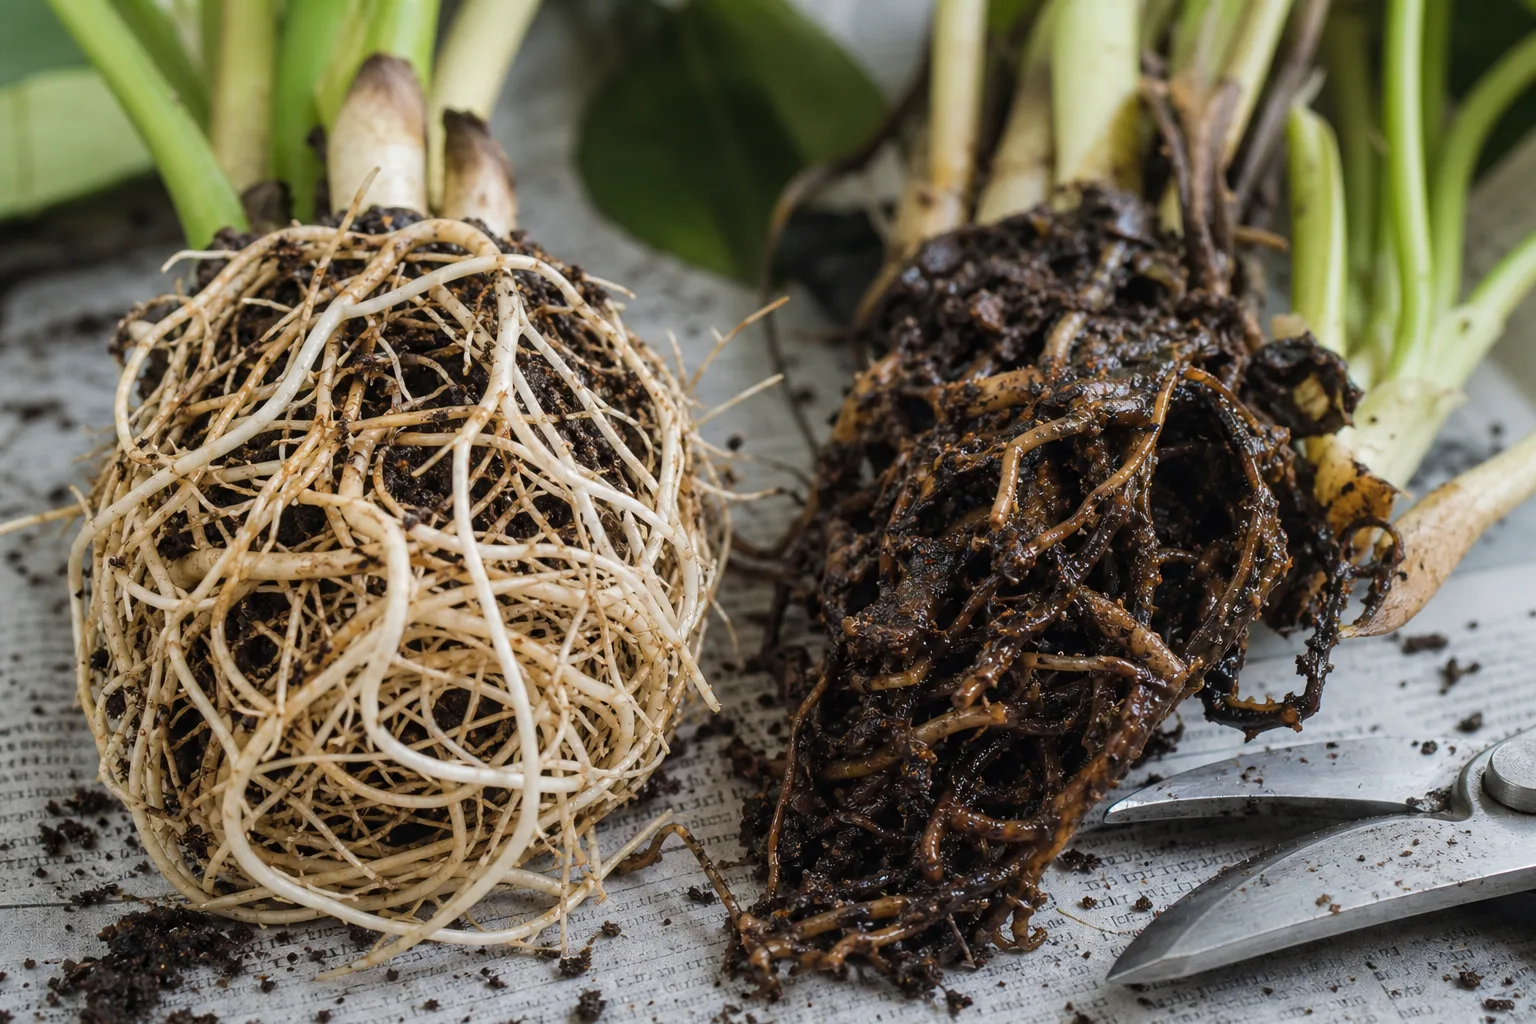
Look for the pattern, firmness, and distribution of roots. Firm, flexible roots may be cream, tan, pale brown, or white depending on the plant and mix. A tight layer circling the outside or a dense pad across the bottom is the maintenance target. Keep healthy roots that grow outward or branch into the center; avoid cutting a root simply because it is long.

Soft, collapsing, dark roots and a sour smell point toward rot, especially when the medium is persistently wet. Remove only clearly dead or rotted tissue with clean tools, discard the saturated old mix, and correct drainage. Do not combine a large routine reduction with a rot rescue: the plant may need a clean pot and a recovery period before any size-control prune is considered.
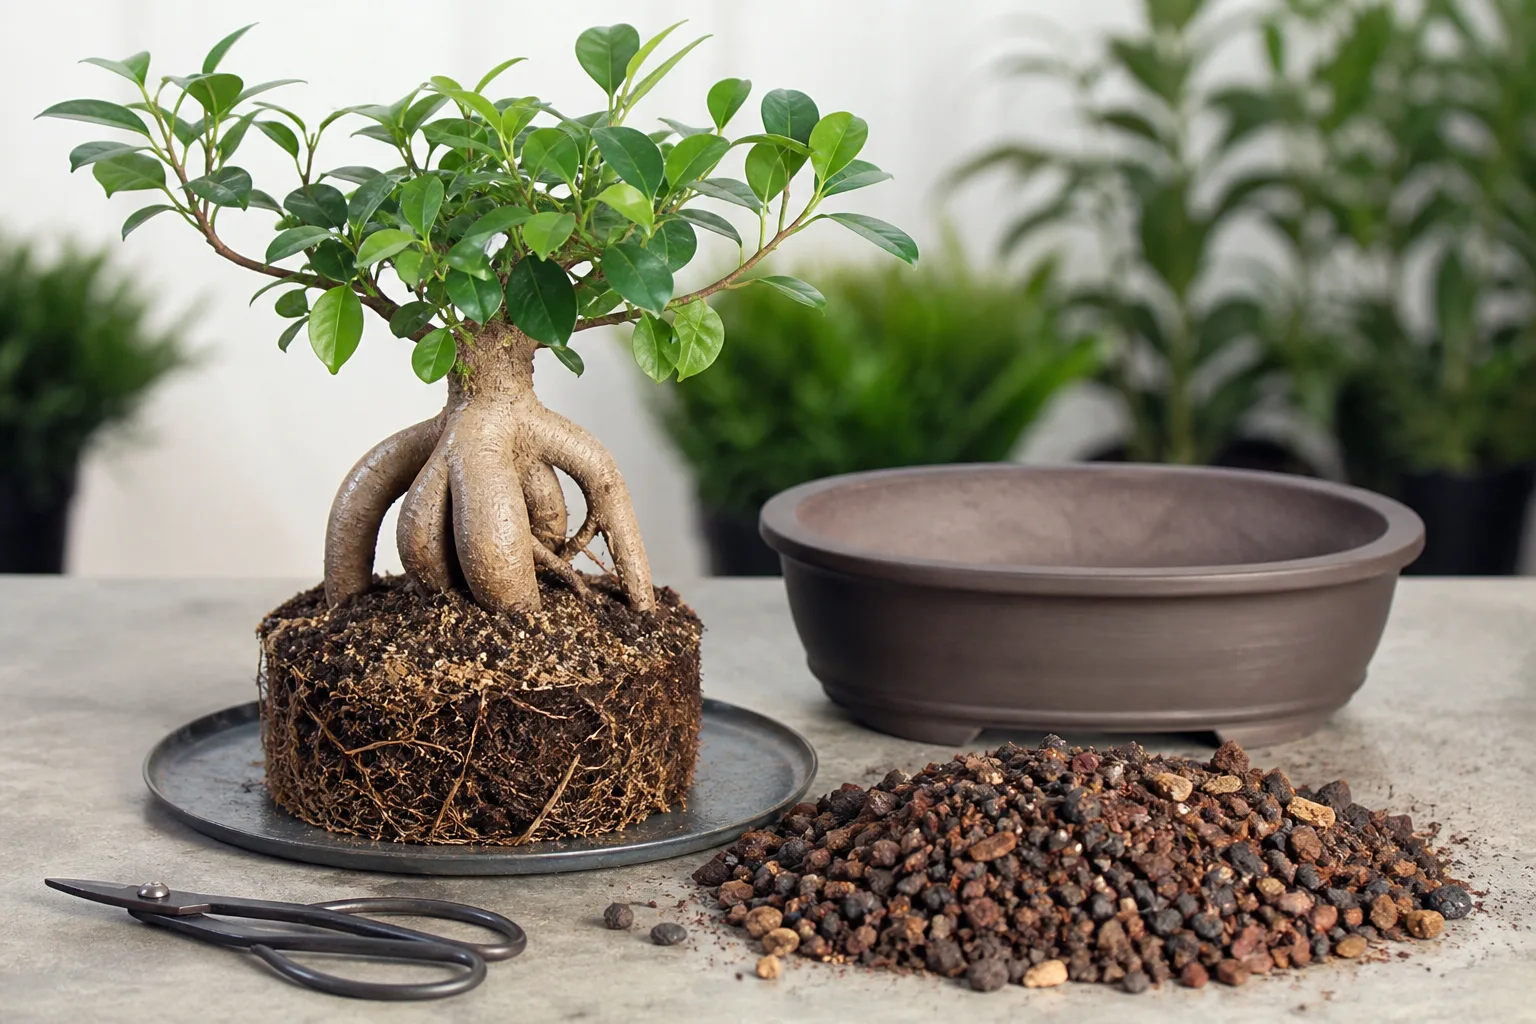
Some plants do not suit a generic root haircut. Homes & Gardens, citing houseplant experts, cautions against routine root pruning of cacti, succulents, bulbs, tubers, rhizomes, and shallow-rooted plants. For these, potting up or species-specific advice is safer. Woody plants with thick structural roots, expensive specimens, and bonsai also deserve plant-specific instructions; “small pot” does not automatically mean “cut more.”
Plan a conservative reduction
Use a limit before you pick up the knife. For a healthy plant needing routine maintenance, the RHS says a light trim removing up to 15% of the root system every few years can be sufficient. A North Carolina Cooperative Extension case study describes a vigorous aloe whose root mass was cut back by as much as one-third; that is a species-specific example, not a general allowance for houseplants. If the ball is much more congested, the RHS describes cutting a slice from one side or the base and advises staggering a substantial reduction over several years to limit stress. For an unfamiliar species, treat 15% as a ceiling, not a target; if the plant needs a bigger cut to fit, choose a slightly larger pot or divide/propagate it instead.
You cannot calculate the exact percentage of living roots from the outside dimensions alone: roots are unevenly distributed, and the dense outer mat may contain a different share than the loose center. A geometric estimate can still help keep your plan modest. For a roughly cylindrical ball, estimate the fraction of ball volume remaining after shaving both sides and the bottom with:
Remaining volume ≈ [(D − 2s) ÷ D]² × [(H − b) ÷ H]
Here, D is the ball’s original diameter, H its height, s the depth removed from each side, and b the depth removed from the bottom. For an 8-inch-wide, 6-inch-tall rootball, shaving ⅛ inch from each side and ¼ inch from the bottom leaves about 90% of its original volume. That is only a planning check, not proof that exactly 10% of its living roots were removed; root density varies. If your planned cut removes a visibly thick band or would expose the central core, reduce the cut or stop.
Mark the old soil line and measure the widest part before trimming. Your target is a rootball that sits back in the same pot with enough room for a thin layer of fresh mix around it—not a perfectly smooth, smaller cylinder at any cost. When the fit requires a large reduction, the pot is telling you that it is too small for the plant’s current root system.
Make shallow cuts through the circling side roots
Start with the least disruptive correction. If the roots are flexible, tease the outer layer loose with your fingers or a blunt stick and redirect a few circles outward. Do not rake through the center or try to untangle every strand. Fine roots that remain intact are part of the plant’s water-absorbing system; the aim is to break the circular track so new roots can grow into fresh mix.
If a tight mat will not release, make three or four shallow vertical cuts around the sides. The University of Georgia Extension’s indoor-plant guide describes making three or four vertical cuts about an inch deep on opposite sides of the rootball, or trimming roots back close to the soil mass. For a smaller pot or finer-rooted plant, use shallower cuts than that general instruction; a one-inch cut is not a minimum to force on every plant. Make each cut from near the top of the rootball toward the base, passing through the outer circling mat without splitting the whole ball into quarters.
If the root pattern is an unbroken spiral, you can shave a very thin outer slice instead of scoring deeply. Keep the blade parallel to the rootball and work around it with steady, controlled strokes. Stop as soon as the continuous coil is interrupted. Do not cut through thick roots that form the plant’s main support or connect directly to a woody trunk; if these are the only roots filling the pot, switch to a larger container or seek species-specific help.
Trim the bottom mat only as much as needed
The bottom is often where roots accumulate, but it is not a license to remove a quarter of every rootball. If a compact pancake of fine roots prevents the plant from sitting at its previous soil depth, use a sharp knife to shave a thin layer from the base. The RHS recommends removing a slice from the base or one side for very congested roots, while its more conservative recurring-maintenance guidance is a light trim. Preserve the central root mass and keep the cut even; a deep wedge can destabilize the plant and remove more functioning roots than necessary.
Hold the plant at its old soil line inside the pot as you check the fit. If the crown now sits too low, do not bury the stem to make the rootball fit. Remove less from the bottom, add only enough mix beneath it to restore the old depth, or choose a slightly larger pot. The original soil line is a useful reference, but keep exposed crowns, rhizomes, and succulent stems at the depth their species requires.
Return the plant to the same pot at its old depth
Empty loose, exhausted mix from the pot and clear the drainage holes. Wash and sanitize the container if it previously held a diseased plant, then rinse it well. Add a shallow bed of fresh, pre-moistened mix so the shortened rootball sits at the original depth; the root crown should not be buried, and the surface should remain low enough below the rim to leave watering space.
Center the rootball and fill around the sides with fresh mix, guiding it into gaps with a blunt stick. Press lightly to remove large air pockets, but do not tamp the medium into a dense plug. Use the same kind of container and drainage setup when possible. If the old pot’s holes are blocked, cracked, or absent, the root pruning will not solve the underlying water problem; repair or replace the pot before returning the plant.
Water once, then stabilize the plant
Water slowly until the mix is evenly wet and a little water exits the drainage holes. Let the pot drain completely; never leave it standing in a full saucer or cachepot. The first watering settles the new mix against the roots. If the level drops after draining, add a little more medium without piling it over the crown.
Put the plant back in its normal stable environment, avoiding a sudden shift to hot sun, cold drafts, or a much darker spot. A brief period of bright indirect light can reduce demand for some indoor foliage plants, but do not assume all species need the same shade treatment. Keep the plant in the conditions that match its care needs and avoid adding another major change at the same time.
Support recovery over the next few weeks
Root-pruned plants may pause growth while they replace fine roots. Check the medium before watering rather than following the old schedule: after losing some root mass, the plant may use water more slowly for a while. Water when the upper mix is dry to the depth appropriate for that species, then allow drainage. A plant that remains wet for days needs better airflow, drainage, or a more suitable mix—not another watering because its leaves look limp.
Hold fertilizer until the plant resumes active growth. Fresh mix may already contain nutrients, and a weak root system cannot use extra fertilizer to compensate for lost roots. Do not also hard-prune healthy stems, divide the plant, change its location, and apply a strong feed in the same week. Let one intervention settle before deciding whether another is needed.
New leaves, stable stems, and a normal return to the plant’s usual watering pattern are better recovery signs than an exact number of days. Some leaf droop shortly after the procedure can occur, but progression matters: a temporary pause that stabilizes is different from worsening collapse in wet mix.
Troubleshoot decline without adding more stress
If the plant wilts after the first watering, check the mix and rootball before watering again. Dry, water-repellent mix may need slow, repeated watering so it can re-wet; saturated mix, a sour smell, and soft roots point toward poor drainage or rot. If the plant is stable but drops one older leaf, monitor it and keep conditions consistent rather than cutting more roots.
If the rootball was reduced more than planned, do not try to “balance” it by removing every leaf. Keep the plant out of extreme heat and maintain suitable light and moisture. For a valuable plant with a very small remaining root system, propagate a healthy cutting as insurance only if the species roots reliably from cuttings; that backup does not replace proper care of the original plant.
Stop and choose a safer option when needed
Stop the routine root-pruning procedure if the plant is actively declining, the rootball is wet and rotten, roots are thick and woody, the plant has a fragile or unusual root structure, or the amount needed to fit exceeds a modest trim. Also stop if you cannot remove the rootball without breaking the container or pulling the stem. These are decision points, not signs that you should use a sharper knife and push through.
A slightly larger pot is safer when the plant still has room to grow or when it would take a major reduction to fit back into the old container. For a delicate species, move up only modestly and use a mix suited to its needs. If the same pot must be retained for a bonsai or established woody plant, follow species-specific timing and pruning guidance; generic houseplant instructions do not replace that expertise.
How often should you root-prune the same plant?
Do not root-prune by the calendar. Inspect when watering behavior changes, growth slows despite appropriate light and care, or roots visibly crowd the container. If a healthy plant needs only a light root trim, the RHS notes that doing so every few years may be enough; fast-growing plants and compact species can reach the point sooner, while slow growers may go much longer.
After one substantial reduction, let the plant recover through a full active-growth period before considering another. If it repeatedly outgrows the pot after a light trim, the issue may be a mismatch between plant size and container rather than a need for increasingly severe cuts. Potting up, dividing a clumping plant, pruning the canopy at an appropriate season, or choosing a naturally smaller cultivar may be a better long-term fit.
Conclusion
A safe root prune is a measured reset: confirm that the plant is healthy enough for the work, loosen flexible circles first, and cut only enough outer and bottom roots to return the rootball to its original pot at the same depth. For general maintenance, use the RHS light-trim guidance of up to 15% of the root system as a ceiling, not a target, and stage a larger correction rather than removing a thick layer at once.
The most important stop rule is simple: if the plant needs a drastic root haircut to fit, do not force it into the old pot. Preserve the healthy central roots, refresh the mix, water through and drain, then keep the plant’s environment steady while new growth resumes. When the species or root structure is uncertain, choose a modestly larger pot or get plant-specific advice before cutting.